
Knowby
How to build a Stellar container.
A step-by-step guide on how to build a Stellar Container.
1
Step 1 of 58
<p>Using the rattle gun, undo the frame bolts.</p>

Using the rattle gun, undo the frame bolts.

2
Step 2 of 58
<p>Hook the sling up.</p>

Hook the sling up.

3
Step 3 of 58
<p>Remove the box.</p><p>This box contains all of your nuts and bolts.</p>

Remove the box.

This box contains all of your nuts and bolts.

4
Step 4 of 58
<p>Take weight with your sling.</p>

Take weight with your sling.

5
Step 5 of 58
<p>Remove the bolts holding the container to frame with the rattle gun.</p>

Remove the bolts holding the container to frame with the rattle gun.

6
Step 6 of 58
<p>Slowly remove the container from frame.</p>

Slowly remove the container from frame.

7
Step 7 of 58
<p>Carefully lay the container down.</p>

Carefully lay the container down.

8
Step 8 of 58
<p>Remove the slings.</p>

Remove the slings.

9
Step 9 of 58
<p>Remove the metal brackets using the rattle gun.</p>

Remove the metal brackets using the rattle gun.

10
Step 10 of 58
<p>Remove the metal bracket using the rattle gun.</p>

Remove the metal bracket using the rattle gun.

11
Step 11 of 58
<p>Attach the 4 eye bolts to the roof of the container.</p>

Attach the 4 eye bolts to the roof of the container.

12
Step 12 of 58
<p>Attach slings to d-shackles and attach the d-shackles to eye bolts.</p>

Attach slings to d-shackles and attach the d-shackles to eye bolts.

13
Step 13 of 58
<p>Attach sling to the d shackles.</p>

Attach sling to the d shackles.

14
Step 14 of 58
<p>Take the weight using the slings, ensure that the slings aren't twisted.</p>

Take the weight using the slings, ensure that the slings aren't twisted.

15
Step 15 of 58
<p>Carefully lift the roof off the container and put it down, out of the way.</p>

Carefully lift the roof off the container and put it down, out of the way.

16
Step 16 of 58
<p>Remove the corner posts and the metal bracket, there will be two of these.</p><p></p>

Remove the corner posts and the metal bracket, there will be two of these.

17
Step 17 of 58
<p>Unwrap the corner posts.</p>

Unwrap the corner posts.

18
Step 18 of 58
<p>The corner posts are numbered.</p>

The corner posts are numbered.

19
Step 19 of 58
<p>Remove the timber packaging.</p>

Remove the timber packaging.

20
Step 20 of 58

Lift the 1st side wall up and put in the support bar.

21
Step 21 of 58

Lift the 2nd side wall up and put in the support bar.

22
Step 22 of 58
<p>Remove all the protective packaging from around the edge of the frame.</p>

Remove all the protective packaging from around the edge of the frame.

23
Step 23 of 58
<p>Lift up the back wall.</p><p>This might be a two or three-person job.</p><p>One person will lift the wall, the other person/s may need to move the side walls to make it easier for the back wall to be lifted.</p><p>Be careful as you will need to walk on the front wall, so remove shoes or ensure there is nothing in the shoes that will scratch or dent the front wall.</p>

Lift up the back wall.

This might be a two or three-person job.

One person will lift the wall, the other person/s may need to move the side walls to make it easier for the back wall to be lifted.

Be careful as you will need to walk on the front wall, so remove shoes or ensure there is nothing in the shoes that will scratch or dent the front wall.

24
Step 24 of 58
<p>Remove the protective packaging from the back wall.</p>

Remove the protective packaging from the back wall.

25
Step 25 of 58
<p>Open both doors. This will require two people, so the doors stay open.</p>

Open both doors. This will require two people, so the doors stay open.

26
Step 26 of 58
<p>Lifting the front wall will be a two-person lift.</p><p>Each person holds open a door and lifts the wall at the same time and together.</p>

Lifting the front wall will be a two-person lift.

Each person holds open a door and lifts the wall at the same time and together.

27
Step 27 of 58

While one person holds the front wall, the other person will get two long bolts to hold the front up temporally and will remove the bolts when the corner posts are getting installed.

28
Step 28 of 58

Hexagon Bolt M12*95

Big washer

Rubber washer

All Bolts, washers and nuts are in order throughout the slides.

29
Step 29 of 58
<p>Hexagon Bolt M12*95</p><p>Big washer</p><p>Rubber washer</p>

Hexagon Bolt M12*95

Big washer

Rubber washer

30
Step 30 of 58

Hexagon Bolt M12*160

Big washer

Rubber washer

31
Step 31 of 58
<p>Hexagon Bolt M12*160</p><p>Big washer</p><p>Rubber washer</p>

Hexagon Bolt M12*160

Big washer

Rubber washer

32
Step 32 of 58
<p>Hexagon Bolt M12*95</p><p>Big washer</p><p>Rubber washer</p><p>Washer</p><p>Nylon Nut M12</p>

Hexagon Bolt M12*95

Big washer

Rubber washer

Washer

Nylon Nut M12

33
Step 33 of 58
<p>Attach your corner pieces to your corners.</p><p>Corner 1 goes to side 1.</p><p></p>

Attach your corner pieces to your corners.

Corner 1 goes to side 1.

34
Step 34 of 58

Place your bolts and washers through the holes on the outside.

Have someone on the inside to help.

Hexagon Bolt M12*95

Big washer

Rubber washer

35
Step 35 of 58

Attach the washer and nut to the bolt once it has come through the hole.

Washer

Nylon Nut M12

Repeat step 33-35 for corner 2.

36
Step 36 of 58
<p>Hexagon Bolt M12*160</p><p>Big washer</p><p>Rubber washer</p><p>Washer</p><p>Nylon Nut M12</p>

Hexagon Bolt M12*160

Big washer

Rubber washer

Washer

Nylon Nut M12

37
Step 37 of 58
<p>Remove the support bar.</p>

Remove the support bar.

38
Step 38 of 58

Attach your corner pieces to your corners.

Place your bolts and washers through the holes on the outside.

Have someone on the inside to help.

Hexagon Bolt M12*95

Big washer

Rubber washer

39
Step 39 of 58

Attach the washer and nut to the bolt once it has come through the hole.

Washer

Nylon Nut M12

Repeat step 37-39 for corner 4

40
Step 40 of 58

Remove all the protective packaging from inside the container.

41
Step 41 of 58
<p>Carefully lift the roof up.</p>

Carefully lift the roof up.

42
Step 42 of 58
<p>Remove all protective packaging from underneath and on top of the roof.</p>

Remove all protective packaging from underneath and on top of the roof.

43
Step 43 of 58
<p>Carefully lift the roof up and over to the container.</p>

Carefully lift the roof up and over to the container.

44
Step 44 of 58
<p>Carefully lower the roof down, making sure all the corners line up.</p>

Carefully lower the roof down, making sure all the corners line up.

45
Step 45 of 58
<p>Roof is on.</p>

Roof is on.

46
Step 46 of 58
<p>Remove slings, d-shackles and eye bolts from the roof.</p><p></p><p>Make sure to keep these as there is one set per frame.</p>

Remove slings, d-shackles and eye bolts from the roof.

Make sure to keep these as there is one set per frame.

47
Step 47 of 58
<p>Using the rattle gun and spanner, tighten all the bolts that attach the corners to the container, repeat for all corners.</p>

Using the rattle gun and spanner, tighten all the bolts that attach the corners to the container, repeat for all corners.

48
Step 48 of 58
<p>Using the rattle gun and spanner tighten all the bolts that attach the corners to the container, repeat for all corners.</p>

Using the rattle gun and spanner tighten all the bolts that attach the corners to the container, repeat for all corners.

49
Step 49 of 58
<p>Hexagon Bolt M12*70</p><p>Washer</p>

Hexagon Bolt M12*70

Washer

50
Step 50 of 58
<p>Hexagon Bolt M12*70</p><p>Washer</p><p>Washer</p><p>Nylon Nut M12</p>

Hexagon Bolt M12*70

Washer

Washer

Nylon Nut M12

51
Step 51 of 58

Place the bolt through the plate attached to the roof and into the bracket attached to the wall.

Repeat for every wall.

Hexagon Bolt M12*70

Washer

Washer

Nylon Nut M12

52
Step 52 of 58
<p>Using the rattle gun and spanner, tighten the bolts that attach the walls to the roof.</p><p>Repeat for every wall.</p>

Using the rattle gun and spanner, tighten the bolts that attach the walls to the roof.

Repeat for every wall.

53
Step 53 of 58
<p>Rubber Plugs.</p>

Rubber Plugs.

54
Step 54 of 58
<p>Plug the holes using the rubber plugs provided.</p>

Plug the holes using the rubber plugs provided.

55
Step 55 of 58
<p>Plug the holes using the rubber plugs provided.</p>

Plug the holes using the rubber plugs provided.

56
Step 56 of 58
<p>Using the rubber plug, plug the holes on both sides of the container.</p>

Using the rubber plug, plug the holes on both sides of the container.

57
Step 57 of 58
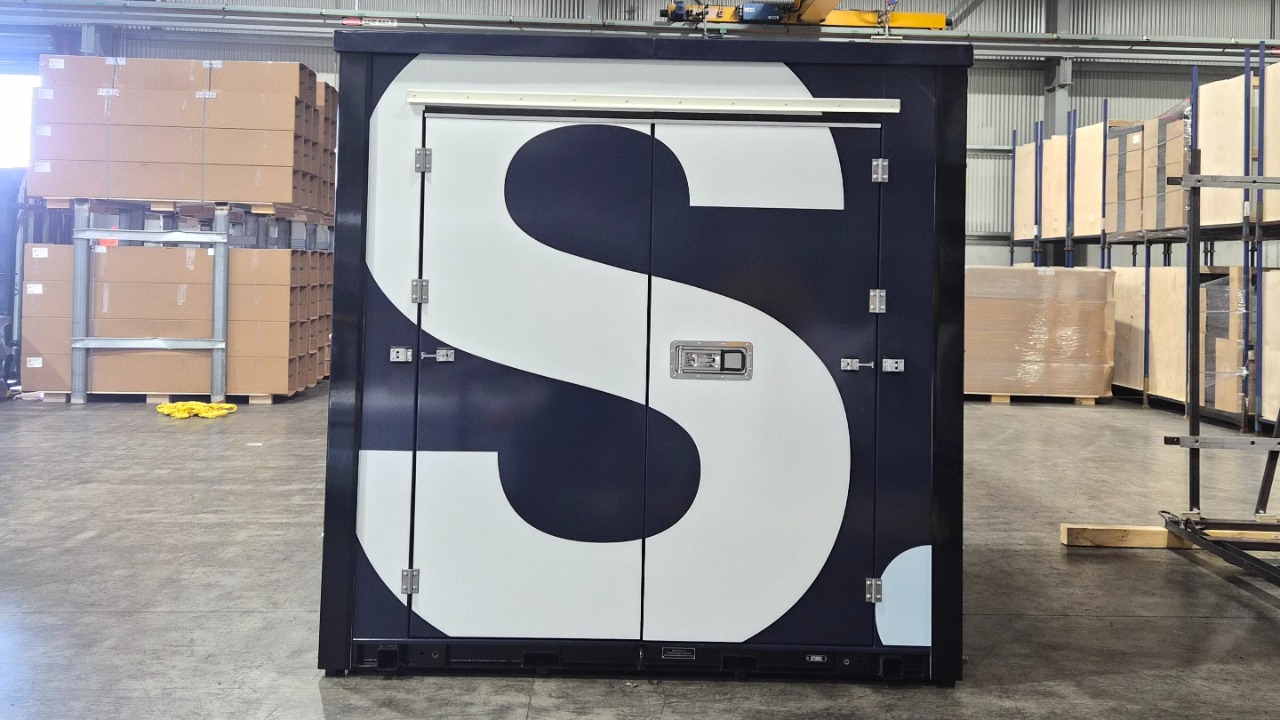
<p>The Stellar container is completed.</p>

The Stellar container is completed.

58
Step 58 of 58
<p>The Stellar container is completed.</p>

The Stellar container is completed.