Follow these instructions to successfully tape a thumb to restrict movement, protect joint/ligaments, relieve pain and minimise risk of injury.
Inspect the area to be taped.
Skin condition should be clean and dry.
Position the patient's hand as if holding a beer/drink.
Apply the anchor tape around wrist, at base of thumb
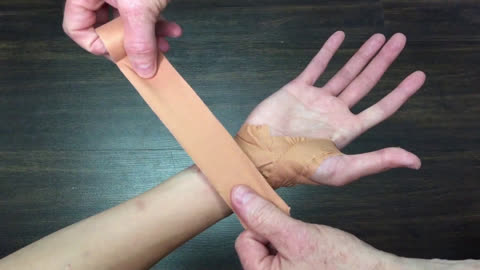
Apply 1st piece of tape around thumb. Known as a "basket weave" pattern.
Repeat previous step by applying a 2nd piece of tape around the thumb.
Lay each subsequent piece of thumb tape in the basket weave pattern and overlapping the previous tape by a half width.
Add 0-3 further layers of tape around the thumb as required until the desired tension is achieved.
Check capillary refill of the thumb nail to assess the vascular supply/ blood circulation in the thumb. Squeeze the thumb nail- if the tape is an appropriate tension around the thumb, then the thumb nail will change from white to pink when squeezed.
Using a closed fist, apply the final anchor tape around the wrist to lock off the tape.
Advise the patient to remove the tape immediately if any adverse signs arise including discomfort, itchiness, numbness or tingling.