Translations can be added on the knowby level. Each knowby has a list of languages set during creation in the Languages tab.
When creating a knowby, a user can:
Add and verify a language, making the translation appear as verified.
Add a language without verification, meaning it will be available only as an automatic translation.

To add translations to your knowby, click the Languages tab on the left side of the screen.
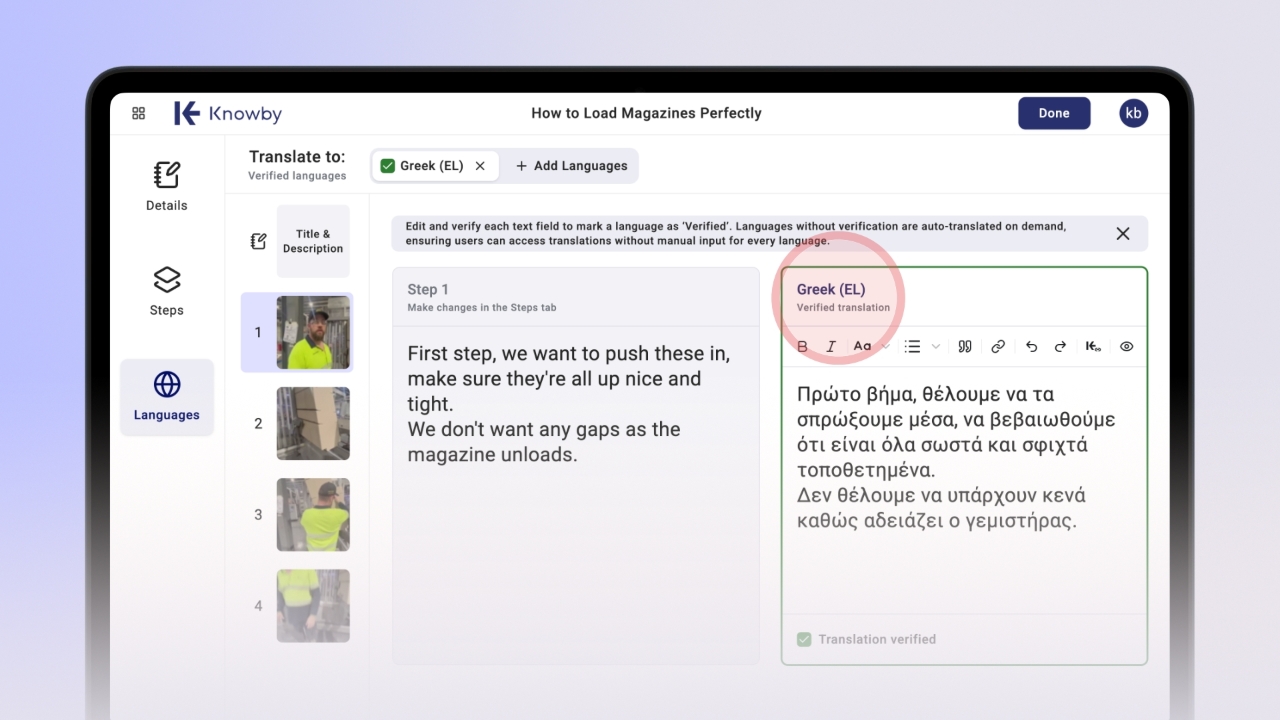
On this screen, you’ll see:
A language management panel at the top – for adding, deleting, and tracking verified translations.
Thumbnails of steps on the left for navigation.
Text boxes – the original text on the left (editable only from other tabs) and the translation on the right.
To add a language, click the "+ Add language" button on the top and select a language from the list. The system will automatically translate all available texts in your knowby: Title, Description, and Steps. This translation is machine-generated and is labeled as Unverified.
To switch between step translations, click on a step in the thumbnails of steps panel on the left.
Review the translation. To edit, use the text box on the right.
When you’re sure the translation is correct, check the Translation verified checkbox in each step. In the Title & Description step, verify both text fields.
Once all steps are verified, a green checkmark appears next to the language, showing it’s verified in your knowby.
You can add multiple languages to your knowby.
Even if not fully verified, the language will still appear in the knowby as an automatic translation.
You can edit the translation and apply text formatting different from the original.
To edit the original step text, go to the Steps or Details tab and make your changes. After editing, a red dot will appear next to the Languages tab, indicating that changes were made.
In the Languages tab, a red banner at the top will show where the text was updated. Navigate to the updated section, and the system will offer to refresh the translation. Click the "Update translation" button to apply the update.
You can verify the language when the knowby is in Draft, Awaiting Approval, or Awaiting Attention status to ensure the translation is correct before publishing.
When the knowby is approved and published, you can access available languages by clicking the language button in the top menu.
The drawer that opens will display available languages. When a language is selected, an entire knowby will be translated.
Any translation edits made during creation (manual translations or formatting) will be applied when viewing the language.
After selecting an auto translation, an entire knowby will be translated, including steps, title, and description. Note, this is a machine translation, so the message about inaccuracy in translation will appear on top of the knowby to warn a user.