Knowby
Optiweigh Cattle quickstart guide
This demonstrates how to assemble a cattle Optiweigh unit. You will need: Scissors / knife, 19mm spanner / socket or a shifting spanner and pliers
1
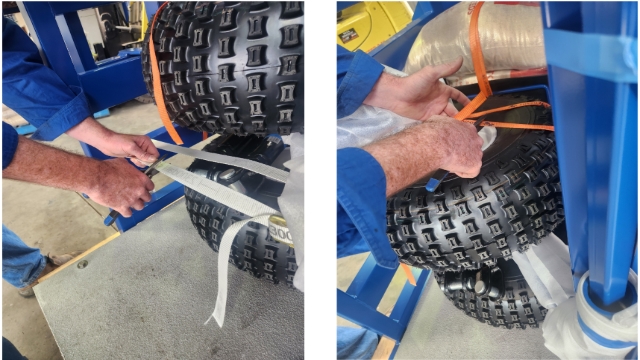
<p>Remove plastic wrapping from Optiweigh unit.</p>

Remove plastic wrapping from Optiweigh unit.
2
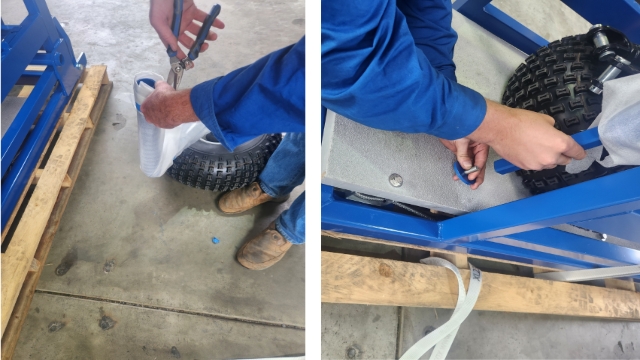
<p>Remove the straps securing Optiweigh unit to pallet and begin removing the wheels and axles.&nbsp;</p>

Remove the straps securing Optiweigh unit to pallet and begin removing the wheels and axles. 
3
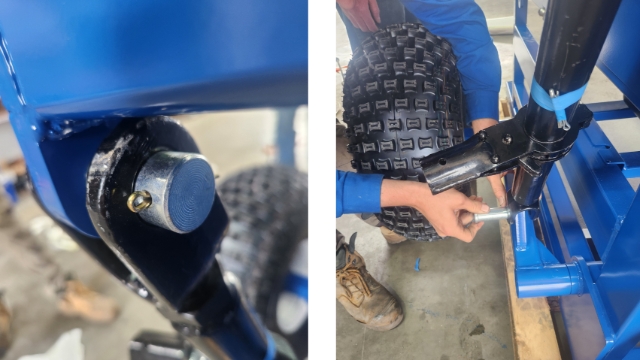
<p>Remove the bolt and washer from the bottom of the axle bar, you should then be able to slide the axle bar out of the wheel axle.<br></p>

Remove the bolt and washer from the bottom of the axle bar, you should then be able to slide the axle bar out of the wheel axle.

4
<p>Slide the wheels into the axle tubes at the front of the machine. Insert Axle bar and tension bolts (19mm)<br></p>

Slide the wheels into the axle tubes at the front of the machine. Insert Axle bar and tension bolts (19mm)
5
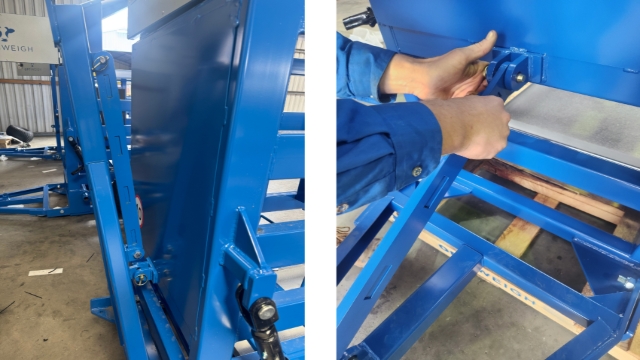
<p>Attach the top links to the unit and wheel axles. Ensure the nut on top link is closest to the unit.&nbsp;<br></p>

Attach the top links to the unit and wheel axles. Ensure the nut on top link is closest to the unit. 
6
<p><span>Lock the bracing bar from the drawbar into the front of the Optiweigh unit using the clevis pin.</span><br><br></p>

Lock the bracing bar from the drawbar into the front of the Optiweigh unit using the clevis pin.
7
<p>The force panels and lick tray can be adjusted depending on the class of stock being weighed. The purpose being to ensure only 1 animal on unit at a time.&nbsp;</p><p>Lick Limiter is to be sat on top of loose lick.&nbsp;</p>

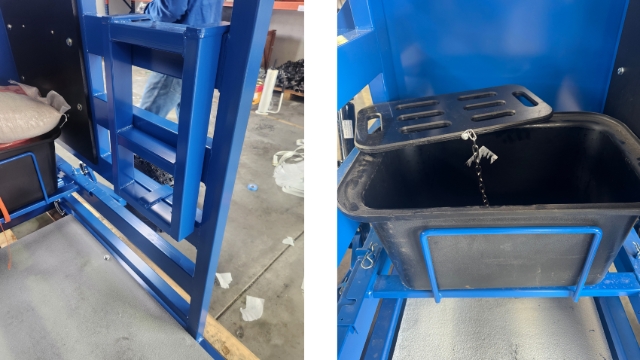
The force panels and lick tray can be adjusted depending on the class of stock being weighed. The purpose being to ensure only 1 animal on unit at a time. 

Lick Limiter is to be sat on top of loose lick. 

8
<p>Use ratcheting top link to jack unit up and down. The toggle circled in image changes direction of top link.</p>

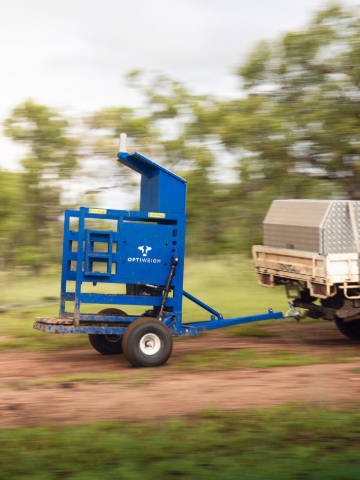
Use ratcheting top link to jack unit up and down. The toggle circled in image changes direction of top link.
9
<p>Connect unit to tow ball and continue jacking until sufficient clearance. It's recommended to not exceed 40km/h.</p>

Connect unit to tow ball and continue jacking until sufficient clearance. It's recommended to not exceed 40km/h.

10
<p>Ensure solar panel is facing North and the unit is positioned on a reasonably flat surface with nothing impacting load bars or platform.&nbsp;</p>

Ensure solar panel is facing North and the unit is positioned on a reasonably flat surface with nothing impacting load bars or platform. 
11
<p>Before deploying Optiweigh unit ensure all lights on the WIC2 box are green.&nbsp;This is good opportunity to use the app to check&nbsp; unit.&nbsp;</p>

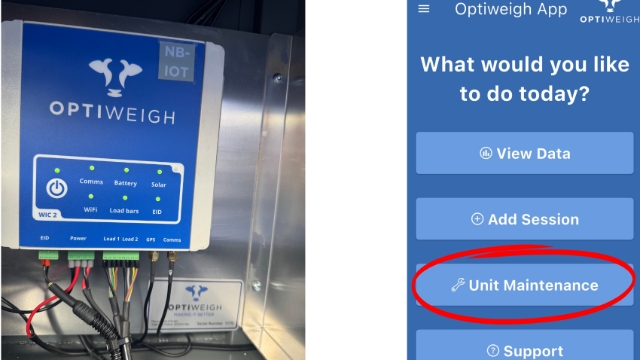
Before deploying Optiweigh unit ensure all lights on the WIC2 box are green. This is good opportunity to use the app to check  unit. 

12
<p><span>See '</span><a class="e-rte-anchor" href="https://optiweigh.zohodesk.com.au/portal/en/kb/articles/connecting-unit-to-the-app" title="check unit link" target="_blank" aria-label="Open in new window"><span>Using the App to check your unit</span></a><span>' for a tutorial.</span></p><p><br></p><p><br>

</p>

See 'Using the App to check your unit' for a tutorial.