It's probable that you currently don't have any projects here, but when you create one, you can easily revisit it by clicking on the project icon located in this area.
Currently, our goal is to start a new project, and you will come across three distinct options by swiping up from the bottom area.
Movie Magic is essentially an automated feature in iMovie that generates a video for you using the video clips you provide.
This specific feature, known as "Storyboard," allows you to utilize pre-existing templates to create things like trailers.
Choose the "Movie" option to initiate the video creation process.
I'll proceed by selecting "Movie." On the next screen, you can import clips, allowing you to bring in a range of content, including photos and videos from your phone.
I'll select clips, and then I'll proceed to press "Create a Movie" at the bottom of the page to initiate the video editing process.
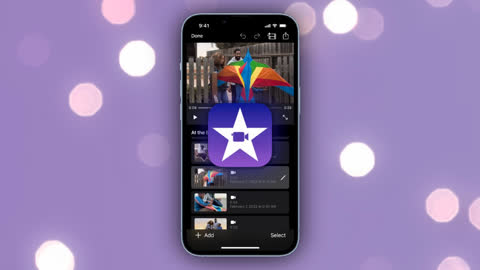
The iMovie interface is straightforward, and it maintains a consistent appearance on both the iPad and other devices.
At the top, you'll find your preview window, where you can review your edited video.
Below is your timeline, where you can see all the different clips you have arranged. As you move your finger along it, you'll notice the corresponding changes in the preview above.
This line is referred to as the playhead indicator. Essentially, wherever this playhead is positioned, it will display the preview from the corresponding clip.
You'll also notice this element between clips, which represents the transition. It's responsible for the smooth transition effect between one clip and another, typically a dissolve. I'll explain how to change this in a moment.
Up here, you'll see a question mark, which provides an overview of where everything is located. However, I'll be covering all these details in this guide, so you can turn that off for now.
There's also a settings option located over here. You can use it to enable themes, which I'll demonstrate later in this guide.
The remaining actions will occur in this area. When you select a clip, this is where your timeline and editing tools will be accessible.
To begin editing, ensure your clips are in the right order. Simply press and hold a clip, then move it to the desired position among other clips in the timeline. This is a fundamental step in video editing.
To trim a clip, select it and use the yellow line to make it shorter or longer. You can also trim the beginning by dragging the start point.
Sometimes you'll need to remove something from the middle of a clip. To do this, select the clip and use the "Split" option. Clicking "Split" will divide the clip into two separate segments.
You can proceed to Delete it, and this action will remove the selected segment.
At the bottom, you'll see a microphone option. Lower it to zero to mute the audio or raise it to increase the volume.
To check if the sound aligns with your preferences, simply hit the play button and listen.
The effect occurring between one clip and another is known as a transition. You can modify it by selecting it. Options include "Slide," which has a distinct appearance, as well as choices like "Wipe" and "Fade." There's also one called "Theme".
By clicking the gear icon, you can change themes. I'm currently using the simple theme, but if I choose the travel theme and press "Done," you'll see the theme's transition when I press play.
There are also filters available here for entire clip, which can alter the visual style of your video.
When you select each clip, you'll discover additional options at your disposal.
For instance, you can apply filters to individual clips. If, for example, you want to make a clip black and white, you can do so using this option right here.
To add text, click on the "T" icon. It's a straightforward process; just select one of these options, and it will add text to your project.
You can tap on the text here to edit it and input your own custom text. Once you're satisfied, simply press "Done," and you can then freely move and position the text anywhere within your video.
That's the text option for you. It includes some animation, which can be quite useful. You'll also notice a small "T" indicator here, signifying that this clip has text assigned to it.
You have the flexibility to modify various aspects of each text, including its color, font, and more.
You also have the option for speed changes right here. You can make it faster by going this way or slower by going the other way. This feature can be quite handy.
You can also create freeze frames, which is a slightly more advanced technique.
Before exporting this project from your phone, take note of the plus sign right here. It allows you to incorporate background music, for instance, using the audio track option. By selecting this option, you can choose from various soundtracks.
You can choose from this list for background music. I'll select this one for now. Simply press the plus sign next to it, and it will add another track down here.
If I wanted to edit this track, I could select it, and there are multiple options available here. For instance, I can press play to preview it, and if it's too loud, I can adjust the volume to make it more like background music.
Within the plus option, you'll discover various methods for importing more clips, photos, and backgrounds. These backgrounds can be especially useful, particularly when working with text, as they can serve as text slates added as clips.
When you've completed your project, click "Done" up here, and it will take you to this menu. In this menu, you can always go back and edit your existing video.
I'll select the "upload" option here because we want to save the video. By doing so, you can save the video, and it will then be rendered or exported to your phone. It will appear in the same location as your photos and videos, following the export settings you've chosen.
To locate the video, simply navigate to your photos library.
You can return to the project tab to access your existing projects for editing, create new projects, or choose from movie magic, storyboards, or the movie option.