How to Screen Record on Mac
Easily capture your Mac screen for tech support, tutorials, or sharing tips with others!
Easily capture your Mac screen for tech support, tutorials, or sharing tips with others!
1
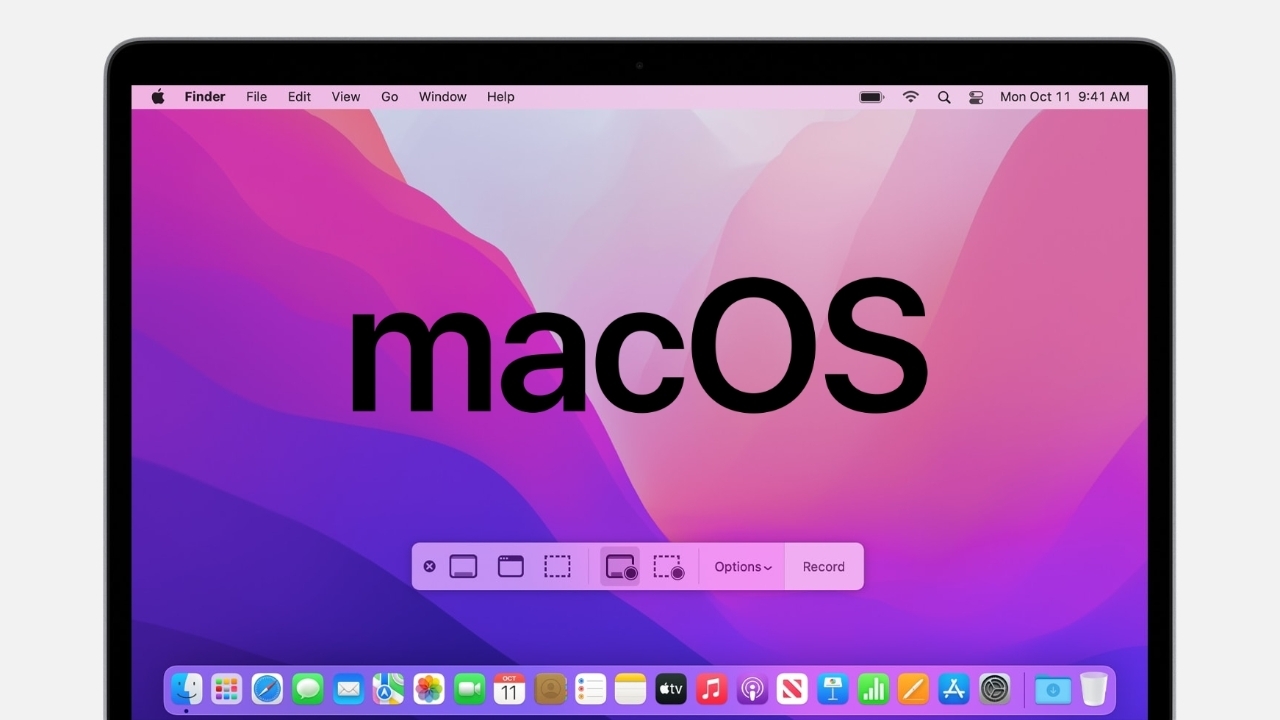
Step 1 of 9Open Screen Recording Controls
- Quick Access! Press Command + Shift + 5 to open the Screen Recording menu instantly.
2
Step 2 of 9Choose Full Screen or Select Area
- Pick Your Shot – You can choose to Record Entire Screen to capture everything on your screen, or select the Record Selected Portion option to focus on a specific area. Use the adjustable frame to customize the recording area.
3
Step 3 of 9Set Your Save Location
- Keep It Organized – Under Options, choose where your recording will be saved (Desktop, Documents, or any location you prefer).
4
Step 4 of 9Customize Recording Options (Optional)
- Enable Floating Thumbnail – Check Show Floating Thumbnail to quickly preview your recording before it saves.
- Show Mouse Clicks – Turn on Show Mouse Clicks if you want to highlight where you click during the recording. Great for tutorials!
- Add Microphone Audio – Under Microphone, choose a connected microphone to add narration to your recording. Useful if you’re explaining what’s on the screen.
5
Step 5 of 9Start Recording
- Let’s Roll – Hit the Record button, and you’re live! An icon will appear, showing you’re recording.
6
Step 6 of 9Perform Your Actions
- Do Your Thing – Go through the actions you want to capture on screen.
7
Step 7 of 9Stop Recording
- Wrap It Up – Click the Stop icon when done. You’ll see a floating thumbnail at the bottom right.
8
Step 8 of 9Review and Finalize
- Edit with Ease – Click the thumbnail to review or trim the footage, then click Done. Your video saves in the location you chose.
9
Step 9 of 9Share Your Creation
- Share It! You’ve got a polished video ready to post, send, or upload wherever you need.