
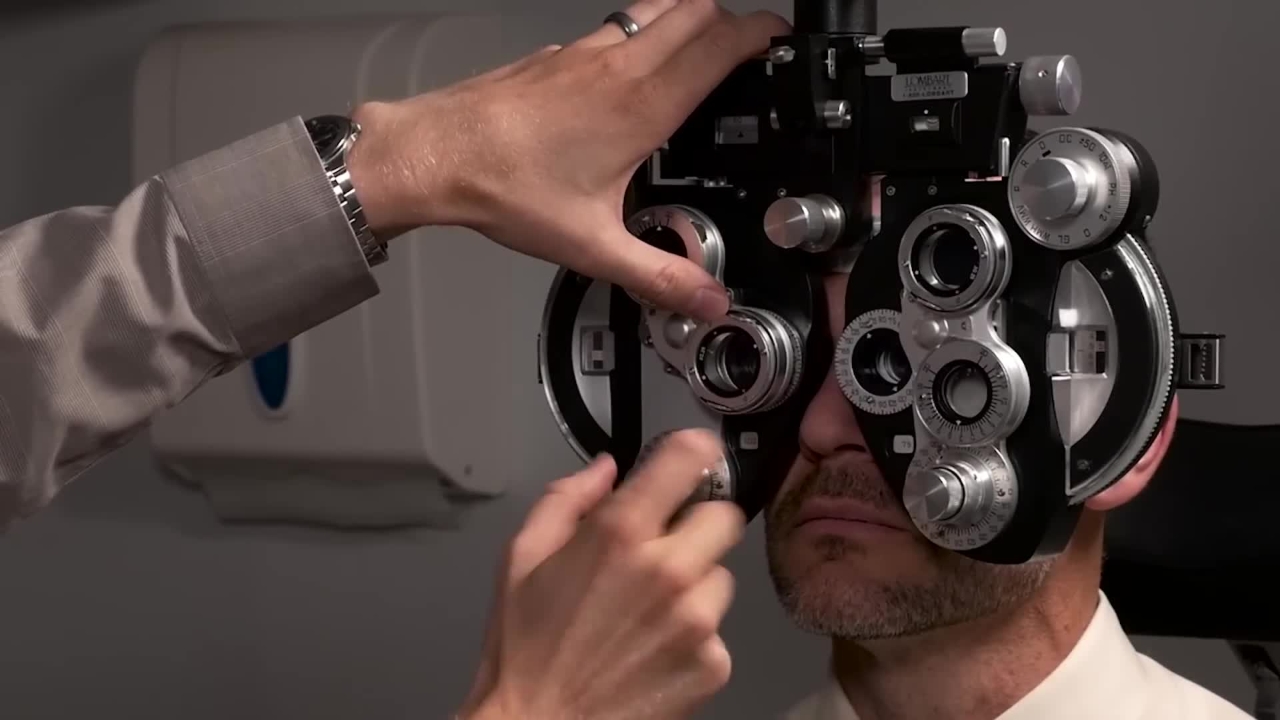
Using Subjective Refraction to Calculate Glasses
I'm Dr. David Meyer. I'm the Director of Contact Lens Services here at the Moran Eye Center in Salt Lake City, Utah.
I'm Dr. David Meyer. I'm the Director of Contact Lens Services here at the Moran Eye Center in Salt Lake City, Utah.
1
Step 1 of 114I'm Dr. David Meyer. I'm the Director of Contact Lens Services here at the Moran Eye Center in Salt Lake City, Utah.
2
Step 2 of 114And today we're going to go through how to calculate a glasses prescription for a patient, and then based on that, how to properly fit a contact lens to that patient.
3
Step 3 of 114One thing that's very important to remember when your patient comes in is case history.
4
Step 4 of 114Find out the last eye exam, any medical issues in general, any previous history of eye surgeries or eye diseases or any sort of complications that they may have had in the past.
5
Step 5 of 114To begin the exam, we'll start with calculating a glasses prescription.
6
Step 6 of 114We're going to start by putting the feropter in front of the patient.
7
Step 7 of 114What's really important is first of all to make sure that the pupil distance in the feropter matches the pupil distance of the patient.
8
Step 8 of 114In order to do that, there's this knob here at the top that adjusts whether the pupil distance is smaller or larger.
9
Step 9 of 114In this case, this patient has a pupil distance of 62, and so I'm going to set it up here at this indicator line at 62.
10
Step 10 of 114Another important thing to factor in is to make sure that the feropter is level, and to do so you use this leveling window here, and to adjust it you turn this dial above, and you try to get it so it's just level right there so the bubble and the dot match up.
11
Step 11 of 114Okay, now in this case we're going to start with the right eye and then go to the left eye.
12
Step 12 of 114In order to do so, you turn this knob so it reads OC, that means to occlude the left eye.
13
Step 13 of 114So currently both of his eyes are open, but you can only see through his right eye because the left eye is occluded.
14
Step 14 of 114Now to begin this, I'm going to blur the patient so that the letters there are very, very blurry.
15
Step 15 of 114And because of previous readings, I already have an idea of roughly what the prescription is based on his last glasses, but I'm going to start out by making his vision very blurry in the right eye, and I'm going to explain to the patient to tell me as soon as he can read these letters, even if they're kind of blurry, but as soon as he can read them.
16
Step 16 of 114Right now I have displayed the 20/30 line. The 20/30 line is a good line to kind of begin refining your refraction.
17
Step 17 of 114So in this case, I want you to tell me as soon as you can start to read those letters, even if they're blurry.
18
Step 18 of 114I'm slowly adding more minus to his prescription.
19
Step 19 of 114- Uh, no. - About there.
20
Step 20 of 114So right when they say "about there," you know that you need to add another, you know, 0.5 to 0.75 more minus, and that's going to be in the ballpark of your prescription.
21
Step 21 of 114So in this case, I'm continuing to refine the sphere. So the sphere is on this side of the ferroptor, and I'm refining it to get as close as we can before I start refining the cylinder component of his prescription.
22
Step 22 of 114So I'm going to ask him, "Is this any better?" - Yes.
23
Step 23 of 114- And even better? - Yes. - And at this point, once you get a good ballpark of the spherical component of the prescription, now you switch over to do the cylinder portion of his prescription.
24
Step 24 of 114And to do so, I turn this, this lens is called the JCC.
25
Step 25 of 114The JCC is short for Jackson Cross Cylinder, and it helps us refine how much astigmatism he has and what the orientation of that astigmatism is.
26
Step 26 of 114And in this case, as I flip it, as you can tell, I'm going to be asking him what looks more sharp and clear.
27
Step 27 of 114Okay, so in this case, I'm going to ask him, "What is more sharp and clear? Number one or number two?" - Number one.
28
Step 28 of 114- So in this case, he said number one, and for a plus cylinder ferroptor, which this is, we turn the dial in the direction of the white dot here on the JCC.
29
Step 29 of 114So in his case, because he said number one is better, I turn the dial, currently it's at about 85 degrees, I turn it to about 75 in this case.
30
Step 30 of 114And then I ask him again, and let me kind of reiterate here, that right now in the JCC, the two dots are straddling this axis here.
31
Step 31 of 114So right here on this axis refinement where all these numbers are, you know, 0 through 180, the line right now matches up at axis 75, and these two dots are on either side of that.
32
Step 32 of 114So that's important in order to know, to figure out where the axis of his prescription is.
33
Step 33 of 114So in this case, I'm going to move it here, and I'm going to say, "What's more clear? Number one or number two?" We'll do it again.
34
Step 34 of 114Number one or number two? Number two. Okay, good.
35
Step 35 of 114So I'm going to move it toward the direction of the white, which is this way. I'm going to ask him again, "Which is more clear? Number one or number two?" They're about the same.
36
Step 36 of 114Pretty close. Just to be safe, I'm going to move it a little bit more in that same direction, and ask him again, "What's more sharp and clear? Number one or number two?" Number one.
37
Step 37 of 114So we're going to go back to where we began here, which is at axis 55.
38
Step 38 of 114And based on his previous glasses that he walked in with, or previous refraction, or whatever, you know, previous prescription we have, we know that that's pretty close to what he had before, so we know we're on the right track.
39
Step 39 of 114Now, in order to refine how much cylinder he needs in his prescription, we have to turn the JCC so now the dots line up with this little arrow here.
40
Step 40 of 114So right now the two white dots here match up at axis 55 that you can see there, and that is how you begin your power refinement.
41
Step 41 of 114And so in this case, it's the same thing. If he likes it when the white is lined up, that means you want to add more cylinder.
42
Step 42 of 114If he likes it when the red is lined up, he wants less. So in this case, let's ask him, "What's more sharp and clear? Number one or number two?" Can I see them? Yeah.
43
Step 43 of 114Number one or number two? Two. Two.
44
Step 44 of 114So he liked it better with the red, and currently he has one diopter of cylinder in there, so I'm going to take out a quarter.
45
Step 45 of 114And then I'm going to ask him again, "What's more clear? Number one or number two?" About the same.
46
Step 46 of 114Pretty close. And I want to be a little more sure, so I'm going to take it down to 0.5 cylinder, and because I've added 0.5 cylinder of essentially minus, because I'm taking away some plus, to compensate for that, I have to add a quarter of plus here in the spherical component of the throptor to maintain a spherical equivalent of the prescription.
47
Step 47 of 114So I'll ask him again, "What's more clear? Number one or number two?" Number one or number two? About the same.
48
Step 48 of 114About the same. So in this case, since it's about the same, you know that you're very close to what we need.
49
Step 49 of 114Just to check one more time, I'm going to bring this down to 0.25 cylinder and ask him again, number one or number two? Definitely number one.
50
Step 50 of 114Definitely number one? And we'll do it one more time. What do you like better? This is number one or number two? They're still pretty close.
51
Step 51 of 114They're still pretty close. Okay. So at that point, we've now refined the axis of the cylinder, and now we've refined the degree or the power of the cylinder.
52
Step 52 of 114So as you can tell here, right now it's a negative 575 plus 50, axis 45.
53
Step 53 of 114And then to go back, I'm going to go back to the spherical component and refine that a little bit.
54
Step 54 of 114I'm going to ask him a few more questions. What looks more sharp and clear? Number one or number two? Two.
55
Step 55 of 114Number one or number two? One.
56
Step 56 of 114One. Okay. Now there are other means by which you can make sure that you haven't overminus or overplus the patient.
57
Step 57 of 114You can balance the eyes if we're working on both eyes, and that's something we can cover in a different segment.
58
Step 58 of 114But for now, based on his previous findings, his last glasses prescription and what we found on an autorefractor, for example, we know we're pretty darn close.
59
Step 59 of 114And then you're going to have the patient read those letters. O, F, L, C, T. Okay.
60
Step 60 of 114And we can even make it down to the 20/20 line. Go ahead and read that.
61
Step 61 of 114T, Z, V, E, C, L. Excellent. Okay.
62
Step 62 of 114So now that we've got the glasses prescription calculated, at that point we need to work on fitting the patient with a contact lens.
63
Step 63 of 114Now, when the patient expresses desire to wear a contact lens, there are a number of factors that you need to consider.
64
Step 64 of 114You need to consider how much the patient wants to wear the contact lens.
65
Step 65 of 114You know, every day or once in a while, you need to find out about past history of his eyes.
66
Step 66 of 114How does he have dry eye problems? Does he have keratoconus or another corneal abnormality? Those are all very important questions to ask to kind of help fit the lifestyle of the patient.
67
Step 67 of 114For today's purposes, we're going to be fitting the patient with a monthly lens.
68
Step 68 of 114This particular one is called a biofinity toric. It's a lens where you take it out at night and put it in the morning, and after one month you throw it away.
69
Step 69 of 114But we're going to go through and show how to put it on a patient's eyes, how to assess it, and how to get the best vision out of it.
70
Step 70 of 114Now, one thing that's very important is when you calculate a glasses prescription, remember that that is almost always different than a contact lens prescription.
71
Step 71 of 114The reason why is because the optical surface of glasses sits out on average about 12 millimeters from the front surface of an eye, whereas a contact lens rests directly on the eye.
72
Step 72 of 114So that changes the optics. So be sure you use a vertex calculator to determine the correct prescription for a contact lens.
73
Step 73 of 114For example, for this patient, the spherical equivalent of his prescription is a negative 5.75.
74
Step 74 of 114If you put that in a vertex calculator, what that would give you is that the proper contact lens would be a negative 5.5.
75
Step 75 of 114Now, in today's purposes, we're going to put a toric contact lens on his eye for demonstration purposes only.
76
Step 76 of 114And before we do that, it's very important that you get some sort of keratometry reading, whether manual keratometry, automated, or even a topography.
77
Step 77 of 114Any of those will help determine which base curve and diameter would be best suited for the patient.
78
Step 78 of 114So for today's purposes, like I said, we're going to be fitting the patient with a biofinity toric contact lens.
79
Step 79 of 114And when you take it out of the blister pack, it's important to make sure the contact lens is not inside out.
80
Step 80 of 114And the best way to tell us to kind of hold it up against the light, and if you look at the edge of the contact lens, the edges should point straight up toward the ceiling like a bowl.
81
Step 81 of 114If you look at it and the edges are kind of flared out or splayed out or they're kind of flattened out, that usually means it's inside out.
82
Step 82 of 114Now that usually doesn't cause a lot of problems, but it can cause some discomfort for the patient, so make sure that the contact lens is not inside out.
83
Step 83 of 114Now, I've put the contact lens on the edge of my finger, and contact lenses typically stick to the surface that is wetter.
84
Step 84 of 114And so try to make sure that your finger is nice and dry so that the contact lens will stick on the patient's eye instead of your finger.
85
Step 85 of 114Now, to do so, I'm going to have the patient lean back and look up high toward the ceiling, and very gently I'm going to pull down on the lower lid and pull up on the upper lid.
86
Step 86 of 114And as he looks up high, I'm going to first place it close to the lower lumbus of his cornea, like so.
87
Step 87 of 114Now, have the patient look down toward the floor, because when you look down toward the floor, it has a tendency to help center the contact lens.
88
Step 88 of 114And make sure that the patient blinks normally to help center the contact lens even more.
89
Step 89 of 114Now, when you place the contact lens on the patient's eye, be sure to give the contact lens a couple of minutes to settle down, especially if it's a toric lens.
90
Step 90 of 114A toric lens has a tendency to orient in the correct position, but it takes a few minutes for the patient's natural blinks to put it in the correct position.
91
Step 91 of 114In this case, we've given the patient a good solid five minutes to let the contact lens settle down.
92
Step 92 of 114At this point, I'm going to pull the slit lamp over here and take a close-up look at the lens to make sure it's fitting properly.
93
Step 93 of 114Okay, come on forward, put your chin down there and your forehead resting forward.
94
Step 94 of 114Now, there are several factors when assessing a contact lens.
95
Step 95 of 114Number one, what we can do is we can pull down on the lower lid just gently and we can see the toric marking.
96
Step 96 of 114In this particular brand of contact lens, the toric marking should be ideally at six o'clock.
97
Step 97 of 114As you can see here, the contact lens is about 10 degrees to the left.
98
Step 98 of 114So it's rotating a little bit temporally.
99
Step 99 of 114As you assess this, have the patient blink normally.
100
Step 100 of 114And as he blinks, you can see the movement of the contact lens.
101
Step 101 of 114Now, ideally, you would like the contact lens to move a little bit, maybe 0.1 to 0.2 millimeters, but not too much, because if it's too much, then it'll be uncomfortable.
102
Step 102 of 114Blink. Another important thing is to make sure there's full limbal coverage and that the contact lens extends beyond the lumbus onto the conjunctiva and it's not rubbing against the lumbus.
103
Step 103 of 114In this case, the contact lens is rotating about 10 degrees temporal or as you're looking at his right eye, it's rotating to my left.
104
Step 104 of 114In that case, whatever the axis of the contact lens or excuse me, of the glasses prescription, you add 10 degrees and put that in the contact lens if you decide to put another one on.
105
Step 105 of 114That rule is commonly referred to as the Lars rule. So if it's to the left, you add.
106
Step 106 of 114If it's to the right, you subtract. So in this case, it was to the left, 10 degrees.
107
Step 107 of 114So we added 10 degrees to the glasses prescription. And then we place that on the contact.
108
Step 108 of 114We use that in the final contact lens prescription. Now, after the contact lens has settled, then you check the visual acuity and then you will do what's commonly called an over refraction.
109
Step 109 of 114Now, an over refraction is to make sure that the contact lens is not too weak or too strong or that you've got the axis wrong.
110
Step 110 of 114And for soft contact lenses, most of the time, as long as you vertex correctly, but the correct contact lens on the over refraction should be close to Plano.
111
Step 111 of 114But behind the foropter, it's always good to make sure. So you do a spherical refinement to make sure the patient is not accepting more plus or more minus or in some cases some astigmatism.
112
Step 112 of 114Thank you for watching this video. Again, I'm Dr. David Meyer.
113
Step 113 of 114And today's video was about fitting a patient with a soft contact lens after doing a basic, basic subjective refraction.
114
Step 114 of 114Thank you.