
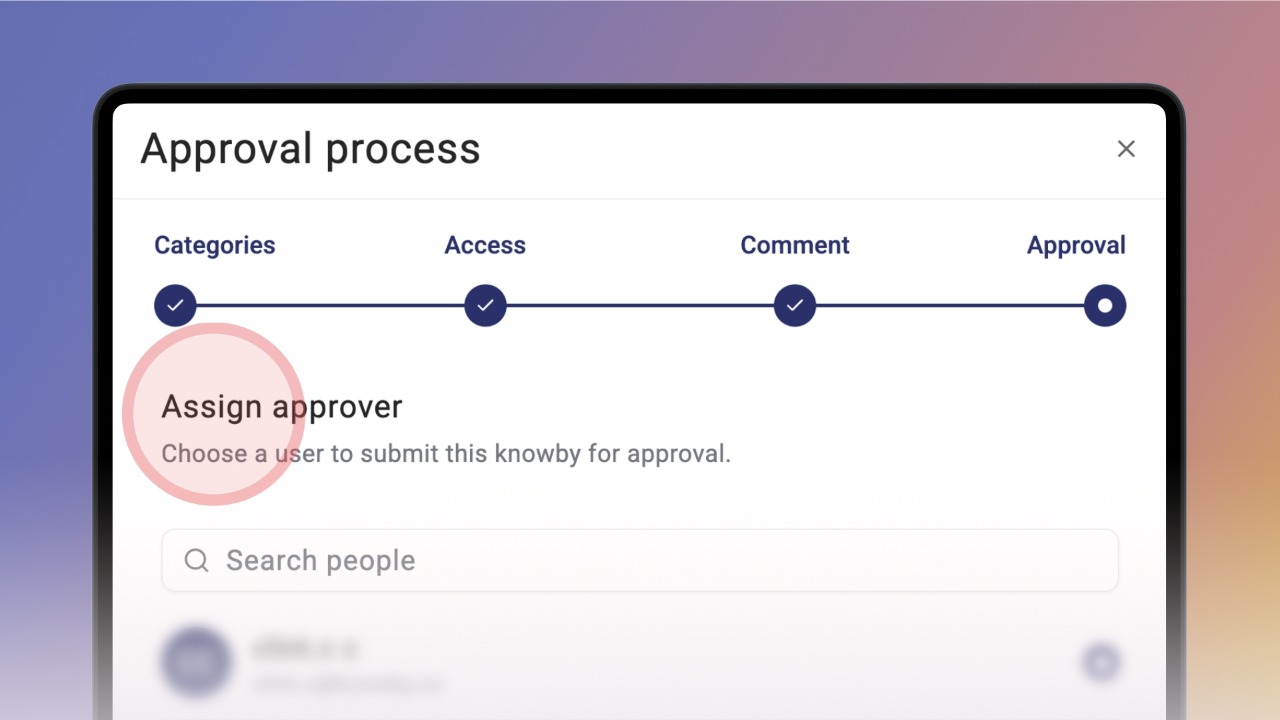
To publish a knowby, submit it for approval first — unless you're an admin, who can publish directly. You can do this from a few places:
The top bar when viewing the knowby — Publish for admins, Submit for Approval for members (who also need to pick an approver)
The "Ready to share" banner at the top of the knowby → Publish it
Knowby Details
The three-dot menu on the knowby card on the home page
Click Submit for Approval (or Publish, if you're an admin) to start.
The Approval Process dialog opens. You can tag your knowby with a category (optional).
Think of it as a label to group related guides together, making them easier to browse, filter, and find. For example: Onboarding, HR, Sales, or IT.
Click Next to continue.
Select who can access this knowby:
Public (Anyone on the web) – visible to anyone via link or web search, including all internal users
Internal (Entire organisation) – visible to all internal users in your organisation
Restricted (Specific teams) – Only visible to teams you select
Click Next to continue.
Add a comment if needed (may be required depending on your organisation's settings).
It will be shown in the Change Log for context.
Click Next to continue.
Assign approver. On this screen, select an approver from the list — only users with approver rights, plus admins, will appear.
Member? Select an approver from the list, then click Submit for Approval.
Your knowby moves to the Submitted for Approval section in the left menu, where it stays until the approver approves it or requests changes.
Publishing as an admin.
Admins see the same screen, but with more flexibility. By default, the button shows Publish — click it to send the knowby straight into the publishing process, no approver needed.
If you select someone from the list, the button changes to Submit for Approval, letting you send it for review instead. Deselect them, and the button switches back to Publish.
At any time, before the approver takes action on the assigned knowby, the editor (creator) or an admin can revoke it from the approver.
To do this, go to the three-dot menu or Knowby Details and click Revoke from Approver. After this action, the knowby will return to Draft status.
As an approver, you'll get a notification when a knowby is assigned to you. Find it in the left menu under Awaiting My Approval. You can:
Approve & Publish — add a comment and send it to publish
Request Changes — add a comment explaining what needs to be fixed, and the knowby will move to the Changes Requested section in the left menu
Once approved — or published directly by an admin — the knowby goes through a processing stage. This can take some time depending on the size of the knowby.
You'll get a push notification once it's done — the knowby will then appear in the Knowbys menu as published.
Need to make changes after publishing?
Just go to the three-dot menu or Knowby Details and click Unpublish. The knowby moves straight back to Draft, so you can make your edits and republish whenever you're ready.