
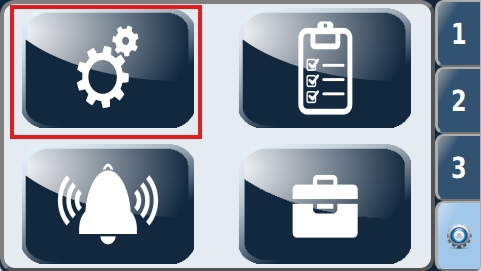
Tap the double gear icon to enter settings
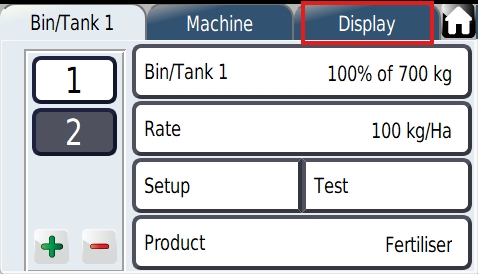
Tap the display tab
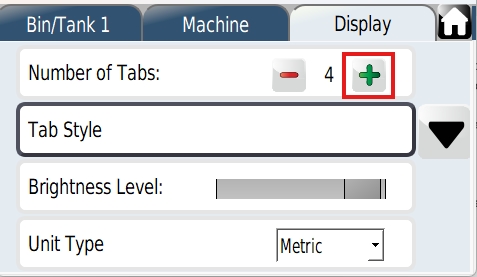
Add an extra tab. In this case we are increasing from 3 to 4 tabs.
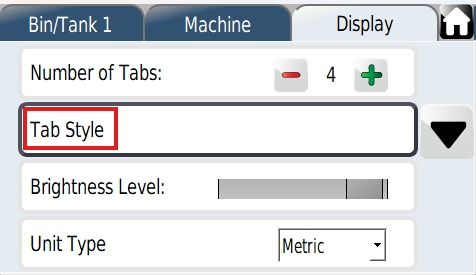
Tap 'Tab Style'
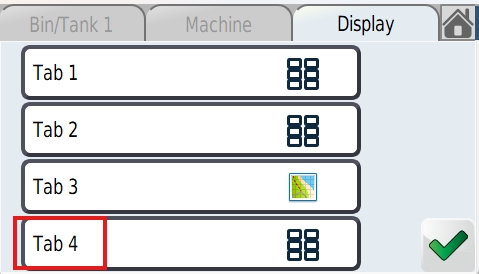
Choose Tab 4 to change the tab setup
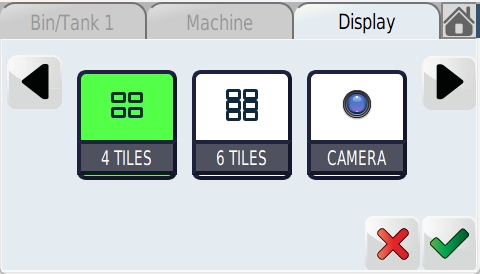
Select '4 Tiles' as the layout setting
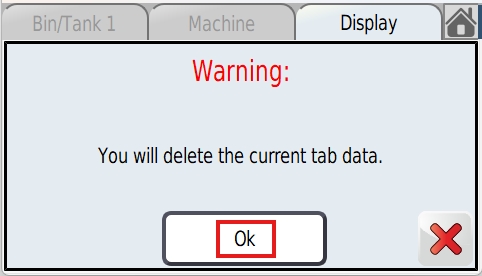
Tap OK to accept the new tab settings
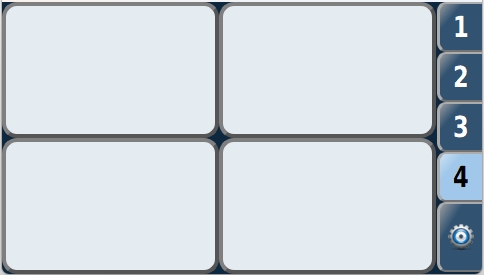
You should now see a new screen on the 4th tab with 4 blank screen tiles.
Press and hold the top left-hand blank tile to enter the tile set up screen
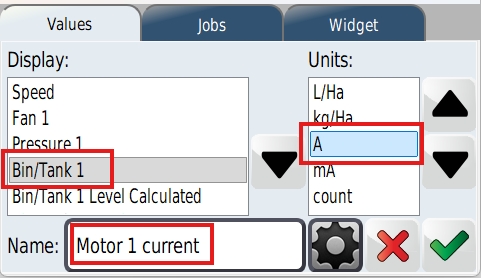
In the tab set up screen, choose 'Bin/Tank 1'
Set the Units to 'A' (amps).
For clarity you can give the tile a useful name such as 'Motor 1 current'.
Note if you wish to test the motor on Bin/Tank 2 then choose that display instead.
Tick to save and exit the set up screen
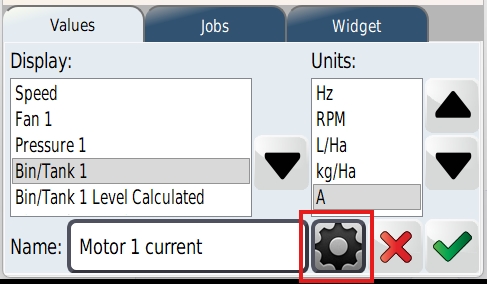
Tap the gear icon
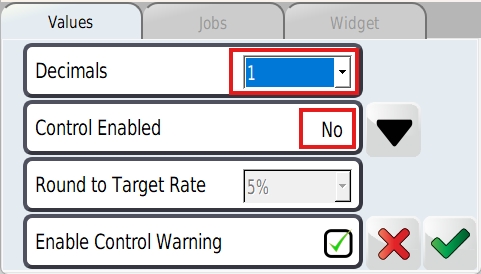
Change 'Decimals' to 1
Change 'Control Enabled' to No
Tick to save and exit
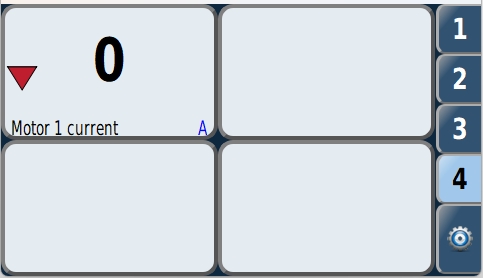
The top left tile should now look like this.
Now press and hold the top right-hand blank tile to enter the set up screen for that tile
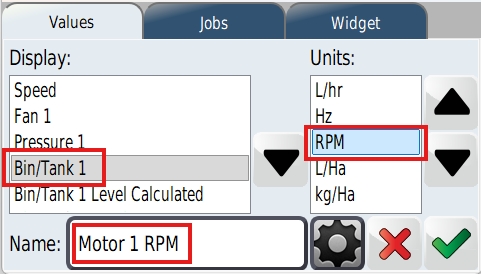
Choose 'Bin/Tank 1' again (or Bin/Tank 2 for the other motor)
Choose RPM to display the motor pulses
Rename the tile to something useful like 'Motor 1 RPM'
Tick to save and exit
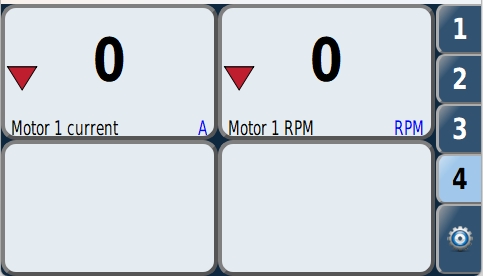
Tab 4 should now look like this.
Press and hold the bottom right-hand tile to enter the set up screen for that tile
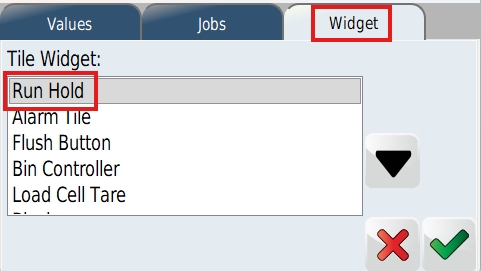
Tap the 'Widget' tab then select 'Run Hold'
Tick to save and exit
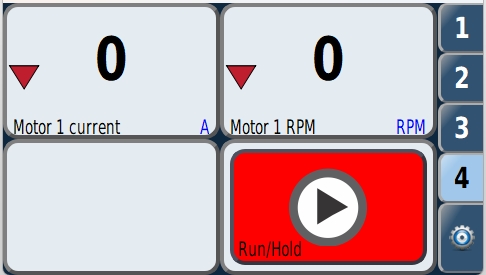
Tab 4 should now look like this.
Before you can activate Run/Hold to test the motor current you need to set 'Enable Prime' and disable the depth switch as described in the next steps
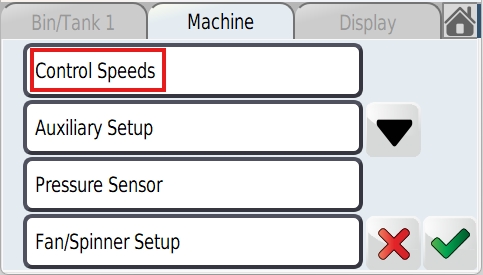
Select 'Control Speeds' in the Machine tab in settings
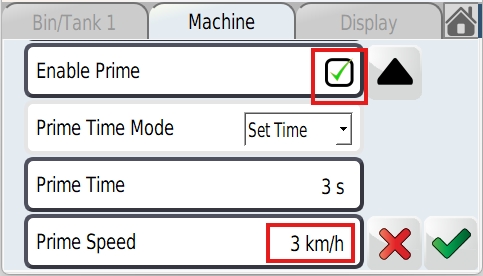
Tick 'Enable Prime' to simulate a ground speed
Choose a low speed such as 3km/h to run the motor at a reasonably low speed for testing
Tick to save and exit
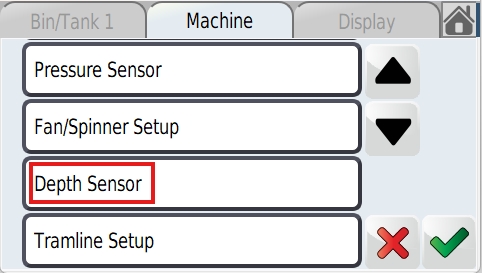
Select 'Depth Sensor' in the Machine tab in settings
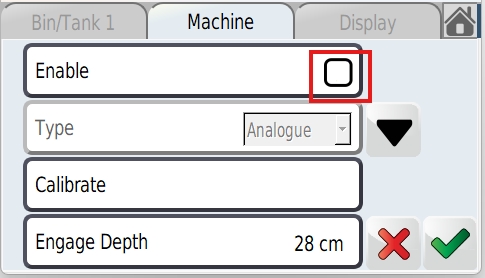
Untick the 'Enable' setting to allow the motor to run without the drill being in the ground
Tick and save to exit
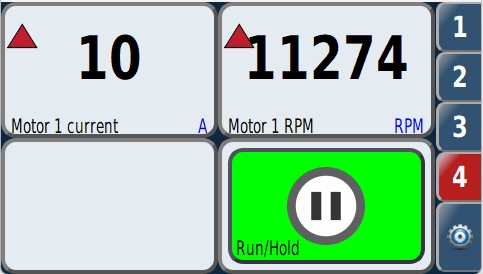
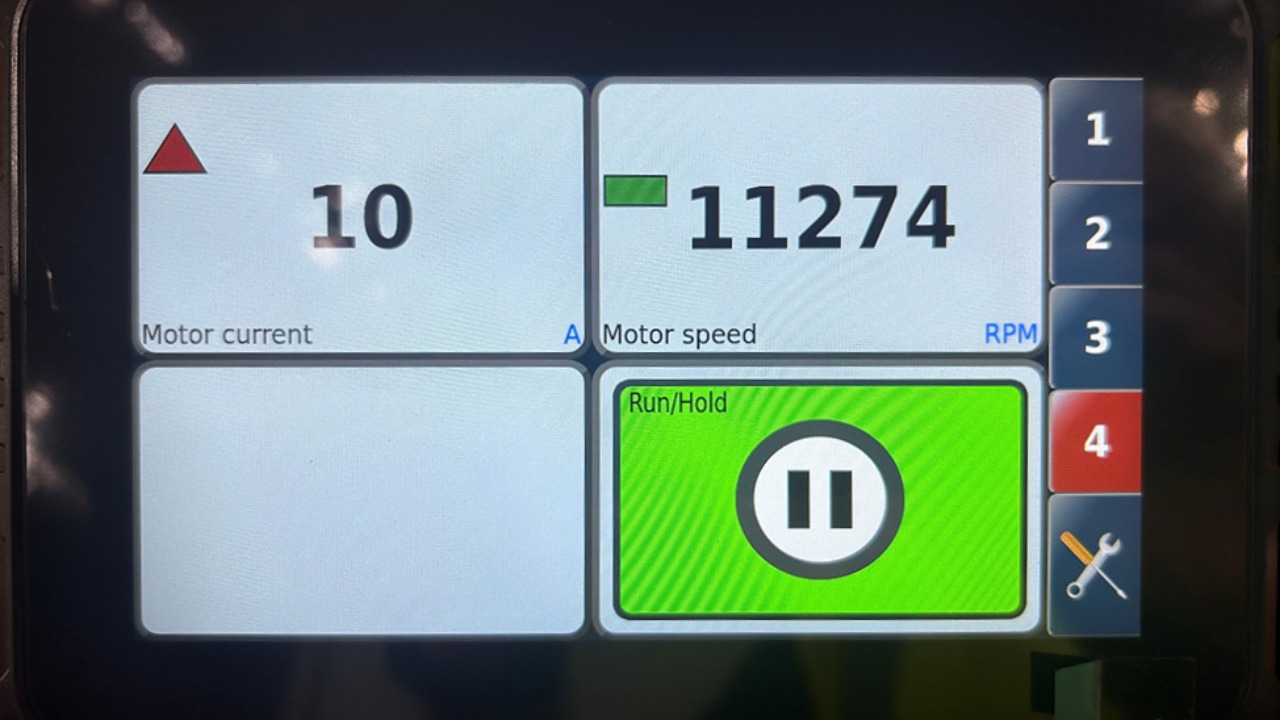
You can now go back to tab 4 and put the drill into 'Run'
The motor current will be displayed and the motor pulses if you have added this tile.
If you measure a motor current at more than 30 amps, there is likely a problem. Tap 'Hold' immediately to stop the motor.
Problem scenarios could include
a blocked metering unit. Check and clear if necessary. Test the motor current again.
a short circuit motor. Talk to SmartAg
The high current problem needs to be resolved BEFORE putting the drill back into work. Failing to do this could damage the new Power Pod.
After testing is complete
Go into settings and tick 'Enable' on the Depth Sensor switch setting (reverse of step 18)
Go into settings and untick "Enable Prime' . Set 'Prime Speed' back to 7 km/h (reverse of step 16)
Delete the extra tab in settings (reverse of step 3)