Knowby Heg Automotive Pty Ltd
Knowby
Mayka Tub Rack Front Window Mesh installation
Follow these instructions to install the Front Window Mesh onto the Mayka Tub Rack
1
Step 1 of 12
Drag to rotate

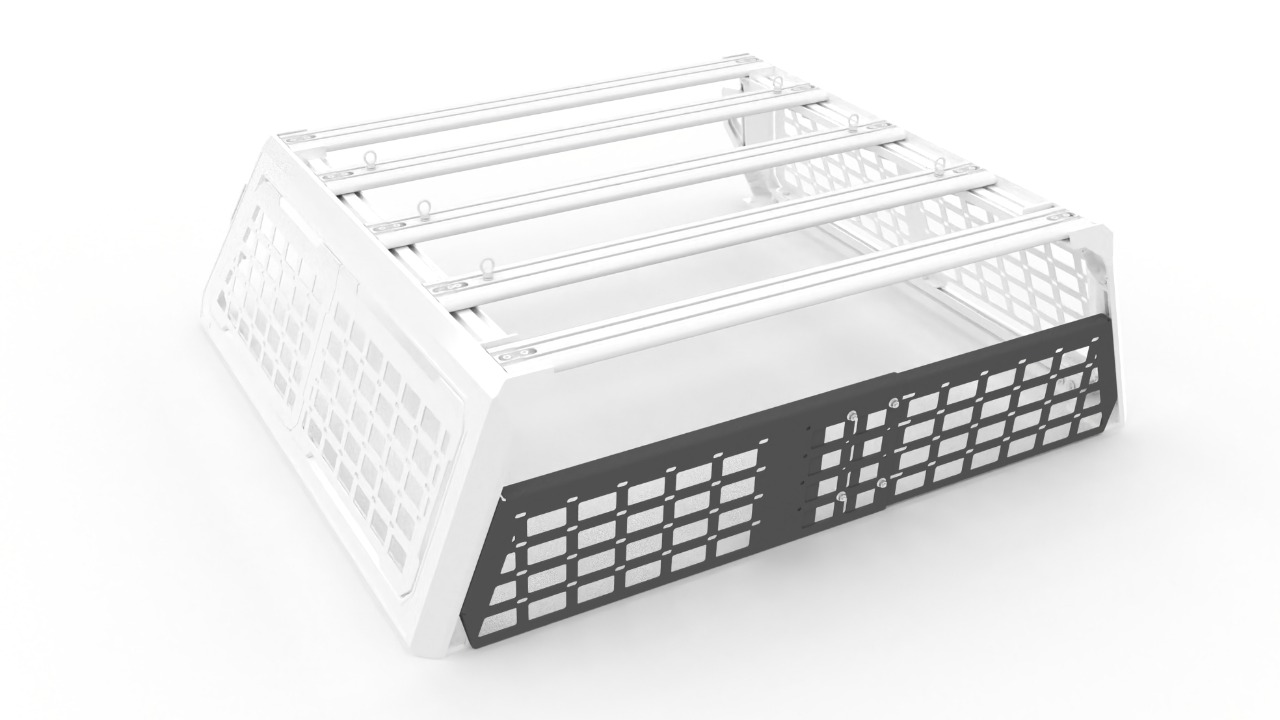
Front Window Mesh

Click "Open Document" to view 3D Model

Please note: We have provided this for reference in the assembly process

2
Step 2 of 12
<p>Open the box and check all components are supplied. You will recieve a bag with the fitting hardware and two seprate panels.</p>

Open the box and check all components are supplied. You will recieve a bag with the fitting hardware and two seprate panels.

3
Step 3 of 12
<p>Place the two panels onto each other so the LH Panel is sitting inside the RH panel as pictured.</p>

Place the two panels onto each other so the LH Panel is sitting inside the RH panel as pictured.

4
Step 4 of 12
<p>Gather the tools required and prepare the fitting kit.</p><p><strong>Tools Required:</strong></p><p></p><ol><li><p>T30 Torx Key</p></li><li><p>13mm Spanner</p></li></ol><p><strong>Your fitting kit should contain the listed components:</strong></p><p></p><ul><li><p>Flat washer D8 (8 × 16 × 1.6 mm) — 4x</p></li><li><p>Spring washer D8 — 4x</p></li><li><p>Torx flat head bolt M8 × 16 — 8x</p></li><li><p>Hex flange nut M8 — 8x</p></li><li><p>M8 × 16 hex head bolt (full thread) — 4x</p></li><li><p>Spring clip nut M8 — 4x</p></li></ul><p></p>

Gather the tools required and prepare the fitting kit.

Tools Required:

  1. T30 Torx Key

  2. 13mm Spanner

Your fitting kit should contain the listed components:

  • Flat washer D8 (8 × 16 × 1.6 mm) — 4x

  • Spring washer D8 — 4x

  • Torx flat head bolt M8 × 16 — 8x

  • Hex flange nut M8 — 8x

  • M8 × 16 hex head bolt (full thread) — 4x

  • Spring clip nut M8 — 4x

5
Step 5 of 12

Fit the 8x Torx flat head bolts through the slotted holes in the panel (you will likely need your panel at it's widest) and then fit the M8 Flanged Hex Nuts to each bolt and finger tighten.

6
Step 6 of 12
<p>Your panel should look like this pre-fitting to the tub rack.</p>

Your panel should look like this pre-fitting to the tub rack.

7
Step 7 of 12
<p>Fit two spring clip nuts into the two front channels of the extrusions. </p>

Fit two spring clip nuts into the two front channels of the extrusions.

8
Step 8 of 12
<p>Guide the panel in place and fix two M8x16mm Hex Head Bolts with spring washers and flat washers.</p>

Guide the panel in place and fix two M8x16mm Hex Head Bolts with spring washers and flat washers.

9
Step 9 of 12

Guide the panel to the desired height and tighten the 16mm Hex Head bolts into the spring T-nuts with a 13mm spanner.

10
Step 10 of 12
<p>With the side bolts tightned at the desired height - Keep the middle bolts loosened until it is fit to the vehicle - This will allow for any adjustment to the tub. </p>

With the side bolts tightned at the desired height - Keep the middle bolts loosened until it is fit to the vehicle - This will allow for any adjustment to the tub.

11
Step 11 of 12

When your tub rack is at the correct width. Tighten using the 13mm spanner and T30 Torx Key.

12
Step 12 of 12
<p>Your window mesh should now be installed.</p>

Your window mesh should now be installed.