
Knowby
Prepare Spare Tyre Carrier, LandCruiser, Under Tray
1
Step 1 of 24
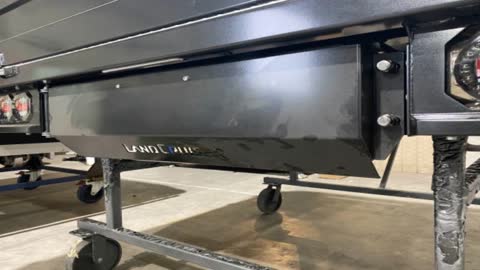
<p>Looks like this when done</p>

Looks like this when done

2
Step 2 of 24
<p>Fit Passenger side bracket to inside of tail light housing
M6 x 16mm for top 2 holes
M8 x 16mm for bottom</p>

Fit Passenger side bracket to inside of tail light housing M6 x 16mm for top 2 holes M8 x 16mm for bottom

3
Step 3 of 24
<p>Tighten
10mm tool for top
13mm tool for bottom</p>

Tighten 10mm tool for top 13mm tool for bottom

4
Step 4 of 24
<p>Fit Drivers side bracket
Notice: there is a &quot;Scollop&quot; cut out, this identifies the top of the bracket.</p>

Fit Drivers side bracket Notice: there is a "Scollop" cut out, this identifies the top of the bracket.

5
Step 5 of 24
<p>Tighten</p>

Tighten

6
Step 6 of 24
<p>Get Fasteners:</p>
<p>Qty 2, M14 x 40 fine Bolts
Qty 2, M14 Fine Nyloc Nut</p>

Get Fasteners:

Qty 2, M14 x 40 fine Bolts Qty 2, M14 Fine Nyloc Nut

7
Step 7 of 24
<p>Tighten the fine thread fasteners to driv side</p>

Tighten the fine thread fasteners to driv side

8
Step 8 of 24
<p>Identify the Main panel</p>

Identify the Main panel

9
Step 9 of 24
<p>Assemble Main Panel:
Qty 1, M12 x 190mm Bolt
M12 large washer</p>

Assemble Main Panel: Qty 1, M12 x 190mm Bolt M12 large washer

10
Step 10 of 24
<p>Feed through then add another large washer</p>

Feed through then add another large washer

11
Step 11 of 24
<p>Add the Main panel</p>

Add the Main panel

12
Step 12 of 24
<p>Add Another large washer</p>

Add Another large washer

13
Step 13 of 24
<p>Add another large washer, and M12 Nyloc nut
Assemble and tighten</p>

Add another large washer, and M12 Nyloc nut Assemble and tighten

14
Step 14 of 24
<p>Rivnut (M6) the Licence plate light fixtures</p>

Rivnut (M6) the Licence plate light fixtures

15
Step 15 of 24
<p>get Qty 2, M6 Domed Head bolts - will be used to fit the licence plate</p>

get Qty 2, M6 Domed Head bolts - will be used to fit the licence plate

16
Step 16 of 24
<p>Pre-Fit the Lic plate bolts</p>

Pre-Fit the Lic plate bolts

17
Step 17 of 24

The panel door should now close like this

18
Step 18 of 24

Fit the Wheel nuts These are the same size as used on the vehice

19
Step 19 of 24
<p>identify the tyre Retainer bracket</p>

identify the tyre Retainer bracket

20
Step 20 of 24
<p>Add safety edge (so the bracket doesent cut the tyre)</p>

Add safety edge (so the bracket doesent cut the tyre)

21
Step 21 of 24
<p>Get the Retainer bracket fasteners:
Qty 2, M12 x 40mm Bolts
Qty 2, M12 Nyloc Nuts
Qty 4, M12 Standard Flat Washer</p>

Get the Retainer bracket fasteners: Qty 2, M12 x 40mm Bolts Qty 2, M12 Nyloc Nuts Qty 4, M12 Standard Flat Washer

22
Step 22 of 24
<p>Pre-fit the fasteners to the tyre retaining bracket.
Washer on both sides.</p>

Pre-fit the fasteners to the tyre retaining bracket. Washer on both sides.

23
Step 23 of 24
<p>Leave bracket in tray (customer or fitting agent will fit)</p>

Leave bracket in tray (customer or fitting agent will fit)

24
Step 24 of 24

Done