
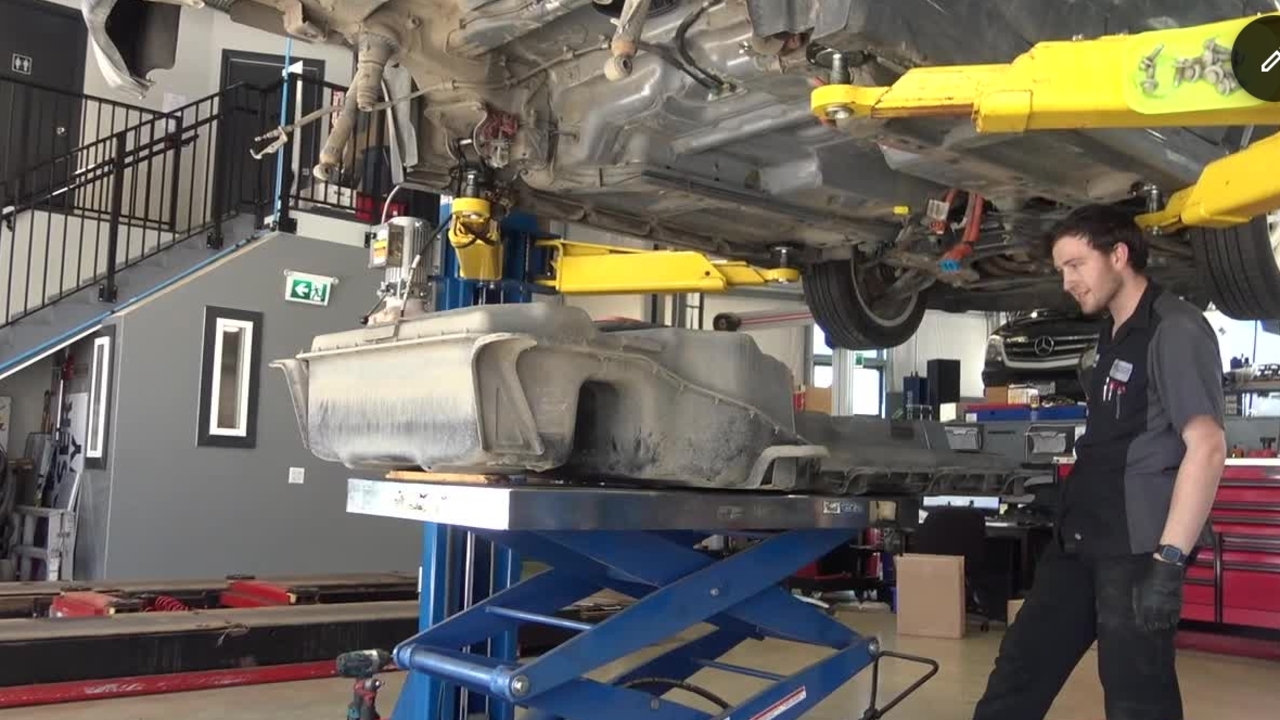
A customer has brought in a 2016 Fiat 500E for repair.
The customer reported that the car would not go into ready mode.
The diagnosis revealed a fault within the battery pack control module.
The first step is to disconnect the 12-volt battery, which runs accessories like lights, wipers, and infotainment systems.
Next, the high-voltage service plug is removed.
In this model, it is located under the rear seat.
The service plug is like a giant fuse. This one is 350A.
Once removed, the high voltage is isolated to the inside of the battery pack, making it safe to work on the vehicle.
The battery pack is removed from under the car, so the car is lifted with a hoist.
On the Fiat, the battery pack extends from just rear of the front wheels almost to the back of the car.
The rearward part is where the fuel tank would be on a gas-powered car.
Several metal protective covers are removed. This exposes the main high-voltage cables, which are colored orange, and the cooling system hoses.
This battery is liquid cooled.
Even though the high-voltage battery has been isolated, the technician puts on rubber electrical safety gloves before proceeding with the next steps.
To ensure there are no pinholes, the gloves are tested before each use.
This is done by rolling up the open ends of the gloves, pressurizing the air inside.
Then the gloves are held to the cheek to check for air leaks.
Once the gloves have passed the test, a pair of work-over gloves are worn over them.
Now the technician is ready to disconnect the electrical cables from the battery pack, starting with the main line and then the secondary line.
Hij plaatst een opvangbak op een schaarlift direct onder de koelvloeistofslangen.
He clamps the hoses, and then loosens the clamps where the hoses connect to the fittings on the battery pack housing.
The coolant drains into the catchment vessel.
To prevent further spillage while the battery pack is being removed, he places caps on the coolant fittings.
As the battery pack goes over the top of the rear axle, the complete rear axle and suspension is removed.
When the battery pack is removed, it is going to drastically change the weight distribution of the vehicle, so the technician secures the front and rear of the vehicle with supports beforehand.
The technician places the scissor lift table beneath the battery and raises it until it contacts the bottom of the battery case.
Now the main bolts can be removed.
With all the bolts removed, the table and battery pack are lowered together.
This vehicle had a considerable amount of mud caked on its underside, so the battery pack cover must be cleaned before it can be opened.
No debris should be allowed to contaminate the interior of the battery case.
The technician uses an industrial vac and compressed air to remove loose mud and dust.
Several dozen bolts hold the top and bottom halves of the battery pack case together.
These are removed.
The top half of the case can now be lifted off, exposing the components of the battery pack.
The technician conducts some tests, verifying voltage readings to ensure there are no other problems.
Satisfied with the results, he disconnects the cables from the connectors on the BPCM and removes the module.
He then installs the replacement module.
The battery pack is now ready to be reinstalled in the vehicle.