Knowby
How to start a job in Business Central.
How to start a job in B.C.
1
Step 1 of 33
<p>Log into the computer or tablet at your work line.</p><p>The password for the tablet's is 252530</p><p>The password for the computer's is 262630</p>

Log into the computer or tablet at your work line.

The password for the tablet's is 252530

The password for the computer's is 262630

2
Step 2 of 33
<p>Find Storco Business Cental on the screen.</p>

Find Storco Business Cental on the screen.

3
Step 3 of 33
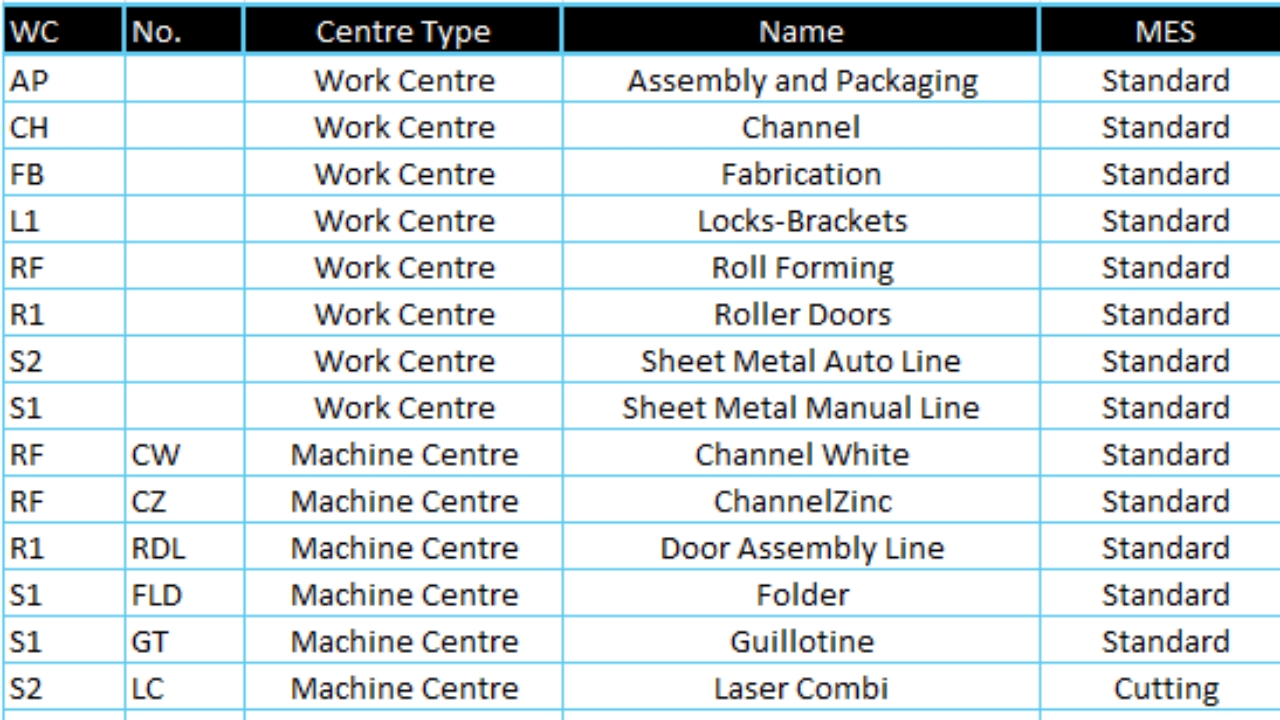
<p>Identify MES centre&nbsp;</p><p>It will be one of the below</p><ul><li><p>Standard</p></li><li><p>Cutting</p></li><li><p>Slitting</p></li></ul><p>e.g. Channel Line is MES Standard</p>

Identify MES centre 

It will be one of the below

  • Standard

  • Cutting

  • Slitting

e.g. Channel Line is MES Standard

4
Step 4 of 33
<p>Once in B.C., click on the relevant MES</p>

Once in B.C., click on the relevant MES

5
Step 5 of 33
<p>Log into MES, your login will be your initials +01 e.g. Billi Austin is BA01.</p><p>Then click OK.</p><p>If there is two people with the same initials, one person will be 01 and the other will be 02.</p><p>e.g.</p><p>Jason Thomas=JT01</p><p>Jesse Thomas=JT02</p>

Log into MES, your login will be your initials +01 e.g. Billi Austin is BA01.

Then click OK.

If there is two people with the same initials, one person will be 01 and the other will be 02.

e.g.

Jason Thomas=JT01

Jesse Thomas=JT02

6
Step 6 of 33
<p>Find your work/machine centre.</p>

Find your work/machine centre.

7
Step 7 of 33
<p>Once you have found your work/machine centre, click OK.</p>

Once you have found your work/machine centre, click OK.

8
Step 8 of 33
<p>Click on 1st shift.</p>

Click on 1st shift.

9
Step 9 of 33
<p>Then click OK.</p>

Then click OK.

10
Step 10 of 33
<p>Find your production order number.</p><p>Your production order number will be in the <strong>Top Right Corner</strong> of your production order ticket that you got off the scheduling board.</p>

Find your production order number.

Your production order number will be in the Top Right Corner of your production order ticket that you got off the scheduling board.

11
Step 11 of 33
<p>To make it easier, you can search your number, just double check the size if there are multiple jobs with the same number.</p>

To make it easier, you can search your number, just double check the size if there are multiple jobs with the same number.
12
Step 12 of 33
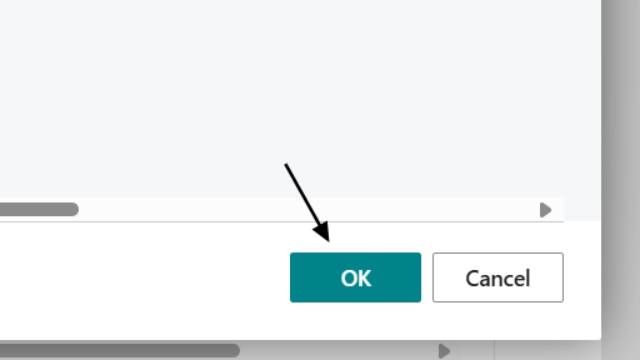
<p>Once you have found your job, click on it to highlight it then click OK.</p>

Once you have found your job, click on it to highlight it then click OK.

13
Step 13 of 33
<p>Now that you're in the job, you need to start your time.</p><p>Different tablets/computers will look different, so have a look for your start run time and click it.</p><p>If there is more than one person on the job, you will need to add them before starting the time.</p>

Now that you're in the job, you need to start your time.

Different tablets/computers will look different, so have a look for your start run time and click it.

If there is more than one person on the job, you will need to add them before starting the time.

14
Step 14 of 33
<p>Start Machine Time/Secondary Time.</p><p></p>

Start Machine Time/Secondary Time.

15
Step 15 of 33
<p>If there is multiple people on the job, you will need to add them.</p><p>Depending on the computer/tablet, depends on where manage resources is, It is generally in the same line as your start time button.</p><p>Click on Manage Resources. </p>

If there is multiple people on the job, you will need to add them.

Depending on the computer/tablet, depends on where manage resources is, It is generally in the same line as your start time button.

Click on Manage Resources.

16
Step 16 of 33
<p>To add another person or multiple people, click on Add Resource.</p>

To add another person or multiple people, click on Add Resource.

17
Step 17 of 33
<p>Type in their initials then click OK.</p><p>Then repeat the process to add more people.</p>

Type in their initials then click OK.

Then repeat the process to add more people.

18
Step 18 of 33
<p>If the time is incorrect, you can add time.</p><p>In manage resources, click on total run time</p>

If the time is incorrect, you can add time.

In manage resources, click on total run time

19
Step 19 of 33
<p>Click on edit list.</p>

Click on edit list.

20
Step 20 of 33
<p>Edit time.</p><p>Remember, the time is in minutes, so if it was 1 hour, change it to 60 minutes.</p>

Edit time.

Remember, the time is in minutes, so if it was 1 hour, change it to 60 minutes.

21
Step 21 of 33
<p>Once the time have been changed complete the job.</p>

Once the time have been changed complete the job.

22
Step 22 of 33
<p>Now you need to add your coil number.</p><p>Click on Material.</p>

Now you need to add your coil number.

Click on Material.

23
Step 23 of 33
<p>Click on Add New Source Lot.</p>

Click on Add New Source Lot.

24
Step 24 of 33
<p>Click on Add New Source Lot.</p><p>Add in your coil number.</p><p>You will find your coil number on your coil.</p><p>After adding the coil number, click OK.</p><p>Repeat for multiple coils.</p>

Click on Add New Source Lot.

Add in your coil number.

You will find your coil number on your coil.

After adding the coil number, click OK.

Repeat for multiple coils.

25
Step 25 of 33
<p>Click this button.</p>

Click this button.

26
Step 26 of 33
<p>After clicking the button, it will move from Source Lot Information to Active Lot Information.</p><p>Click OK.</p>

After clicking the button, it will move from Source Lot Information to Active Lot Information.

Click OK.

27
Step 27 of 33
<p>After clicking ok, you will be able to see the coil on the right hand of the screen, along with your time being active.</p>

After clicking ok, you will be able to see the coil on the right hand of the screen, along with your time being active.

28
Step 28 of 33
<p>Find your consumption line.</p><p>On the consumption line find the Lot No.</p>

Find your consumption line.

On the consumption line find the Lot No.

29
Step 29 of 33
<p>Click on Lot No. and a drop-down bar will appear. Click on the coil you want to use.</p>

Click on Lot No. and a drop-down bar will appear. Click on the coil you want to use.

30
Step 30 of 33
<p>Once you click on the coil, B.C. will do the math and work out the consumption of the coil.</p>

Once you click on the coil, B.C. will do the math and work out the consumption of the coil.

31
Step 31 of 33
<p>Find the Output Line.</p><p>Click Output.</p>

Find the Output Line.

Click Output.

32
Step 32 of 33
<p>Once you click output, an output line will appear with the amount you need for the job.</p>

Once you click output, an output line will appear with the amount you need for the job.

33
Step 33 of 33

That is how to start a job in B.C.