
Knowby
TC - Trailcore Fuel Cap
How to make a Trailcore Fuel Filler Cap
1
Step 1 of 22
<p>Unscrew bolt from lock barrel</p>

Unscrew bolt from lock barrel

2
Step 2 of 22
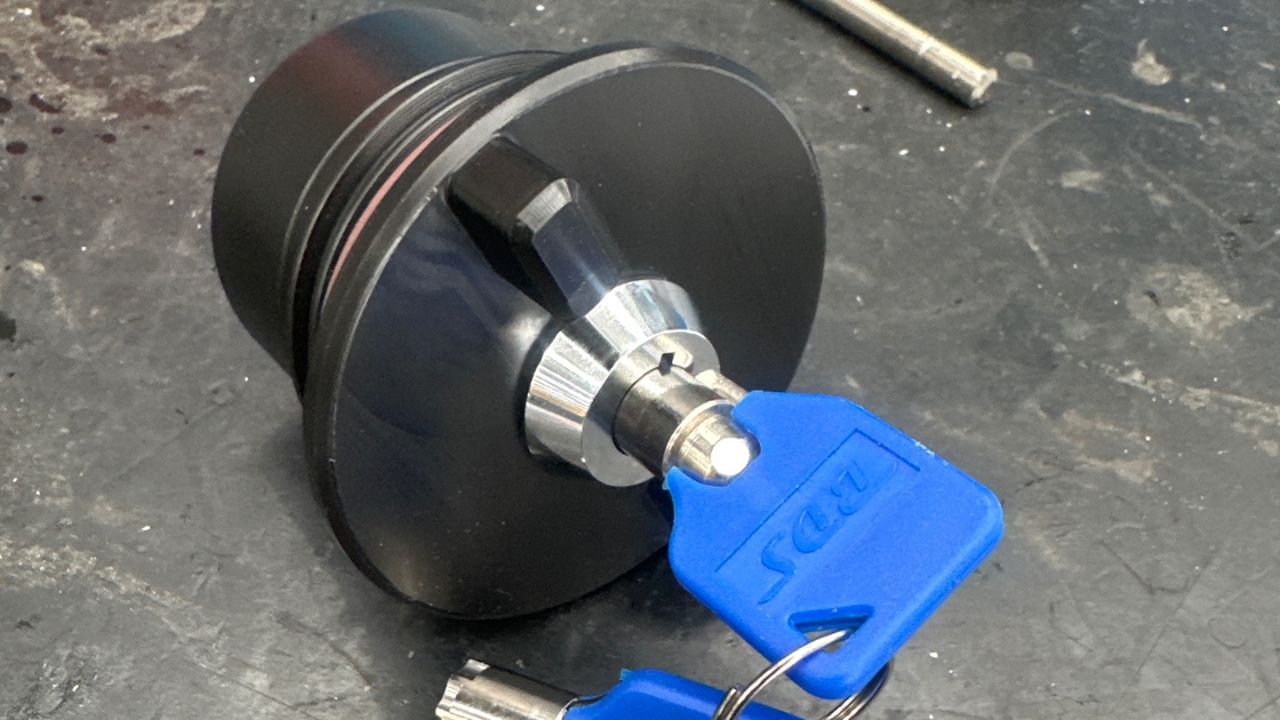
<p>Place lock barrel into top half of fuel cap ensure the 2 lines on the lockbarrel face away from the hole (Pac-Man doesn’t want to eat the ball)</p>

Place lock barrel into top half of fuel cap ensure the 2 lines on the lockbarrel face away from the hole (Pac-Man doesn’t want to eat the ball)

3
Step 3 of 22
<p>Apply locktite to nut supplied in lockbarrel bag</p>

Apply locktite to nut supplied in lockbarrel bag

4
Step 4 of 22
<p>Drop nut over lockbarrel thread and tighten</p>

Drop nut over lockbarrel thread and tighten

5
Step 5 of 22
<p>Place PRT-007296 over the thread ensuring the notch on the outside of the part is facing away from the hole and the notch in the inside of the part is facing towards the hole</p>

Place PRT-007296 over the thread ensuring the notch on the outside of the part is facing away from the hole and the notch in the inside of the part is facing towards the hole

6
Step 6 of 22
<p>Place PRT-007298 inside PRT-007268</p>

Place PRT-007298 inside PRT-007268

7
Step 7 of 22
<p>Insert the small spring between the parts</p>

Insert the small spring between the parts

8
Step 8 of 22

Place the mechanism over the thread of the lock barrel, make sure the lip of PRT-007298 is facing down

9
Step 9 of 22
<p>Place PRR-007382 over the lockbarrel thread ensure the part reads corrrectly (UP instead of PU)</p>

Place PRR-007382 over the lockbarrel thread ensure the part reads corrrectly (UP instead of PU)

10
Step 10 of 22
<p>Apply locktite to the bolt supplied with lockbarrel</p>

Apply locktite to the bolt supplied with lockbarrel

11
Step 11 of 22
<p>Tighten bolt to thread using 11mm spanner</p>

Tighten bolt to thread using 11mm spanner

12
Step 12 of 22
<p>Spray a little bit of lubricant into mechanism</p>

Spray a little bit of lubricant into mechanism

13
Step 13 of 22

Test to see if mechanism and key works properly

14
Step 14 of 22
<p>Place fuel cap O-ring over the bottom half of the fuel cap</p>

Place fuel cap O-ring over the bottom half of the fuel cap

15
Step 15 of 22
<p>Line up PRT-007473-01 with the grooves along the sides of the bottom half of the fuel cap</p>

Line up PRT-007473-01 with the grooves along the sides of the bottom half of the fuel cap

16
Step 16 of 22
<p>Line press grooves up the the part grooves</p>

Line press grooves up the the part grooves

17
Step 17 of 22

Press down firmly

18
Step 18 of 22
<h1>CQC</h1>
<p>Make sure locking arm is in to make it easier for the top half of the fuel cap to go into the bottom half</p>

CQC

Make sure locking arm is in to make it easier for the top half of the fuel cap to go into the bottom half

19
Step 19 of 22
<p>Place top half of fuel cap into bottom half of fuel cap</p>

Place top half of fuel cap into bottom half of fuel cap

20
Step 20 of 22

Press down firmly

21
Step 21 of 22

CQC

Test too see if the top half moves freely while in the locked position

22
Step 22 of 22

CQC

Test to see if the top half stops moving when you move the key to the unlocked position