
Knowby
Santos Toolbox Body - Assembly Knowby
1
Step 1 of 45

It will look like this when complete

2
Step 2 of 45
<p>Start with the powder coated Body</p>

Start with the powder coated Body

3
Step 3 of 45
<p>Get the Rivnut gun, and M6 sealed Rivnuts</p>

Get the Rivnut gun, and M6 sealed Rivnuts

4
Step 4 of 45
<p>Install Rivnuts in roof of toolbox for Muller vent</p>

Install Rivnuts in roof of toolbox for Muller vent

5
Step 5 of 45
<p>If installed correctly it they will look like this.&nbsp;</p>

If installed correctly it they will look like this. 

6
Step 6 of 45

Prepare the Muller vent by enlarging the holes to 7mm

7
Step 7 of 45
<p>Apply the silicone. A big bead like this</p>

Apply the silicone. A big bead like this

8
Step 8 of 45
<p>Install the Muller vent like this</p>

Install the Muller vent like this

9
Step 9 of 45

Tighten

These are the same M6 fasteners used for License plate fasteners

10
Step 10 of 45

Pit Blanking fasteners to the front of the canopy. Stainless M6 button head

11
Step 11 of 45
<p>it will look like this</p>

it will look like this

12
Step 12 of 45
<p>Install a sideboard catch to back of box.&nbsp;</p><p>M6 Countersunk fasteners</p>

Install a sideboard catch to back of box. 

M6 Countersunk fasteners

13
Step 13 of 45
<p>It will look like this</p>

It will look like this

14
Step 14 of 45

We will now make the mounting rails. They will look like this when complete

15
Step 15 of 45
<p>Face the hexagon cutout up</p>

Face the hexagon cutout up

16
Step 16 of 45
<p>Clamp part to the table so it is steady</p>

Clamp part to the table so it is steady

17
Step 17 of 45
<p>Get the M10 nutsert and fastener</p>

Get the M10 nutsert and fastener

18
Step 18 of 45
<p>Spin them together</p>

Spin them together

19
Step 19 of 45
<p>Put in hole</p>

Put in hole

20
Step 20 of 45
<p>Use Vicegrip on bottom side.&nbsp;</p><p><br></p><p>We shoudnt have to do this next time. The hex was cut a little too big&nbsp;</p>

Use Vicegrip on bottom side. 


We shoudnt have to do this next time. The hex was cut a little too big 

21
Step 21 of 45
<p>Use a hex bit (Size:..) and drill on slow speed to install the Nutsert</p>

Use a hex bit (Size:..) and drill on slow speed to install the Nutsert

22
Step 22 of 45
<p>It will look like this from the bottom side if installed correctly</p>

It will look like this from the bottom side if installed correctly

23
Step 23 of 45

Lift the door onto the Door jig

24
Step 24 of 45

Fit the door. M6 Nuts

25
Step 25 of 45
<p>Identify the gas struts. Ideally we woudl use 2 x 250N. We only had 300N in stock&nbsp;</p>

Identify the gas struts. Ideally we woudl use 2 x 250N. We only had 300N in stock 

26
Step 26 of 45

Install the top like this. Note the large stainless washer on each side

27
Step 27 of 45
<p>Drill the bottom mount (9mm)</p>

Drill the bottom mount (9mm)

28
Step 28 of 45
<p>Should now look like this. Tighten the gas struts with a 12mm and 13mm spanner.&nbsp;</p>

Should now look like this. Tighten the gas struts with a 12mm and 13mm spanner. 

29
Step 29 of 45
<p>Now try the door.&nbsp;</p><p>Adjust the latch striker here if required. Size:.......</p>

Now try the door. 

Adjust the latch striker here if required. Size:.......

30
Step 30 of 45

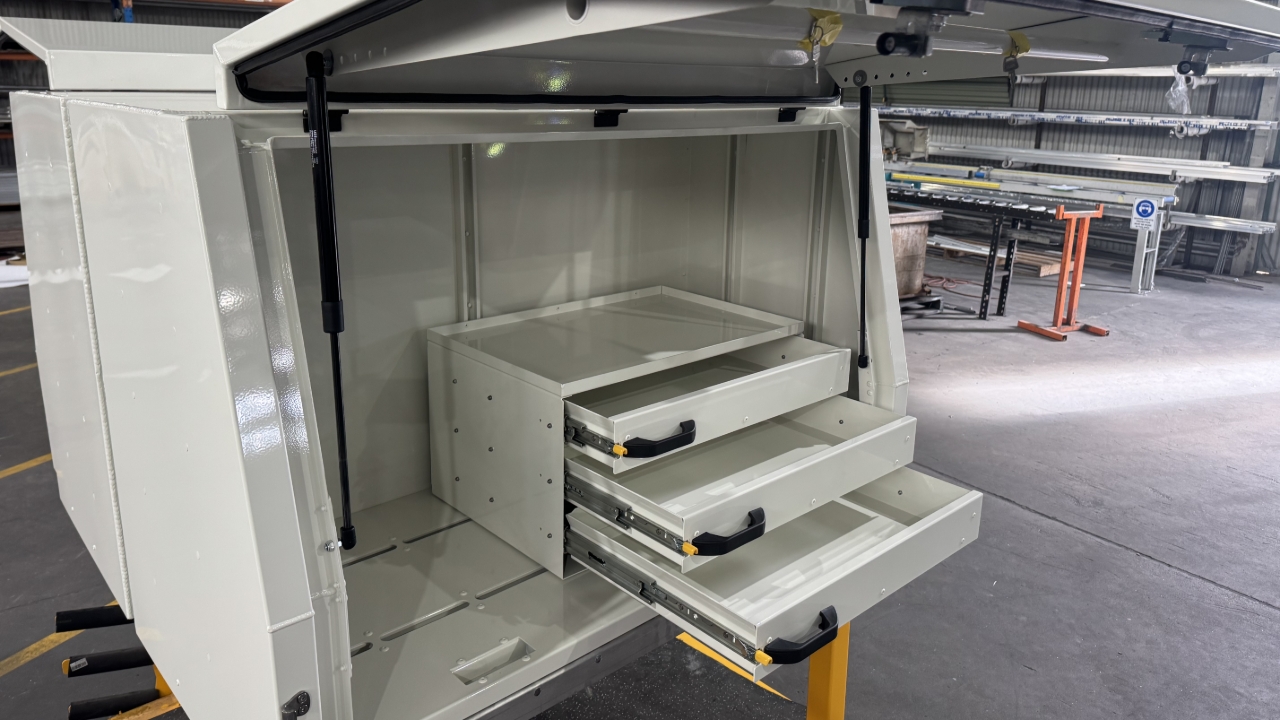
We will now fit the drawer unit, when install it will look like this. It goes to the Drivers Side. 

31
Step 31 of 45

Firstly, remove the bottom drawer by squeezing the release tabs and pulling straight out. 

32
Step 32 of 45
<p>Get a "K4" fasteners kit</p>

Get a "K4" fasteners kit

33
Step 33 of 45

Flip the drawer onto its back, and fit the fasteners like this. 

34
Step 34 of 45

Fit Drawer set to toolbox. 

35
Step 35 of 45

Make sure there is clearance, so everything can open 

36
Step 36 of 45

It will now look like this

37
Step 37 of 45
<p>Get another K4 fasteners kit</p>

Get another K4 fasteners kit

38
Step 38 of 45

Fit the Shelf to the Passenger side box

39
Step 39 of 45

Now we fit the MSA Fridge slide to the Passenger side box. It will look like this when installed. 

40
Step 40 of 45
<p>Open the package, and flip it over.&nbsp;</p><p><br></p><p>Drill out these 2 x holes to 9mm, located at front of slide.&nbsp;</p>

Open the package, and flip it over. 


Drill out these 2 x holes to 9mm, located at front of slide. 

41
Step 41 of 45
<p>Measure 155mm from back of slide. Drill here to 9mm on both sides of slide.&nbsp;</p>

Measure 155mm from back of slide. Drill here to 9mm on both sides of slide. 

42
Step 42 of 45
<p>Get another K4 fasteners kit</p>

Get another K4 fasteners kit

43
Step 43 of 45
<p>Fit the slide to the toolbox</p>

Fit the slide to the toolbox

44
Step 44 of 45

It should now look like this

45
Step 45 of 45

The complete setup should now look like this.