
Knowby
Build an Alloy Base Tray, Dual Cab
1
Step 1 of 25

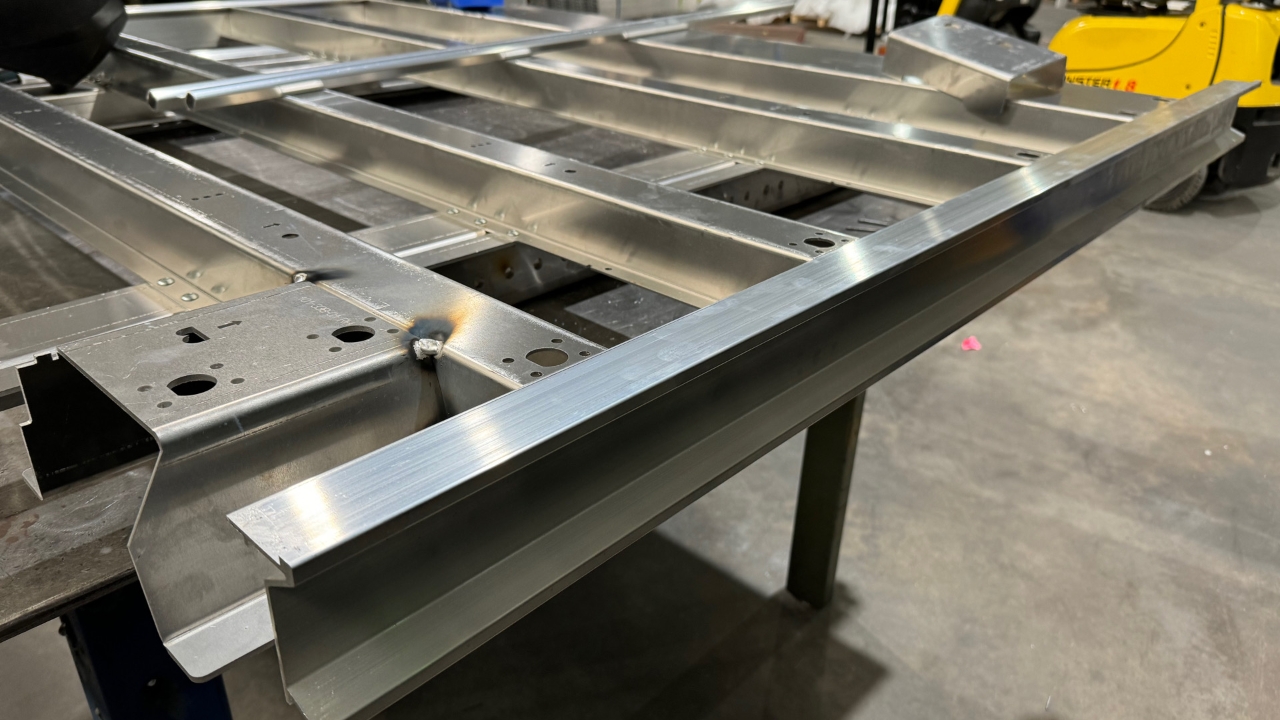
It looks like this when it is all tacked up

2
Step 2 of 25

Lay the chassis rails onto the table

3
Step 3 of 25

Flip it over and insert the three times rivets on the underside to hold the rails together

4
Step 4 of 25
<p>There should be three rivets per chassis rail</p>

There should be three rivets per chassis rail

5
Step 5 of 25

Flip the rails back over so they are in the correct orientation

6
Step 6 of 25

Lay on all the crossmember the little Laser arrow should point towards the front of the Tray

7
Step 7 of 25
<p>The Laser cut Arrow should point towards the front of the Tray</p>

The Laser cut Arrow should point towards the front of the Tray

8
Step 8 of 25

Rivet down all the crossmembers with the rivets which are long enough for 8mm

9
Step 9 of 25

Fit the back Ladder rack mounts. The Laser cut Arrow should point towards the front of the Tray.

10
Step 10 of 25

Tack weld it into place

11
Step 11 of 25
<p>Get the gunnel rail extrusions</p>
<ul>
<li>Qty 2 @ 1725mm for sides</li>
<li>Qty 1 @ 1730mm for back <strong><em>You will need to use the cut off saw to trim 10 mm from the ones which we have been supplied with</em></strong></li>
</ul>

Get the gunnel rail extrusions

  • Qty 2 @ 1725mm for sides
  • Qty 1 @ 1730mm for back You will need to use the cut off saw to trim 10 mm from the ones which we have been supplied with
12
Step 12 of 25
<p>Get the rope rail extrusions</p>
<ul>
<li>Qty 2 @ 1642mm for sides</li>
<li>Qty 1 @ 1830mm for back <strong><em>You will need to use the cut off saw to trim 10 mm from the ones which we have been supplied with</em></strong></li>
</ul>

Get the rope rail extrusions

  • Qty 2 @ 1642mm for sides
  • Qty 1 @ 1830mm for back You will need to use the cut off saw to trim 10 mm from the ones which we have been supplied with
13
Step 13 of 25
<p>Notice that the when view from the back, the rope rail support pieces all lean to the centre</p>

Notice that the when view from the back, the rope rail support pieces all lean to the centre

14
Step 14 of 25
<p>Mark the position of the support pieces on The back of the Tray</p>
<ul>
<li>At side</li>
<li>390mm</li>
</ul>

Mark the position of the support pieces on The back of the Tray

  • At side
  • 390mm
15
Step 15 of 25

Tack weld them in place

16
Step 16 of 25
<p>Mark out the position of the support pieces on the sides of the tray. <strong><em>Notice that all of the rope rail support pieces lean forward towards the headboard.</em></strong></p>
<ul>
<li>At back</li>
<li>380mm</li>
<li>760mm</li>
<li>1180mm</li>
</ul>

Mark out the position of the support pieces on the sides of the tray. Notice that all of the rope rail support pieces lean forward towards the headboard.

  • At back
  • 380mm
  • 760mm
  • 1180mm
17
Step 17 of 25
<p>Mark out their positions</p>

Mark out their positions

18
Step 18 of 25

Tack weld them in place

19
Step 19 of 25
<p>Fit the gunnel rails and tack weld them in place</p>

Fit the gunnel rails and tack weld them in place

20
Step 20 of 25

Position the front Ladder rack pieces

21
Step 21 of 25

Tack weld them into place

22
Step 22 of 25
<p>Cut the Uni strut rail profile</p>
<ul>
<li><strong>Dual Cab:</strong> Cut length is 1600 mm, qty 4</li>
</ul>

Cut the Uni strut rail profile

  • Dual Cab: Cut length is 1600 mm, qty 4
23
Step 23 of 25

Fit the Uni strut rail

24
Step 24 of 25

Fit the license plate Light bracket and rivet it in place

25
Step 25 of 25

It should look like this