Knowby Metalform
Knowby
CH270 STARTER MOTOR REPLACEMENT
Recommend using power tools to remove flywheel. Pulley Puller Required.
1
Step 1 of 32
<p>Switch machine off and disconnect negative battery terminal.</p>

Switch machine off and disconnect negative battery terminal.

2
Step 2 of 32
<p>Take photo or mark wire locations. Remove all wire, 10mm spanner needed.&nbsp;</p>

Take photo or mark wire locations. Remove all wire, 10mm spanner needed. 

3
Step 3 of 32
<p>Remove these two 10mm nuts</p>

Remove these two 10mm nuts

4
Step 4 of 32
<p>Remove this 8mm bolt.</p>

Remove this 8mm bolt.

5
Step 5 of 32
<p>Remove hose from rocker cover. Hose is just pushed in no tools required.</p>

Remove hose from rocker cover. Hose is just pushed in no tools required.

6
Step 6 of 32
<p>Remove air box / intake assembly.</p>

Remove air box / intake assembly.

7
Step 7 of 32
<p>Remove these two 10mm nuts.</p>

Remove these two 10mm nuts.

8
Step 8 of 32
<p>Remove these two 10mm bolts.</p>

Remove these two 10mm bolts.

9
Step 9 of 32
<p>Remove flywheel cover. Then remove ignition switch assembly, x3 10mm bolts.</p>

Remove flywheel cover. Then remove ignition switch assembly, x3 10mm bolts.

10
Step 10 of 32
<p>If you have feeler gauges, Use feeler gauges to measure coil spacing from flywheel. If not grab a piece of paper and fold it until it fits snug between coil and the flywheel and put aside for reassembly. Remove the two 10mm bolts holding on coil.&nbsp;</p>

If you have feeler gauges, Use feeler gauges to measure coil spacing from flywheel. If not grab a piece of paper and fold it until it fits snug between coil and the flywheel and put aside for reassembly. Remove the two 10mm bolts holding on coil. 

11
Step 11 of 32
<p>Remove flywheel nut, 22mm nut. recommend using an impact gun (powertool). If using hand tools you will need to find a way to lock flywheel in place that will not cause damage to any other engine components e.g. engine casings.</p>

Remove flywheel nut, 22mm nut. recommend using an impact gun (powertool). If using hand tools you will need to find a way to lock flywheel in place that will not cause damage to any other engine components e.g. engine casings.

12
Step 12 of 32
<p>Remove these three components keep note of order they come off and orientation.&nbsp;</p>

Remove these three components keep note of order they come off and orientation. 

13
Step 13 of 32
<p>Use 3 point pulley puller to remove fly wheel. Attach pulley removal tool using x3&nbsp; (M6x1.25 thread pitch) bolts. Bolts lengths will depend on tool used.&nbsp;</p>

Use 3 point pulley puller to remove fly wheel. Attach pulley removal tool using x3  (M6x1.25 thread pitch) bolts. Bolts lengths will depend on tool used. 

14
Step 14 of 32
<p>Tighten main bolt of pulley removal tool on the crankshaft pulling the flywheel off. If using a hydraulic removal tool, DO NOT HIT WITH HAMMER as it will brake the tool.</p><p>Remove Flywheel.</p>

Tighten main bolt of pulley removal tool on the crankshaft pulling the flywheel off. If using a hydraulic removal tool, DO NOT HIT WITH HAMMER as it will brake the tool.

Remove Flywheel.

15
Step 15 of 32
<p>Keep track of key steel.</p>

Keep track of key steel.

16
Step 16 of 32
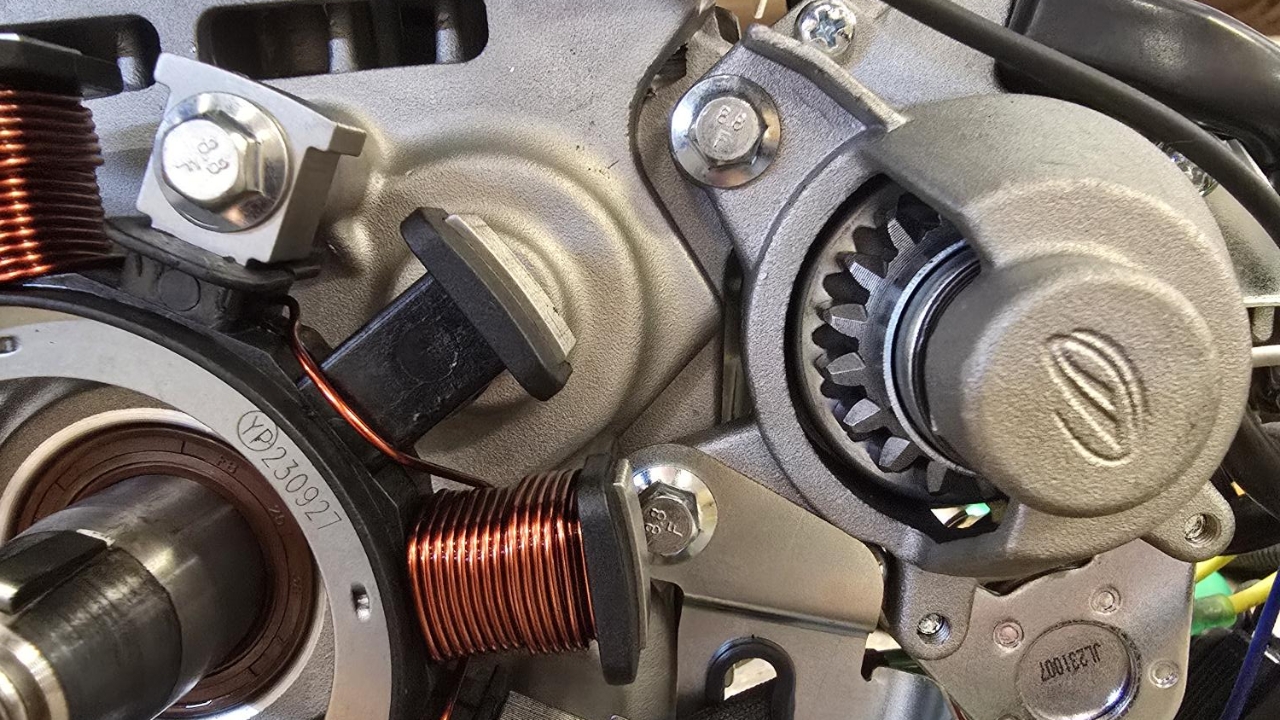
<p>Now you can access the two 10mm bolts securing the starter the the engine. Replace faulty starter motor.&nbsp;&nbsp;</p>

Now you can access the two 10mm bolts securing the starter the the engine. Replace faulty starter motor.  

17
Step 17 of 32
<p>Refit key steel.</p>

Refit key steel.

18
Step 18 of 32
<p>Refit flywheel.</p>

Refit flywheel.

19
Step 19 of 32
<p>Refit these three component in the order and orientation they were removed.</p>

Refit these three component in the order and orientation they were removed.

20
Step 20 of 32
<p>Tighten crankshaft nut to 51.5Nm</p>

Tighten crankshaft nut to 51.5Nm

21
Step 21 of 32
<p>Refit ignition assembly with three 10mm bolts.</p>

Refit ignition assembly with three 10mm bolts.

22
Step 22 of 32
<p>Refit coil using 10mm bolts leave loose. Fit piece of paper that you put aside earlier between the coil and the flywheel. Lightly press on coil applying the light pressure towards the flywheel and tighten 10mm bolts. Remove paper once bolts are tightened.</p>

Refit coil using 10mm bolts leave loose. Fit piece of paper that you put aside earlier between the coil and the flywheel. Lightly press on coil applying the light pressure towards the flywheel and tighten 10mm bolts. Remove paper once bolts are tightened.

23
Step 23 of 32
<p>Refit flywheel cover / pull start assembly making sure these two earth wire are behind the cover. If not, remove cover and put wire on first then refit cover.</p>

Refit flywheel cover / pull start assembly making sure these two earth wire are behind the cover. If not, remove cover and put wire on first then refit cover.

24
Step 24 of 32
<p>Tighten the two 10mm nuts and two 10mm bolts holding cover on. four faster in total holding cover assembly on.</p>

Tighten the two 10mm nuts and two 10mm bolts holding cover on. four faster in total holding cover assembly on.

25
Step 25 of 32
<p>Refit air filter box / intake to engine.</p>

Refit air filter box / intake to engine.

26
Step 26 of 32
<p>Insert hose back into rocker cover while fitting airbox / intake assembly.</p>

Insert hose back into rocker cover while fitting airbox / intake assembly.

27
Step 27 of 32
<p>Loosely fit these two 10mm nuts.</p>

Loosely fit these two 10mm nuts.

28
Step 28 of 32
<p>Loosely fit this 8mm bolt. Once all three fasteners are on tighten them all.</p>

Loosely fit this 8mm bolt. Once all three fasteners are on tighten them all.

29
Step 29 of 32
<p>Before starting engine with starter motor use pull start the turn over the engine a couple of times. You are not trying to start engine in this step you are just checking to make sure there are no rubbing/ scrapping noises.&nbsp;&nbsp;</p>

Before starting engine with starter motor use pull start the turn over the engine a couple of times. You are not trying to start engine in this step you are just checking to make sure there are no rubbing/ scrapping noises.  

30
Step 30 of 32
<p>Refit wire the starter motor using images/ notes you kept while disassembly.</p>

Refit wire the starter motor using images/ notes you kept while disassembly.

31
Step 31 of 32
<p>Refit negative battery terminal.</p>

Refit negative battery terminal.

32
Step 32 of 32
<p>Switch on machine a test new starter motor.</p>

Switch on machine a test new starter motor.