
Knowby
Flatbed Router SOP
1
Step 1 of 7
<p>All Female Stripper Units require Routing.</p>

All Female Stripper Units require Routing.

2
Step 2 of 7
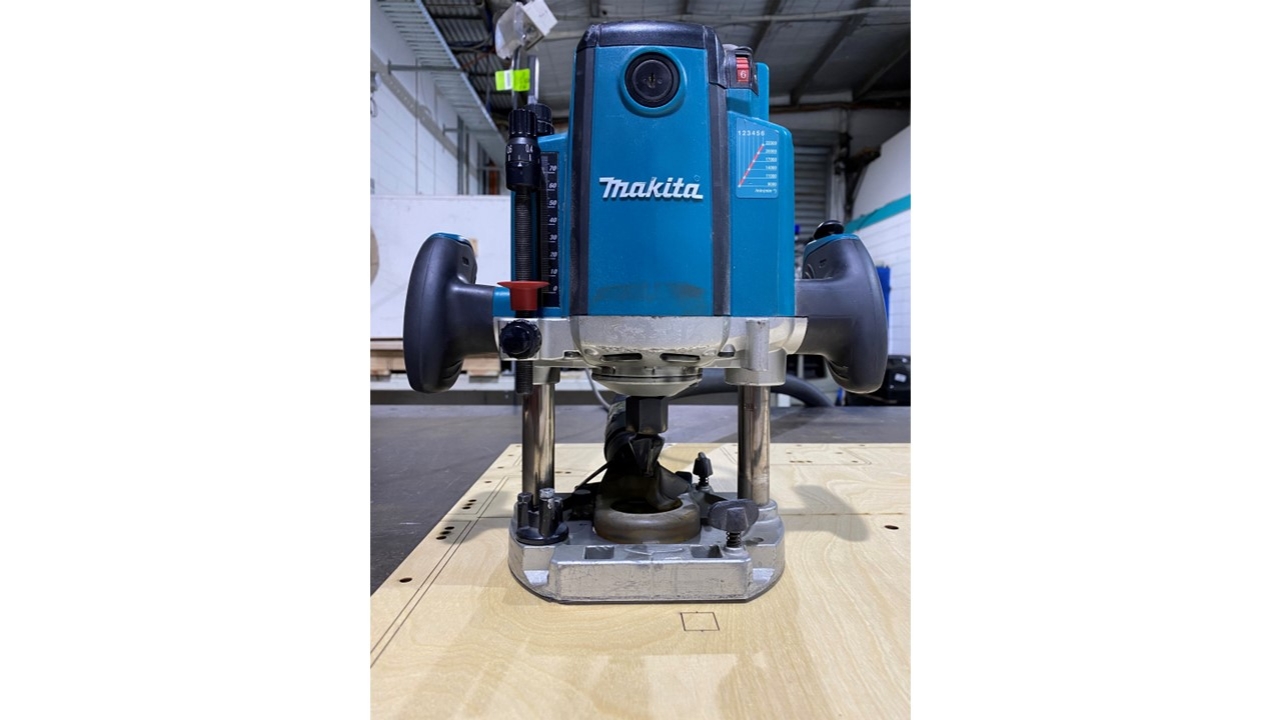
<ol><li><p>Depth Adjustment.<br>&nbsp; Wind up or down to set Depth</p></li><li><p>Depth Adjustment Quick Change.<br>&nbsp; &nbsp;Rotate to one of three set positions</p></li><li><p>Router Bit.<br>&nbsp; &nbsp; Bit to suit desired cut</p></li><li><p>Trigger and Trigger Lock.<br>&nbsp; &nbsp; &nbsp;Press trigger with fore finger to             start router. Press Trigger lock on         the top of handle with thumb to             keep router running. Press trigger         again to release the trigger lock.  </p></li><li><p>RPM Adjustment.<br>&nbsp; &nbsp; &nbsp; Speed Control                                           Rotate to control RPM&nbsp;</p></li></ol><p></p>
  1. Depth Adjustment.
      Wind up or down to set Depth

  2. Depth Adjustment Quick Change.
       Rotate to one of three set positions

  3. Router Bit.
        Bit to suit desired cut

  4. Trigger and Trigger Lock.
         Press trigger with fore finger to start router. Press Trigger lock on the top of handle with thumb to keep router running. Press trigger again to release the trigger lock.

  5. RPM Adjustment.
          Speed Control Rotate to control RPM 

3
Step 3 of 7
<p>Router position lock and Vacuum connection point.</p><p>1.Router position lock lever. Pull lever up to release, push lever down to lock.</p><p>2.Firmly attach vacuum hose.</p><p></p>

Router position lock and Vacuum connection point.

1.Router position lock lever. Pull lever up to release, push lever down to lock.

2.Firmly attach vacuum hose.

4
Step 4 of 7
<p>Router Locked Down in cutting position.</p><p>It is not necessary to use the lock and is up to the operator if they prefer to use.</p>

Router Locked Down in cutting position.

It is not necessary to use the lock and is up to the operator if they prefer to use.

5
Step 5 of 7
<p>Check that Vac dust bucket is not full.</p><p>Turn on Vac when ever Router is in use.</p>

Check that Vac dust bucket is not full.

Turn on Vac when ever Router is in use.

6
Step 6 of 7
<p>Check the depth setting of the bit. Ensure it is not touching the surface of bench below the timber &nbsp;as this will damage the router bit and may cause kick back</p><p></p><p>Use depth adjustment knob correct if necessary.</p>

Check the depth setting of the bit. Ensure it is not touching the surface of bench below the timber  as this will damage the router bit and may cause kick back

Use depth adjustment knob correct if necessary.

7
Step 7 of 7

Ensure that you grip the router by both handles and hold tightly. 

Pull down to bring the router to the right height.

Pull the trigger and hold (or lock with trigger lock)

Push/Pull against the timber and work into corners and radii.