
Before starting read our effluent management plan located in dairy shed office

Starting at the hydrant located in all effluent paddocks connect up elbow adapter using the cam lock system

Disconnect all camlock fittings on each pipe. Our effluent system consists of 7 pipes each being 50 metres long in length each fitted with male and female camlocks at each end for convenience.
For ease of towing simply only pull one pipe at a time.
Using the tow rope provided, this can be located in the motorbike tool box, tie up/ choke each pipe and hook up to tow ball only.
Make sure you select the correct fitting on each pipe in order to keep its sequence and join back up correctly. Generally the female end with all the clamps is the end to pull with.
Engage (4WD) to help the motorbike tow the pipes safely.

Connect all the pipes together using the camlock fittings. There are male and female fittings designed to connect 2 pipes together easily. Make sure the female camlock has a rubber inner seal inside it and that’s in good condition making it a tight fit.

Drag the pipes along the side of the fence line one after the other (end for end) until you reach the back of paddock

Left over pipe placed on the opposite side of paddock out of the way to be used later on when irrigator is turned around and on another run
Correct way to move the irrigator
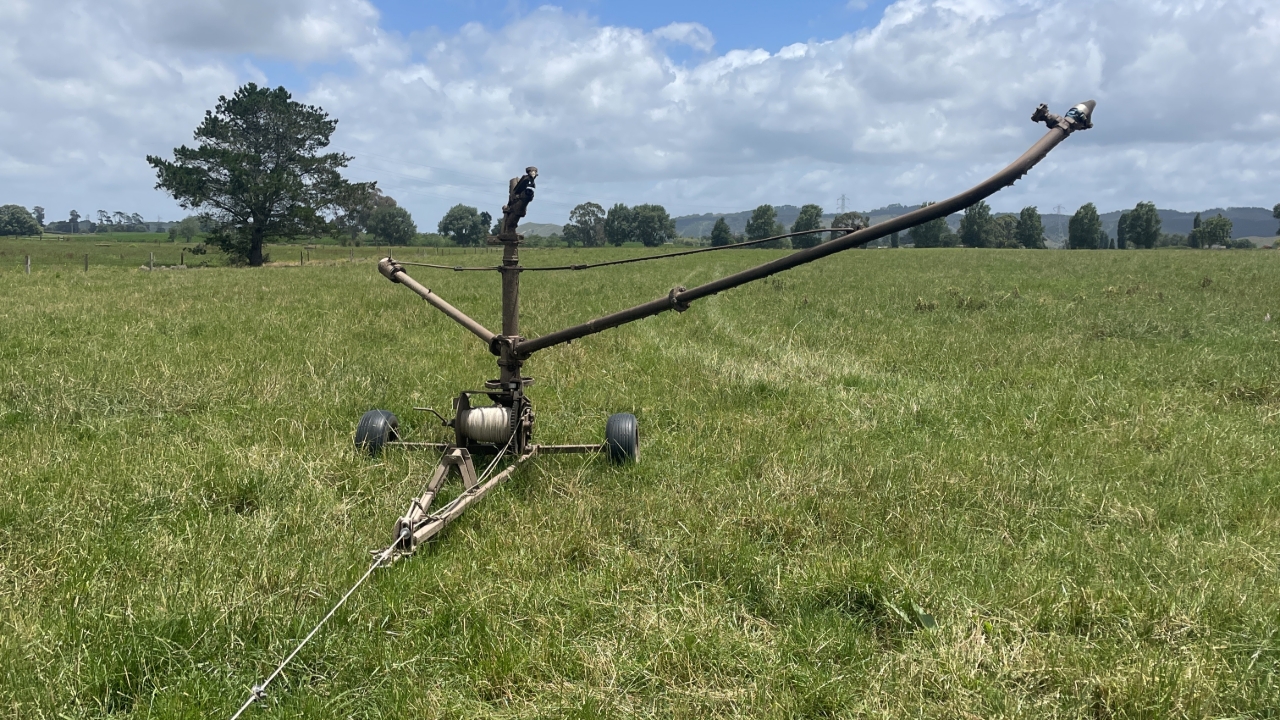
Ensure that the winch rope up is completely wound up on spool before relocating. The remaining rope that is left needs to be correctly tied up on the irrigator frame including the chain hook as shown.
Connect the tow hitch of the irrigator to the tow ball of the motorbike ensuring that the locking pin is correctly engaged in the correct travel position.
Correctly drive the motorbike at the appropriate speed (no more than 10km/hr) ensuring that irrigator arms are supported to prevent the arms from breaking off at the joins and also will stop the arms from rotating and colliding with your head during travel.
Relocating the irrigator to a new position
Step out 20 meters from the fence lines and an extra 5 metres to create a safe buffer zone when next to any water drains. Position the irrigator facing forward from this mark.
Ensuring all pipes are correctly layer out. This must ensure that the pipe and the irrigator must not be any closer than 3 metres to prevent the pipes from crossing over or kinking during operation.
Connect the pipe to the bottom of the irrigator.
Open the shut off lever to the open position or the left side
Disconnect both the levers.
Connect the winch rope to the tow ball of the motorbike and pull out slowly (optimism speed is 5km/hr using only first gear on the motorbike.

Located at the opposite end of the paddock on the fence line is a stay post that is set deeper in the ground used to tie your chain around
On the irrigator engage both drive levers and using the winch handle, whined up the loose line.
While one end of the arms is permanently blocked off the other has a nozzle.
Inspect this nozzle on the end of the arm and also the canon nozzle to ensure that it’s not blocked with debris, and if it is then simply twist the one on the arm off then simply twist the nozzle back on.
If the canon nozzle is block, same applies, simply unscrew the fitting off (anticlockwise) unblock and then screw back on (clockwise)
Locate the hydrant that comes out of the ground in the paddock. Turn the tap on to allow effluent water to flow through.

At the End of the feed pad is the control room/shed inside there there will be a switch board

Inside the control room are 2 control switches
PS= Pond Stirrer
I = irrigator
Ensure both (PS & I) are turned to the right (ON) and then push the green start button to activate pump
Video to show how to turn pump on

Return to then paddock and check irrigator operation is correct.
Ensure the winch rope is going around slowly and that the wheels start to move. This will be a very slow movement.
Monitor the irrigators travel distance and duration of operation. Take note of how long the irrigator is in progress and turn off the control switches when it’s at the end of its run. It will have liquid coming out one side of the arms and also the canon above.

Once the irrigator has finished its run or before the day ends as there are no timers or auto shut off controls so simply return to the pump shed and turn off these same three control switches (video attached)
Turning pump off video