Knowby Heg Automotive Pty Ltd
Knowby
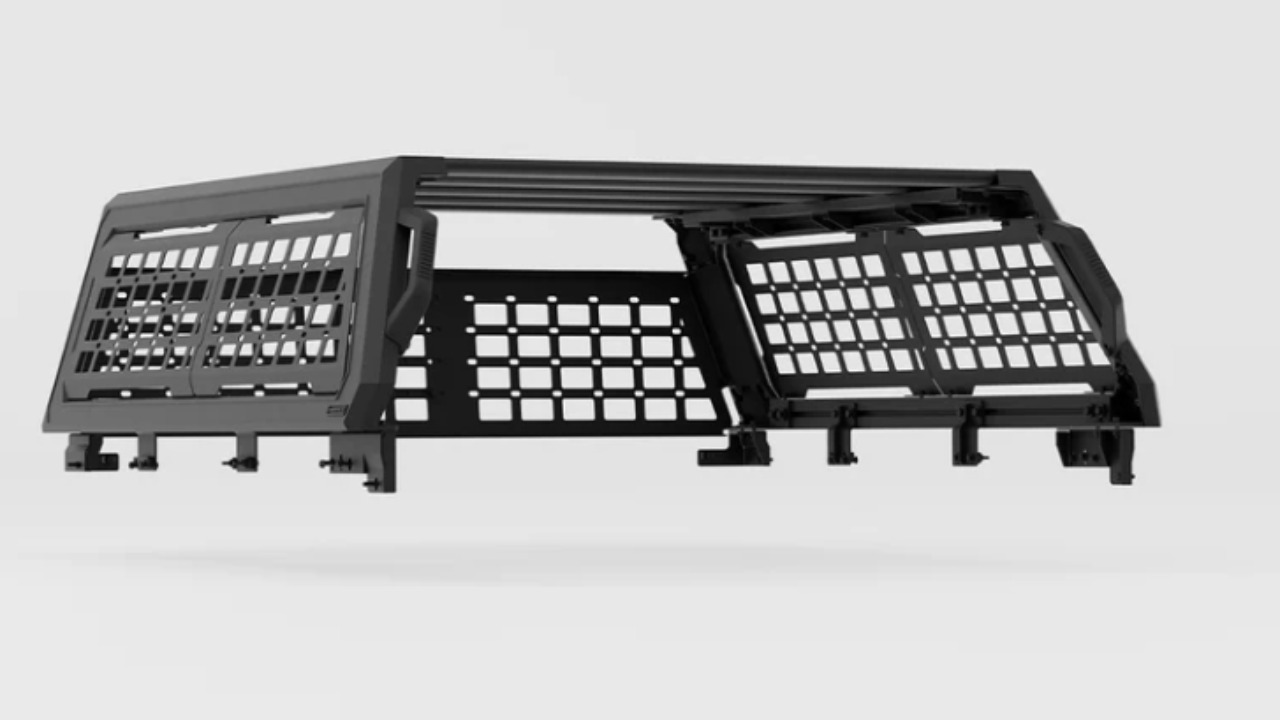
Mayka Tub Rack Assembly
Follow these instructions to assemble your Mayka Tub Rack.
1
Step 1 of 24
Drag to rotate

Click "Open Document" to view 3D Model

Brackets and fitted components have been colour coded per legend below:

Green: Rear Brackets

White: Crossbars

Yellow: Tie Down Eyelets

Please note: We have provided this for reference in the assembly process

2
Step 2 of 24
<p>Before assembling the product, unpack all items contained in the box and ensure everything has been supplied - You will receive:</p><ul><li><p>1x LHS Frame Pre-Assembled</p></li><li><p>1x RHS Frame Pre-Assembled</p></li><li><p>1x Fitting Kit and Brackets (Small Box)</p></li><li><p>5x Crossbars (Long Box)</p></li></ul><p>If you have ordered a Front Window Mesh - This will be supplied in a seperate box and you will need to follow separate instructions. </p><p></p>

Before assembling the product, unpack all items contained in the box and ensure everything has been supplied - You will receive:

  • 1x LHS Frame Pre-Assembled

  • 1x RHS Frame Pre-Assembled

  • 1x Fitting Kit and Brackets (Small Box)

  • 5x Crossbars (Long Box)

If you have ordered a Front Window Mesh - This will be supplied in a seperate box and you will need to follow separate instructions.

3
Step 3 of 24
<p>Unwrap and lay out all provided components.</p>

Unwrap and lay out all provided components.

4
Step 4 of 24
<p>Tools required for the Tub Rack Assembly:</p><ul><li><p>13mm Spanner or Socket (with Wrench)</p></li><li><p>6mm Hex Key </p></li><li><p>Masking Tape - Recommended</p></li></ul><p></p>

Tools required for the Tub Rack Assembly:

  • 13mm Spanner or Socket (with Wrench)

  • 6mm Hex Key

  • Masking Tape - Recommended

5
Step 5 of 24
<p>You will be provided with 3x bags of fasteners:</p><ul><li><p>1x Tub Rack Assembly</p></li><li><p>Mounting Hardware</p></li><li><p>Tie Downs</p></li></ul><p>Please note: The mounting hardware will vary from this image based on the vehicle specific kit.</p><p></p>

You will be provided with 3x bags of fasteners:

  • 1x Tub Rack Assembly

  • Mounting Hardware

  • Tie Downs

Please note: The mounting hardware will vary from this image based on the vehicle specific kit.

6
Step 6 of 24
<p>Fit three right angle brackets to the top extrusion channels. (LHS pictured)</p><p>You will need:</p><ul><li><p>6x spring T-nuts</p></li><li><p>6x 16mm Hex Head Bolts</p></li><li><p>6x Spring Washers</p></li><li><p>6x Flat Washers</p></li></ul><p></p>

Fit three right angle brackets to the top extrusion channels. (LHS pictured)

You will need:

  • 6x spring T-nuts

  • 6x 16mm Hex Head Bolts

  • 6x Spring Washers

  • 6x Flat Washers

7
Step 7 of 24

Fit all 3 T-nuts into the top and bottom channel, then space evenly.

8
Step 8 of 24

Finger tighten the bolts into the T-nuts with a spring washer then flat washer fitted to the bolt.

Repeat on all brackets.

9
Step 9 of 24
<p>Space all brackets evenly before tightening.</p>

Space all brackets evenly before tightening.

10
Step 10 of 24

Use a 13mm spanner to tighten the bolts.

Repeaat steps 10-14 on the RHS side panel.

11
Step 11 of 24
<p>Fit one crossbar to either end of the LHS or RHS frame.</p><p>You will need:</p><ul><li><p>4x Flat washers</p></li><li><p>4x Flanged Nuts</p></li><li><p>4x 35mm Socket Head Cap Bolts</p></li></ul><p></p>

Fit one crossbar to either end of the LHS or RHS frame.

You will need:

  • 4x Flat washers

  • 4x Flanged Nuts

  • 4x 35mm Socket Head Cap Bolts

12
Step 12 of 24

Finger tighten the nut and bolt to fix the crossbar into place.

13
Step 13 of 24
<p>Fit another bar to the opposite end of the frame with the remaining fasteners.</p>

Fit another bar to the opposite end of the frame with the remaining fasteners.

14
Step 14 of 24
<p>Fit the opposite end of the crossbars to the opposite side frame.</p><p>You will need:</p><ul><li><p>4x Flat washers</p></li><li><p>4x Flanged Nuts</p></li><li><p>4x 35mm Socket Head Cap Bolts</p></li></ul><p></p>

Fit the opposite end of the crossbars to the opposite side frame.

You will need:

  • 4x Flat washers

  • 4x Flanged Nuts

  • 4x 35mm Socket Head Cap Bolts

15
Step 15 of 24
<p>Next you will need to fit the 3 remaining crossbars. </p><p>You will need (per crossbar):</p><ul><li><p>4x Flat washers</p></li><li><p>4x Spring T-nuts</p></li><li><p>4x 25mm Socket Head Cap Bolts</p></li></ul><p></p>

Next you will need to fit the 3 remaining crossbars.

You will need (per crossbar):

  • 4x Flat washers

  • 4x Spring T-nuts

  • 4x 25mm Socket Head Cap Bolts

16
Step 16 of 24

Fit the spring T-nuts into the channels - 2 on either side per crossbar.

17
Step 17 of 24

Place the crossbar in place and finger tighten the bolts with a flat washer to secure the bar in place.

Repeat steps 20 & 21 for the 2 remaining bars.

18
Step 18 of 24
<p>Evenly space the bars or to your preference/required spacing. </p>

Evenly space the bars or to your preference/required spacing.

19
Step 19 of 24

Use the 6mm hex key to lightly tighten the bolts - Do not fully tighten as you might need adjustment when fitting the rack to your vehicle.

20
Step 20 of 24
<p><strong>(Optional Step)</strong> Prepare the 6x Tie Down Eyelets for install.</p><p>You will need (Supplied in Tie down hardware bag):</p><p></p><ul><li><p>1x Tie Down Eyelet</p></li><li><p>1x Spring Washer</p></li><li><p>1x Flat washer</p></li><li><p>1x T-nut</p></li></ul><p></p>

(Optional Step) Prepare the 6x Tie Down Eyelets for install.

You will need (Supplied in Tie down hardware bag):

  • 1x Tie Down Eyelet

  • 1x Spring Washer

  • 1x Flat washer

  • 1x T-nut

21
Step 21 of 24

Fit the washer over the eyelet thread and loosely thread the t-nut on, then fit the eylet into the channel.

Repeat with the remaining 5 eyelets.

22
Step 22 of 24
<p>Space all eyelets as preferred. </p>

Space all eyelets as preferred.

23
Step 23 of 24

Tighten each eyelet when in desired position.

24
Step 24 of 24
<p>Your tub rack should now be loosely assembled and ready to be fit to your vehicle once the brackets are completed. </p>

Your tub rack should now be loosely assembled and ready to be fit to your vehicle once the brackets are completed.