Knowby Mick Tighe 4x4 & Outdoor
Knowby
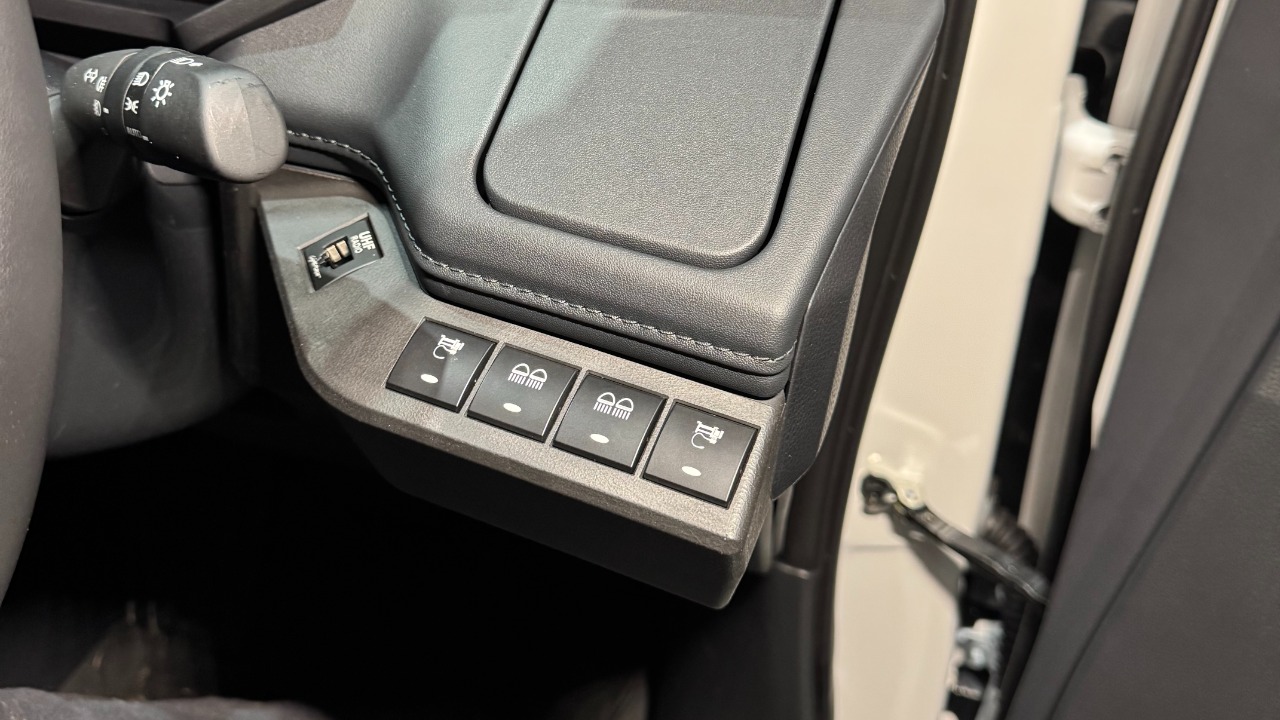
OTA - Toyota N90 Hilux Driver Side Switch Panel
Installation instructions for the OTA - Toyota N90 Hilux Driver Side Switch Panel (Fitting time does not include wiring of switches) Please Note: Handle the switch panels with care, particularly during removal after installation. They can be damaged or broken if excessive or uneven force is applied.
1
Step 1 of 13
<p>Gather the required tools for this installation - You will need:</p><p></p><ol><li><p>Trim Tool</p></li><li><p>Pick</p></li></ol><p>Note: This panel uses standard 22x22mm Toyota Style Switches and can be arranged as per customers needs.</p><p></p>

Gather the required tools for this installation - You will need:

  1. Trim Tool

  2. Pick

Note: This panel uses standard 22x22mm Toyota Style Switches and can be arranged as per customers needs.

2
Step 2 of 13
<p>Carefully, using the trim tool, begin by unclipping the top panel surrounding the cupholder.</p>

Carefully, using the trim tool, begin by unclipping the top panel surrounding the cupholder.

3
Step 3 of 13
<p>With that top panel mostly unclipped, unclip the surround of the dash cluster.</p><p>Note: Lower RH Corner only</p>

With that top panel mostly unclipped, unclip the surround of the dash cluster.

Note: Lower RH Corner only

4
Step 4 of 13
<p>Fully remove the top panel once the surround is loose.</p>

Fully remove the top panel once the surround is loose.

5
Step 5 of 13
<p>Unclip the side panel.</p>

Unclip the side panel.

6
Step 6 of 13
<p>Unclip the panel under the cup holder, that we will be replacing.</p>

Unclip the panel under the cup holder, that we will be replacing.

7
Step 7 of 13
<p>Remove and refit the red clips from the OEM panel onto the OTA panel.</p><p>You may need to use a pick in order to remove these clips.</p>

Remove and refit the red clips from the OEM panel onto the OTA panel.

You may need to use a pick in order to remove these clips.

8
Step 8 of 13
<p>Before installing the OTA panel, we recommend pre-wiring connections for the switches.</p>

Before installing the OTA panel, we recommend pre-wiring connections for the switches.

9
Step 9 of 13
<p>Connect the required switches before fixing the switches into the panel.</p>

Connect the required switches before fixing the switches into the panel.

10
Step 10 of 13
<p>Align and push the OTA switch panel into the same location as the removed OEM panel.</p>

Align and push the OTA switch panel into the same location as the removed OEM panel.

11
Step 11 of 13
<p>Clip the side panel back into place.</p>

Clip the side panel back into place.

12
Step 12 of 13
<p>Refit the top panel back into place and reclip the dash cluster surround, to complete the installation.</p>

Refit the top panel back into place and reclip the dash cluster surround, to complete the installation.

13
Step 13 of 13
<p>Your OTA switch panel is now installed!</p><p></p><p>Thank you for supporting our brand.</p>

Your OTA switch panel is now installed!

Thank you for supporting our brand.