
Knowby
Thaco Feedback - Actions Aug 2026
1
Step 1 of 17
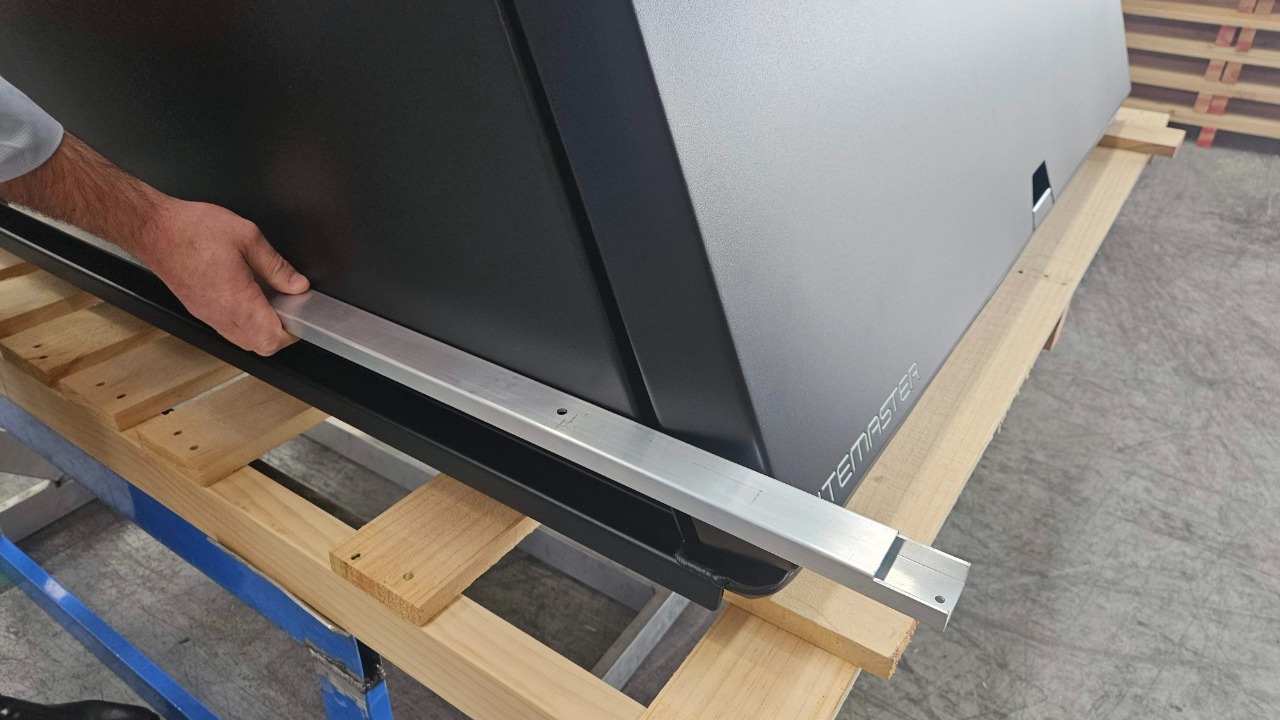
<p><strong>Front wall / Door infill alignment</strong></p><p>Utilise straight edge to use front wall as datum</p><p>Refer to drawing for tolerance</p>

Front wall / Door infill alignment

Utilise straight edge to use front wall as datum

Refer to drawing for tolerance

2
Step 2 of 17
<p><strong>Front wall / Door infill alignment</strong></p><p>Utilise straight edge to use front wall as datum</p><p>Refer to drawing for tolerance</p><p><em>Shown 5mm</em></p>

Front wall / Door infill alignment

Utilise straight edge to use front wall as datum

Refer to drawing for tolerance

Shown 5mm

3
Step 3 of 17
<p><strong>Front wall / Door infill alignment</strong></p><p><strong>Position #1 </strong></p>

Front wall / Door infill alignment

Position #1

4
Step 4 of 17
<p><strong>Front wall / Door infill alignment</strong></p><p><strong>Position #2</strong></p>

Front wall / Door infill alignment

Position #2

5
Step 5 of 17
<p><strong>Front wall / Door infill alignment</strong></p><p><strong>Position #3 &amp; #4</strong></p>

Front wall / Door infill alignment

Position #3 & #4

6
Step 6 of 17
<p><strong>Front wall / Door infill alignment</strong></p><p>Utilise straight edge to use front wall as datum</p><p>Refer to drawing for tolerance</p><p><em>Shown 3mm, position #4</em></p>

Front wall / Door infill alignment

Utilise straight edge to use front wall as datum

Refer to drawing for tolerance

Shown 3mm, position #4

7
Step 7 of 17
<p><strong>Example side profile showing left side front corner</strong></p>

Example side profile showing left side front corner

8
Step 8 of 17
<p><strong>Front (Large) Infill alignment/blending</strong></p><p></p>

Front (Large) Infill alignment/blending

9
Step 9 of 17
<p><strong>Front (Large) Infill alignment/blending</strong></p>

Front (Large) Infill alignment/blending

10
Step 10 of 17
<p><strong>Rear (Small) Infill alignment/blending</strong></p>

Rear (Small) Infill alignment/blending

11
Step 11 of 17
<p><strong>Front (Large) Infill alignment/blending</strong></p>

Front (Large) Infill alignment/blending

12
Step 12 of 17

Powder Coating Inspection Process

  • Completed immediately after exiting the powder coating plant

  • 100% inspection of all surfaces using a handheld light

  • Special attention to edges and lower faces

13
Step 13 of 17

Powder Coating Inspection Process

  • Completed immediately after exiting the powder coating plant

  • 100% inspection of all surfaces using a handheld light

  • Special attention to edges and lower faces

14
Step 14 of 17
<p><strong>Latch / Switch position </strong></p><p><strong>Showing untrimmed on this model</strong></p>

Latch / Switch position

Showing untrimmed on this model

15
Step 15 of 17

Technique to identify infill blending within fabrication

  • Apply thin layer of engineers 'blue' ink to surface, Let dry

  • Run sander over surface to visually see surface flatness/blending

16
Step 16 of 17
<p><strong>Ground edge prior to using sander</strong></p><p><strong>Radius applied already</strong></p>

Ground edge prior to using sander

Radius applied already

17
Step 17 of 17

Ground edge prior to using sander

Radius applied already