Knowby Vacvator
Knowby
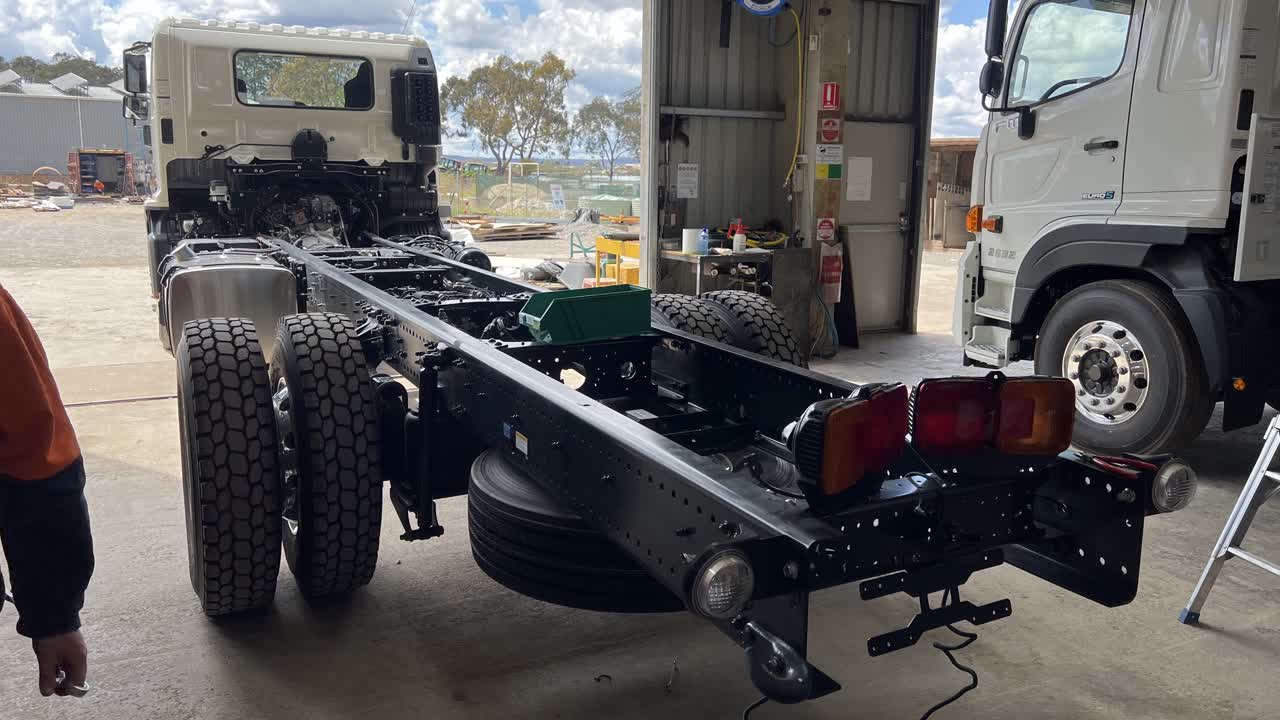
TMC40 Chassis Fitout
1
Step 1 of 20
<p>Disconnect OEM tail lights</p>

Disconnect OEM tail lights

2
Step 2 of 20
<p>Remove OEM tail lights</p>

Remove OEM tail lights

3
Step 3 of 20
<p>Remove reverse buzzer, cut from harness and keep</p>

Remove reverse buzzer, cut from harness and keep

4
Step 4 of 20
<p>Photo of reverse buzzer removed with harness and mounting bolt. Ensure to keep the mounting bracket and bolt for remounting in the cab.</p>

Photo of reverse buzzer removed with harness and mounting bolt. Ensure to keep the mounting bracket and bolt for remounting in the cab.

5
Step 5 of 20
<p>Remove OEM tail light harness from rear cross member.</p>

Remove OEM tail light harness from rear cross member.

6
Step 6 of 20
<p>Untie rear light harness from chassis extension and tie up in front of the second last cross member</p>

Untie rear light harness from chassis extension and tie up in front of the second last cross member

7
Step 7 of 20
<p>Harness tied up</p>

Harness tied up

8
Step 8 of 20
<p>Using a 30mm socket and the tyre removal tool, lower the spare tyre and place on a pallet to be stored until the completion of truck.</p>

Using a 30mm socket and the tyre removal tool, lower the spare tyre and place on a pallet to be stored until the completion of truck.

9
Step 9 of 20
<p>Photo of tyre lowered</p>

Photo of tyre lowered

10
Step 10 of 20
<p>Remove spare tyre carrier and place in the bin.</p>

Remove spare tyre carrier and place in the bin.

11
Step 11 of 20
<p>Remove rear crossmember and plane in the steel bin.</p>

Remove rear crossmember and plane in the steel bin.

12
Step 12 of 20
<p>Remove 4x chassis bolts and 2x shock bolts on either side.</p>

Remove 4x chassis bolts and 2x shock bolts on either side.

13
Step 13 of 20
<p>Cable tie shocks out of the road to allow room for Magnet drill.</p>

Cable tie shocks out of the road to allow room for Magnet drill.

14
Step 14 of 20
<p>Set Mag drill up with a 16mm Broach cutter and drill 4x holes through crossmember to allow bolts to go through for subframe mounting.</p>

Set Mag drill up with a 16mm Broach cutter and drill 4x holes through crossmember to allow bolts to go through for subframe mounting.

15
Step 15 of 20
<p>Photo of which 4 holes needed drilling.</p>

Photo of which 4 holes needed drilling.

16
Step 16 of 20
<p>Apply masking tape to chassis between the holes where the last crossmember finishes.</p>

Apply masking tape to chassis between the holes where the last crossmember finishes.

17
Step 17 of 20
<p>Measure half way between holes 96 &amp; 97 and project a square line down the chassis on both sides as shown.</p>

Measure half way between holes 96 & 97 and project a square line down the chassis on both sides as shown.

18
Step 18 of 20
<p>Using an angle grinder and correct PPE, cut excess chassis starting at the bottom working your way up.</p>

Using an angle grinder and correct PPE, cut excess chassis starting at the bottom working your way up.

19
Step 19 of 20
<p>Cut all the way through except the corner. This will allow you to get help or hook up the crane to catch beams so they don’t fall.</p>

Cut all the way through except the corner. This will allow you to get help or hook up the crane to catch beams so they don’t fall.

20
Step 20 of 20
<p>After cutting off excess chassis, tidy up and round edge with a flappy disc. Once completed, clean with brake clean and spray black paint on chassis end and in the drilled holes to prevent rust.</p>

After cutting off excess chassis, tidy up and round edge with a flappy disc. Once completed, clean with brake clean and spray black paint on chassis end and in the drilled holes to prevent rust.