
Knowby
SILENT AIR CONTROL SERVICE
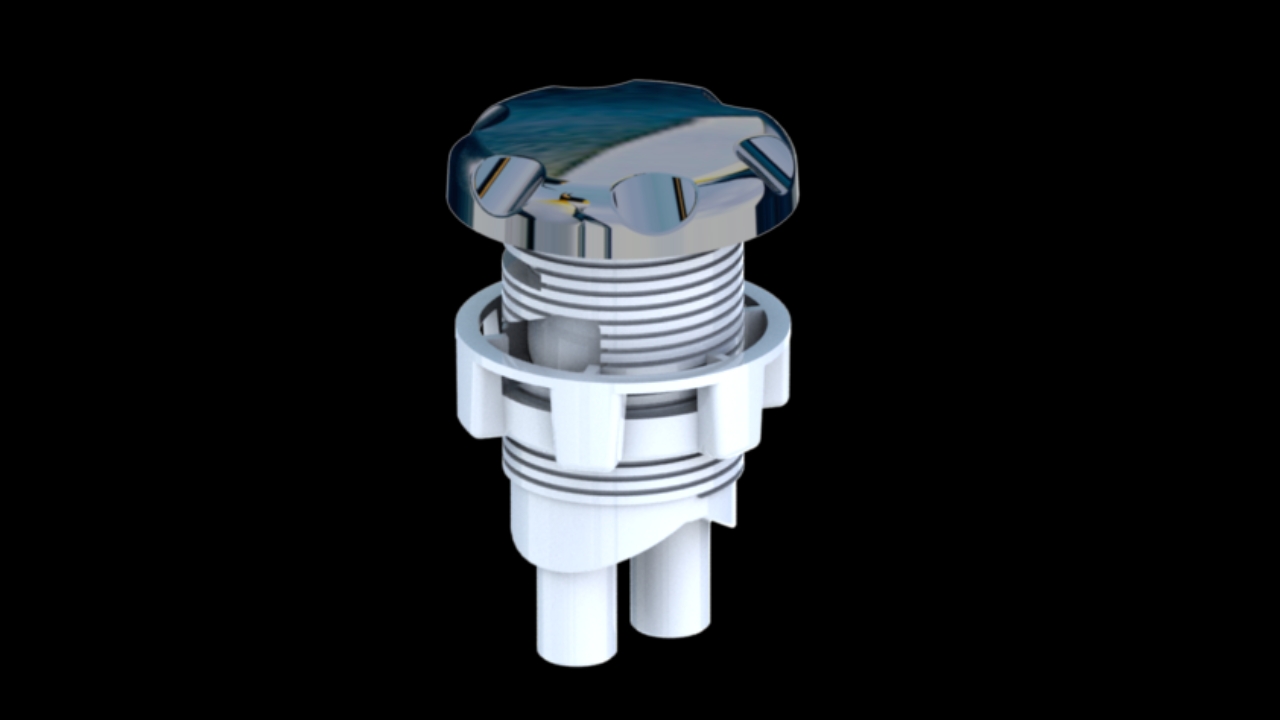
Step-by-step instructions for removing and replacing the cap and valve centre on Markons Silent Air controls
1
Step 1 of 11
<p>Part No:</p><p><strong>ASxx.xx.xx</strong></p><p></p><p>Description:</p><p><strong>SILENT AIR CONTROLS</strong></p><p></p><p></p><p></p>

Part No:

ASxx.xx.xx

Description:

SILENT AIR CONTROLS

2
Step 2 of 11
<h1>SERVICE KIT</h1><p></p><p>When orderring your service kit, be sure to tell us what style cap you currently have and we will include this in the service kit.</p><p></p><p></p><p>Contains</p><ul><li><p>Replacement valve centre fitted with lubricated oring</p></li><li><p>Cap to match the part being replaced</p></li></ul><p></p>

SERVICE KIT

When orderring your service kit, be sure to tell us what style cap you currently have and we will include this in the service kit.

Contains

  • Replacement valve centre fitted with lubricated oring

  • Cap to match the part being replaced

3
Step 3 of 11
<h1>Tools Required</h1><p></p><p>Long Nose pliers</p><p></p><p></p><p></p><p></p>

Tools Required

Long Nose pliers

4
Step 4 of 11
<h1>STEP 1</h1><p></p><p>Remove the cap.</p><p></p><p>Note:  the caps are a push fit on,  sometimes they might be tight to remove if they have been in place for a while.</p><p></p><p>In this case, carefully use a butter knife or something similar and lever under the edge of the cap to prize it off.</p><p></p><p></p><p></p><blockquote><p>Be carefull you dont damage your acrylic bath surface</p></blockquote><p></p>

STEP 1

Remove the cap.

Note: the caps are a push fit on, sometimes they might be tight to remove if they have been in place for a while.

In this case, carefully use a butter knife or something similar and lever under the edge of the cap to prize it off.

Be carefull you dont damage your acrylic bath surface

5
Step 5 of 11
<h1>STEP 2</h1><p></p><p>Using long nose pliers, grip the small tang on the edge of the inner peice.</p><p></p><p>Bend the tang inwards slightly and pull up with the pliers</p><p></p><p></p><blockquote><p>Note the tang has a "hook" on the side that locates in a slot in the main body, that is why you need to bend inwards slightly&nbsp; - to release the hook.</p></blockquote><p></p>

STEP 2

Using long nose pliers, grip the small tang on the edge of the inner peice.

Bend the tang inwards slightly and pull up with the pliers

Note the tang has a "hook" on the side that locates in a slot in the main body, that is why you need to bend inwards slightly  - to release the hook.

6
Step 6 of 11
<h1>STEP 3</h1><p></p><p>Pull the centre out, it should have an oring around it.</p><p></p><p></p><blockquote><p>If the oring is broken makes sure you clean all the broken pieces out from inside of the body.</p></blockquote><p></p>

STEP 3

Pull the centre out, it should have an oring around it.

If the oring is broken makes sure you clean all the broken pieces out from inside of the body.

7
Step 7 of 11
<h1>STEP 4</h1><p></p><p>Fit the new centre with o-ring supplied.</p><p></p><p>Locate the centre in the body as shown.</p><p></p><p>There is a hook on the side of the tang on the centre, this hook needs to line up and engage in the slot in the body</p><p></p><p>Push the centre down untill you feel the hook clip in place.</p><p></p><p></p><blockquote><p>Check the oring is well lubricated - use MX22 Silicone grease.</p></blockquote><p></p><blockquote><p>It is important that the tang hook locates in the slot in the body.</p></blockquote><p></p>

STEP 4

Fit the new centre with o-ring supplied.

Locate the centre in the body as shown.

There is a hook on the side of the tang on the centre, this hook needs to line up and engage in the slot in the body

Push the centre down untill you feel the hook clip in place.

Check the oring is well lubricated - use MX22 Silicone grease.

It is important that the tang hook locates in the slot in the body.

8
Step 8 of 11
<h1>STEP 5</h1><p></p><p>Some times the centre is hard to push fully into place.</p><p></p><p>If this is the case use the old centre you took out and use it to help push the new centre in place.</p><p></p>

STEP 5

Some times the centre is hard to push fully into place.

If this is the case use the old centre you took out and use it to help push the new centre in place.

9
Step 9 of 11
<h1>STEP 6</h1><p></p><p>Replace the cap</p><p></p><p>There are drive dogs on the side of the cap that need to engage in the valve centre.</p><p></p><p>Lower the cap in place and rotate it untill you feel it engage.</p><p></p><p>Push the cap fully home.</p><p></p><blockquote><p>NOTE: If the tang is not correctly in position if will lean in towards the centre and prevent the cap form being fitted correctly. Make sure tang is engage correctly - it should be vertical.</p></blockquote><p></p>

STEP 6

Replace the cap

There are drive dogs on the side of the cap that need to engage in the valve centre.

Lower the cap in place and rotate it untill you feel it engage.

Push the cap fully home.

NOTE: If the tang is not correctly in position if will lean in towards the centre and prevent the cap form being fitted correctly. Make sure tang is engage correctly - it should be vertical.

10
Step 10 of 11
<h1><strong>Use</strong></h1><p></p><p>To control the amount of air flow to the jets rotate the cap.</p><p></p><p>To increase air flow rotate the cap clockwise</p><p></p><p>To reduce air flow rotate the cap anti clockwise.</p>

Use

To control the amount of air flow to the jets rotate the cap.

To increase air flow rotate the cap clockwise

To reduce air flow rotate the cap anti clockwise.

11
Step 11 of 11
<h1>CARE</h1><p></p><p></p><p>Using a soft cloth and mild detergent clean the surface of the air control cap.</p><p></p><p>Do not use an abrasive material as this will scratch the surface of the product</p><p></p><p></p><blockquote><h2>NOTE</h2><p>On chrome plated products do not use cleaners that contain chlorine as this can attack the surface of the chrome</p></blockquote><p></p><p></p><p></p>

CARE

Using a soft cloth and mild detergent clean the surface of the air control cap.

Do not use an abrasive material as this will scratch the surface of the product

NOTE

On chrome plated products do not use cleaners that contain chlorine as this can attack the surface of the chrome