
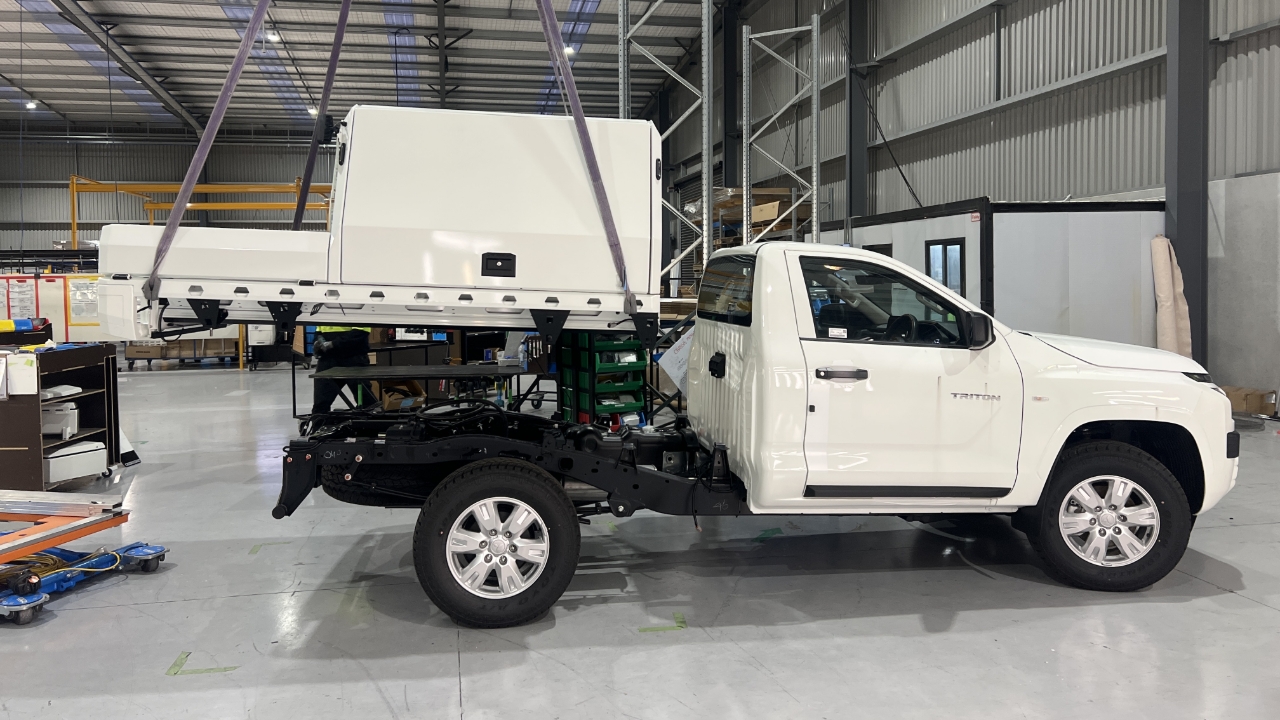
Ensure main wiring loom is pre-installed to vehicle as access will be limited when body is installed.
Ensure
H&S Note: Refer to the linked Knowby demonstrating how to safely use and maintain the chain hoist.
M&M - Trailcore Chain Hoist

While body is on the kartar hoist, pre-install M12x45 SS bolts through the chassis mounts in the following sequence:
- M12x45 SS Bolt
- M12 HD Round Washer
- Chassis Mount
CQC: Ensure M12 HD washer is used. (Thicker than standard washer)
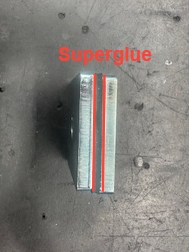
Superglue the packer stacks together to prevent these from rotating during assembly.
6mm 50x50 Steel Washer
Superglue
3mm rubber
Superglue
6mm 50x50 Steel Washer

Install the packer stacks over each mounting point on the vehicle chassis ensuring the washer is sitting straight with the chassis mount.
Align body onto vehicle using M12 bolts.
Slowly lower into place.
Measure the distance from the fitout to the cab on the LH and RH side to ensure this is same on each side.
CQC: Body, Infills etc. must be at least 28mm from the cab at the closest point.
Ensure this remains at 28mm even after bolts are fully torqued.
TOYOTA HILUX & LC DC ONLY
At the front mounting point, thread a fine threaded M12x45mm bolt into the vehicle chassis nut.
CQC: Use an M12 spring washer and HD flat washer.
TOYOTA HILUX & LC DC ONLY
Using the 90-degree impact driver, tighten but don't torque the M12x45 fine thread.
TOYOTA HILUX & LC DC ONLY
CQC: CRITICAL TORQUE SPEC
Torque bolt to 105NM, ensure torque wrench clicks in a free position away from the chassis mount.
Ensure correct torque process is used as per this Knowby:
Using a Torque Wrench at Utemaster
TOYOTA HILUX & LC DC ONLY
Repeat steps 4-6 on the other side.

FRC2 (Ford Ranger and Super Duty)
Chassis Fastener Spec:
M12 x 45 Bolt
M12 HD (3mm thick) Round Washer
Chassis Mount
50x50x6 Washer
50x50x3 Fibre Reinforced Rubber
50x50x6 Washer
Vehicle Chassis
50x50x6 Washer
M12 Nyloc Nut
Loosely install an M12 nut and 40x40 flat washer to all bolts.
FRC2: On the Ford Ranger, Use a 50x50x6 Washer on the underside of the chassis mount. (instead of 40x40)
Tighten the bolt with the impact driver to compress but not torque.
CQC: Ensure packer stack remains square to the chassis mount

CQC: CRITICAL TORQUE SPEC
Torque all remaining bolts to 75NM.Ensure correct torque process is used as per this Knowby:
Using a Torque Wrench at Utemaster

CQC: Sign the QC sheet and confirm torque spec set on the torque wrench matches this requirement.