
Knowby
Boss Canopy Body, Assembly
This is a “pack down” style construction. Parts are powder coated in subassemblies then assembled at the end. It is important to get Sikaflex in all the right places so it seals
1
Step 1 of 70

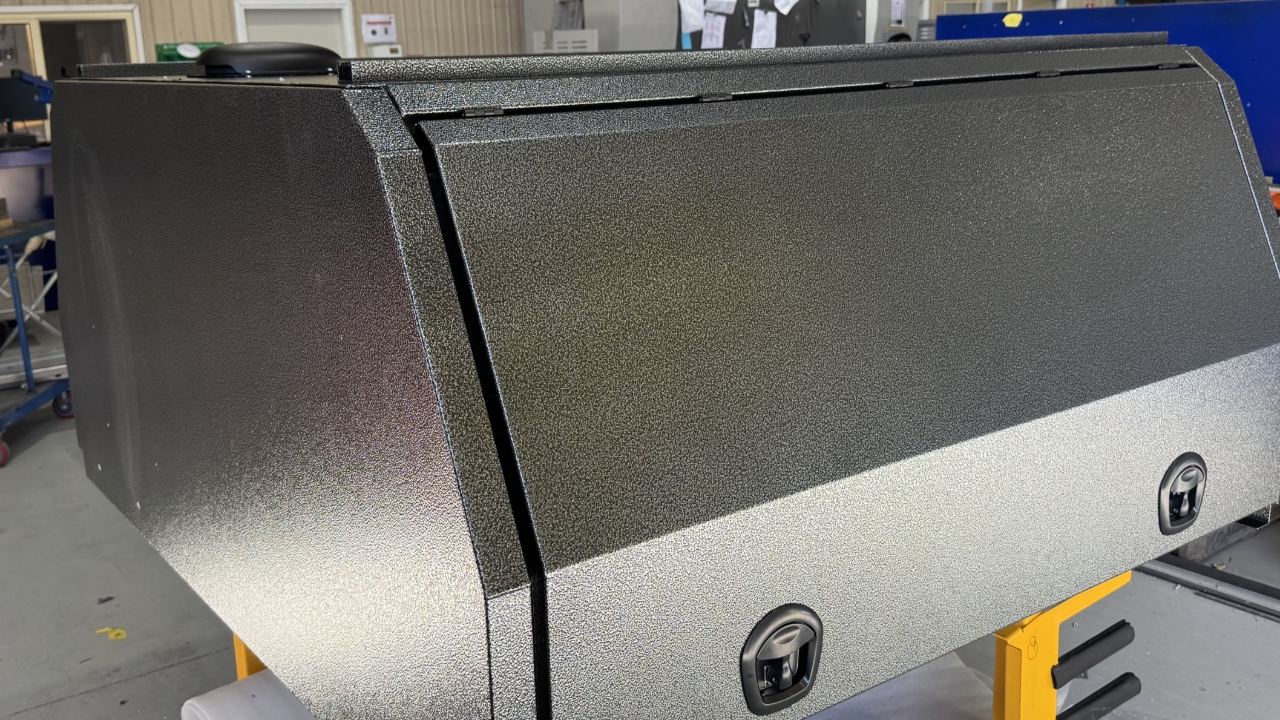
Looks like this when done

2
Step 2 of 70
<p>Start with the floor</p>

Start with the floor

3
Step 3 of 70
<p>Countersink</p>

Countersink

4
Step 4 of 70
<p>Depth to suit M6 countersunk bolt</p>

Depth to suit M6 countersunk bolt

5
Step 5 of 70

Fit braces

6
Step 6 of 70

Tighten.

M6 Serated nuts

7
Step 7 of 70
<p>Get 4x Unistrut end caps</p>

Get 4x Unistrut end caps

8
Step 8 of 70

Put in the end caps

9
Step 9 of 70

Looks like this when the base is prepared

10
Step 10 of 70

Build doors

11
Step 11 of 70
<p>Fit latches</p>

Fit latches

12
Step 12 of 70
<p>Replace original with this striker</p>

Replace original with this striker

13
Step 13 of 70
<p>Fit drip rails. </p><p>Peel off the plastic Coating.</p>

Fit drip rails.

Peel off the plastic Coating.

14
Step 14 of 70
<p>Red: the trip rail lip should face up like this. </p><p>Yellow: the hinge should be positioned like this</p>

Red: the trip rail lip should face up like this.

Yellow: the hinge should be positioned like this

15
Step 15 of 70
16
Step 16 of 70
<p>Tighten on the hinges with M6 serrated nuts</p>

Tighten on the hinges with M6 serrated nuts

17
Step 17 of 70
<p>Start the rubber seal at the bottom of the door so the joint is at the bottom</p>

Start the rubber seal at the bottom of the door so the joint is at the bottom

18
Step 18 of 70

Rubber seal

19
Step 19 of 70

Trim and Join

20
Step 20 of 70

Prepare end walls

21
Step 21 of 70
<p>Fit the L brackets</p>

Fit the L brackets

22
Step 22 of 70
<p>M6x16</p><p>M6 Serrated nuts</p>

M6x16

M6 Serrated nuts

23
Step 23 of 70

Countersink

24
Step 24 of 70
25
Step 25 of 70

Fit end wall

26
Step 26 of 70

Fit Huck Bolts loosely. Don’t Install the nuts yet.

27
Step 27 of 70

Fit other end.

28
Step 28 of 70

End wall bottom bolts

29
Step 29 of 70

Tighten

30
Step 30 of 70
<p>Install Rivnuts in roof </p>

Install Rivnuts in roof

31
Step 31 of 70
<p>The underside should look like this when installed correctly </p>

The underside should look like this when installed correctly

32
Step 32 of 70

Silicone

33
Step 33 of 70
34
Step 34 of 70
<p>Tighten </p>

Tighten

35
Step 35 of 70

Silicone

36
Step 36 of 70
37
Step 37 of 70

Fit roof

38
Step 38 of 70

Put in countersunk M6 fasteners

39
Step 39 of 70
<p>Don’t put the nuts on just yet</p>

Don’t put the nuts on just yet

40
Step 40 of 70

Silicone the centre seam

41
Step 41 of 70

Fit other roof piece

42
Step 42 of 70

Fit countersunk M6 fasteners

43
Step 43 of 70
<p>M6x16 Flanged head bolts. M6 serrated nuts. </p><p>Tighten all up</p>

M6x16 Flanged head bolts. M6 serrated nuts.

Tighten all up

44
Step 44 of 70
<p>Fit fasteners to the roof brackets</p>

Fit fasteners to the roof brackets

45
Step 45 of 70
<p><strong>Important:</strong></p><p>This connection is easy to forget!</p>

Important:

This connection is easy to forget!

46
Step 46 of 70
<p>Fit serrated nuts and Tighten top of end walls</p>

Fit serrated nuts and Tighten top of end walls

47
Step 47 of 70

Identify the top corner braces. There is a left and right hand

48
Step 48 of 70
<p>Fit Huck bolt. </p><p><strong>BUT</strong> do not install the shuck nuts yet</p>

Fit Huck bolt.

BUT do not install the shuck nuts yet

49
Step 49 of 70
<p>Fit packer plate</p>

Fit packer plate

50
Step 50 of 70

It should look like this. Notice that the Parker plate is up inside.

51
Step 51 of 70

Fit door to the door assembly trolley

52
Step 52 of 70
<p>Fit door and tighten nuts</p>

Fit door and tighten nuts

53
Step 53 of 70
<p>Fit gas struts</p>

Fit gas struts

54
Step 54 of 70
<p>Check that the gap at the top of the door is the same as the gap at the bottom of the door if it is not use the braces</p>

Check that the gap at the top of the door is the same as the gap at the bottom of the door if it is not use the braces

55
Step 55 of 70
<p>Use straps as braces to hold the canopy square close the door to test</p>

Use straps as braces to hold the canopy square close the door to test

56
Step 56 of 70
<p>Use the standard boss tiedowns and a channel nut</p>

Use the standard boss tiedowns and a channel nut

57
Step 57 of 70
<p>Adjust the straps so that they hold it in the correct position</p>

Adjust the straps so that they hold it in the correct position

58
Step 58 of 70
<p>Once you’re happy that canopy is square tighten all of the Fasteners</p>

Once you’re happy that canopy is square tighten all of the Fasteners

59
Step 59 of 70

Install all of the Hucks

60
Step 60 of 70

Sikaflex: outside lower corners

61
Step 61 of 70

Sikaflex: inside lower corners

62
Step 62 of 70

Sikaflex: top corners

63
Step 63 of 70

This steps needs to be replaced

Looks too messy

64
Step 64 of 70
<p>This is required on a Boss Tray, identify the C shaped mount rails</p>

This is required on a Boss Tray, identify the C shaped mount rails

65
Step 65 of 70
<p>Install the Rivnuts</p>

Install the Rivnuts

66
Step 66 of 70
<p></p><p>If installed correctly, it should look like this from the underside</p>

If installed correctly, it should look like this from the underside

67
Step 67 of 70
<p>Fit with the washer and Dome headed bolt</p>

Fit with the washer and Dome headed bolt

68
Step 68 of 70
<p>Pack the two mount rails together and wrap in foam</p>

Pack the two mount rails together and wrap in foam

69
Step 69 of 70
<p>Put inside canopy</p>

Put inside canopy

70
Step 70 of 70

Looks like this when done