This is the first thing you'll see when you open up the program. Any of your previous projects will be in here or if this is your first time opening it, then you'll just have option to create a new project. Click on the + and we're going to select Movie.
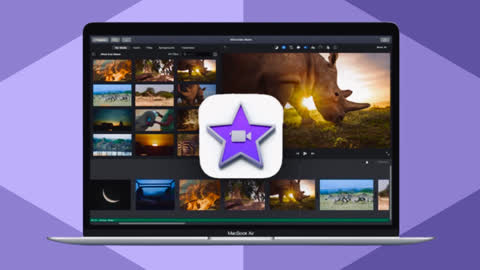
Over here is where you can access all of your files, your photos and your video assets.
Up the top you can switch between your media, your project files that you're using, your audio, titles, backgrounds and transitions.
Over here is your playback window or where you can preview your masterpiece that you're editing.
And you've got some tools and controls and things across the top here.
Below that we've got our playback controls here to play, to skip forward to the next clip and back to the previous clip.
We can also maximize our playback if we wanna play back our video full screen.
We can record a voiceover for our video by pressing this button here.
Down the bottom here we've got our timeline, this is where we're gonna be editing our video down.
We've got a Settings button up here, which is going to give us our project settings.
If we wanna go back to our projects area to select or switch between different projects, we can click up here.
And right up in the top right-hand corner is our export button to save our video.
So the first thing you wanna do is to import your primary video footage.
So we can come up the top here to File, Import Media, we can go ahead and then select the files that we wanna use.
You can either go and individually pick the files that you want, you can hold down Command to select multiple files.
I can also select the folder and hit Import Selected. And all of those files and folders that are in there are going to be brought in.
So now we've imported those files into our project and we can access those at any time up here under Project Media, My Movie.
From here, you wanna import your footage down into your timeline. We can just click and drag to drop that entire clip down.
Before we get into the editing, come over to this settings area. Now we have a clip in the timeline and we can customize what this looks like. We can adjust the clip size to make it a bit bigger and we can also specify if you wanna have the Audio Waveforms on or off.
Now at any time if you wanna zoom in and out on your timeline, we can grab this little slider here and zoom in or we can use the keyboard shortcuts Command - and Command + to zoom in and out.
So let's start trimming the clip down.
If you wanna trim our video, we can press Command + B on the keyboard and that's going to blade or to split our clip in two, so I now have a left clip and a right clip.
We can remove this first one by pressing Delete on the keyboard and now our video starts right at that point.
Now if i undo this, Command + Z, Command + Z.
Another way that we can do this is by selecting our clip, we can grab this left handle here, you can see our cursor changes and we can drag this across to where we want our video to start.
So let's go across to the end, zoom out, come and click on the end of the video here and then zoom back in. So, we're finished speaking here and that's where we'll want to finish, so, grab this end handle, I can drag it back to where we want the video to finish.
If we want to remove this big gap in the middle here, we can blade or split our clip at this point. Command + B, now, I could come over here and add another cut and delete that section or again, I can just grab that handle and slide it back to where I want that clip to start.
So the idea here is using a combination of splitting our clips using that blade tool, deleting clips or adjusting the in and out points or the start and finish time of these clips until we're just left with the things that we actually want to use in our video.
Now, if you wanna pick something up and move it around and adjust the order of these, we can just click and drag on a clip and we can drop it back in wherever you would want it by moving these chunks of content around.
Next step is to bring in any overlay or B-roll footage into your video.
So I've got a couple of extra clips up the top here, let's grab this one here and drop it down onto our timeline but instead of dropping it down the bottom here, we're gonna drop it on top of where we actually want it.
So now if I'm just moving my mouse cursor past here, we can see that I'm talking, then at this section, we've got some overlay footage and then it will go back to me talking afterwards.
These clips function like regular clips. You can adjust the start and end points. To start from a specific point, use Command + B to make a cut. Remove unwanted sections with the same command. Adjust the clip's length as needed. Rearrange clips to fit your edit.
From there, we're gonna add in any titles or graphics that you wanna use in your videos.
So let's come up to the top here to titles and in here there's a lot of different presets and things that you can use to literally drag and drop onto your video.
If we hover our mouse over, we can see that some of them are animated, whereas some of them are just static titles.
I'm gonna grab a basic title, so I click on it, I'm gonna drag it down onto the timeline where I want that to appear and we can see it shows up there as its own little clip.
Now, I'm gonna zoom in on this section. Again, just like any other clip, we can pick it up, we can move it around, we can adjust how long it's going to be on screen for by using the handles on the edge.
So to edit this, we wanna double click on it and then we can select the text at the top here and type in what we'd like.
Now up here, we can adjust the colors, we can adjust the fonts as well and we've also got the size here too.
So now that you've got all of your titles in there, next up, we're going to look at any transitions or effects if you wanna use them in your video.
So if I come up the top here to transitions, there are some pretty simple ones that are built in that again, we can just click and drag and drop onto our timeline.
Now with some of these things, you really don't wanna go overboard, some of these can really cheapen your video, so I say, use these sparingly but the ones that I would normally use would be a cross dissolve and maybe a fade to black or a fade to white.
All we need to do is just to click and drag, let's say we want the cross dissolve and we just need to drop it down between the two clips here. You can see we've got that square has appeared, we now have a transition between these two clips.
Likewise, if we pick a fade to black and drop that one down there in that spot, it's going to fade from one to black and then back to the next clip.
I won't use a transition between the two similar shots. Instead, I'll delete the transition and zoom in on one shot to create a different perspective, making it seem like a second camera angle and adding variety for viewers.
I'll choose the second clip, click on crop, select crop to fill, and adjust the size to create a zoomed-in shot. Be cautious not to over-zoom or crop too much to maintain video quality.
But if we click off this now to see what this looks like, we've got the first clip that plays through and then at the next one here, it's zoomed in a little bit.
For a smooth transition, align the eyes, especially if there's a person in the shot like this. Click back, go to crop, and align them more closely.
For video enhancements, choose this clip, go to the top, find the video stabilizer, select it, and check the box to remove shakiness from your footage.
If you wanna speed up or slow down a clip, then you can do that up here under the speed controller.
Now, the next step is to bring in any music that we wanna have in our video.
To add audio, go to "Audio." You can use music from iTunes, Sound Effects, or GarageBand if it's already imported. If not, import music files under "My Media" using "File" > "Import Media" and select your tracks.
I've added two tracks up here, so I'll grab one and drop it into the timeline at the start. Music and audio files are green clips, while video clips are blue, making it easy to distinguish between them.
Similar to regular clips, you can move them, adjust their start and end times. Here, you can grab the endpoint and shorten it to match your video's end.
Hover over the music track, and a circle appears. Click and pull it back to create a fade-out effect. The music will play at full volume until the marker and then gradually fade out. You can also fade in by doing the same at the start.
Next up, you'll wanna adjust your volume level.
First, lower the music volume to zero. Focus on adjusting the primary audio's volume levels correctly before fine-tuning the music volume. It's crucial to ensure that your primary audio is clear and audible.
Start by setting the audio for the first clip correctly. Once selected, adjust the volume by moving the volume adjustment bar up to increase it or down to decrease it. After that, you can apply the same settings to all the other clips simultaneously.
In iMovie, aim for a volume where you see yellow but avoid orange or red, which causes distortion. Find the balance for each clip to maximize volume without hitting those problematic levels.
As the entire video uses the same equipment, you can simplify this. Copy the first clip (Command + C), select all other clips, and paste volume adjustments (Edit > Paste Adjustments > Volume). Ensure no parts go into the red and adjust if needed.
Now in terms of audio effects and removing things like background noise, we can do this in here as well.
To make additional adjustments to a clip, select it. You can use the noise removal tool by choosing "Reduce background noise" at the top. Alternatively, experiment with equalizer settings, which offer basic presets for bass boost or treble reduction.
In the filters section, you'll find audio effects. By selecting "None," you can access various effects to alter voices, create echoes, or simulate different room atmospheres for your audio.
When adding background music, aim for a starting volume of 20-30% (with 100% as max). Play the video with headphones, adjust based on personal preference—some tracks are louder.
Then once you've got your audio added, the next step is to colour grade or colour correct any of your footage.
Start by colour grading the first clip at the beginning, and then apply the same adjustments to the other clips. Select the first clip, go to the top, and explore various colour grading options.
Under this colour balance area, this is where you're really gonna see some automatic adjustments. In my experience, they're not that great.
In the colour correction section, adjust your shot's brightness and contrast with the white slider for light areas, the black circle for dark areas, and the middle slider for mid-tones.
Next, adjust the white balance using the end slider. Moving it to the left makes the shot cooler with more blue, while moving it to the right adds warmth with a yellow-orange tint. Find the right balance for your shot.
The middle slider controls saturation, determining colour intensity. Dragging it to the left removes colours for a black and white effect, while going to the right intensifies them. Find the right balance for your desired look, often somewhere in the middle.
So for a comparison, this is what our shot looked like before and this is what it looks like now.
In the Clip Filters section, you'll find built-in filters similar to Instagram filters. If any of these match your desired video look, feel free to use them by selecting one. However, it's often best to avoid these for a more customized look.
Once you're happy with your colour grading, copy the clip, select the others, and paste the colour corrections (Edit > Paste Adjustments > Color Correction). These tools apply to B-roll or overlay footage as well—just select the clips and use the top tools.
The final step is to save out your video to export it.
To export your video, click the share button in the top right corner. You can create an email-friendly version, save a freeze frame, directly export to YouTube or Facebook, or choose "Export File" to save it to your computer.
For exporting, I use "Export File." Choose "Video and Audio," set the resolution (usually 1080P), and opt for "High" quality. For compression, "faster" works well, as the quality difference is minimal.
Click "Next," select your save location (like Desktop), and hit "Save" to export. Check the exported video on multiple devices for quality. If needed, make changes in iMovie and re-export. When satisfied, your video is done.
In the top right corner, you can monitor the progress of your video export. Clicking on it provides details, and it shows an estimated time, which, in this case, is one minute for the video.