
Knowby
SoA Kasa Smart WiFi Plug Installation & Setup
A step by step process for installing a Kasa Smart WiFi plug and setting it up on the Kasa app in order to perform remote operation.
1
Step 1 of 24
<p>Search &quot;Kasa Smart&quot; in the App Store or Google Play then locate an install the &quot;Kasa Smart&quot; application.</p>
<p>iPhone: https://apps.apple.com/us/app/kasa-smart/id1034035493</p>
<p>Android: https://play.google.com/store/apps/details?id=com.tplink.kasa_android&amp;hl=en_US&amp;gl=US</p>

Search "Kasa Smart" in the App Store or Google Play then locate an install the "Kasa Smart" application.

iPhone: https://apps.apple.com/us/app/kasa-smart/id1034035493

Android: https://play.google.com/store/apps/details?id=com.tplink.kasa_android&hl=en_US&gl=US

2
Step 2 of 24
<p>Ensure local network permission is enabled. The app will provide a button that reads &quot;Open Settings.&quot; Click this button and ensure the toggle for &quot;Local Network&quot; is turned on as seen in the next step.</p>

Ensure local network permission is enabled. The app will provide a button that reads "Open Settings." Click this button and ensure the toggle for "Local Network" is turned on as seen in the next step.

3
Step 3 of 24
4
Step 4 of 24
<p>Once the &quot;Kasa Smart&quot; application has completed install and you confirmed that permission is granted to local networks you can login in with the following credntials:</p>
<p>Username: soa@keepitsimplestorage.com</p>
<p>Password: <em>hidden while KnowBy is set to public</em></p>

Once the "Kasa Smart" application has completed install and you confirmed that permission is granted to local networks you can login in with the following credntials:

Username: soa@keepitsimplestorage.com

Password: hidden while KnowBy is set to public

5
Step 5 of 24
<p>Upon a successful login you will be asked to agree to terms and conditions. Select the option stating that you &quot;accept&quot; and then click confirm.</p>

Upon a successful login you will be asked to agree to terms and conditions. Select the option stating that you "accept" and then click confirm.

6
Step 6 of 24
<p>Click the &quot;+&quot; icon in the top right corner of the main screen of the application to start the process of adding the smart switch.</p>

Click the "+" icon in the top right corner of the main screen of the application to start the process of adding the smart switch.

7
Step 7 of 24
<p>A popup screen will appear with two options. Click on the option to add a &quot;Device&quot;.</p>

A popup screen will appear with two options. Click on the option to add a "Device".

8
Step 8 of 24
<p>On the device list page select the &quot;Smart Plugs&quot; tab.</p>

On the device list page select the "Smart Plugs" tab.

9
Step 9 of 24
<p>From the &quot;Add a Smart Plug&quot; screen select the &quot;Smart Plug Lite / Mini&quot; tab.</p>

From the "Add a Smart Plug" screen select the "Smart Plug Lite / Mini" tab.

10
Step 10 of 24
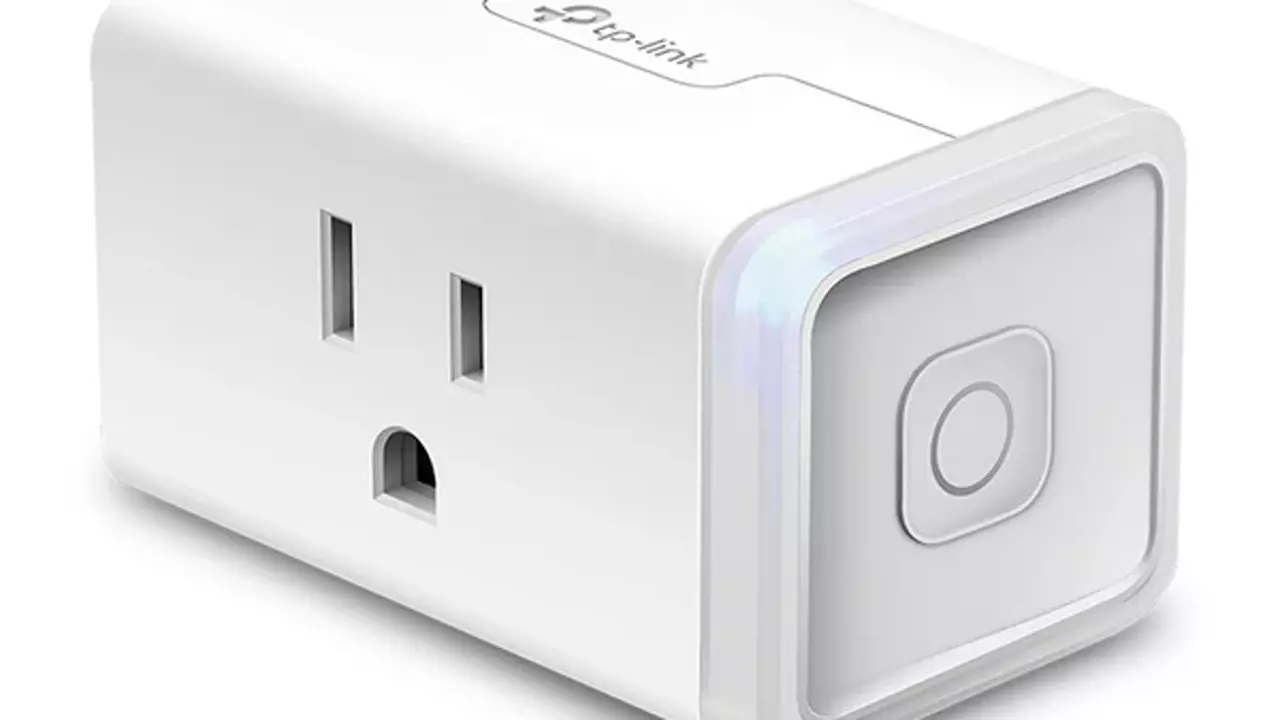
<p>You will be taken to a new screen and asked to plug in the smart switch. At this time please connect the smart switch to the outlet it will be operating out of.</p>

You will be taken to a new screen and asked to plug in the smart switch. At this time please connect the smart switch to the outlet it will be operating out of.

11
Step 11 of 24
<p>After you have confirmed the smart switch is plugged in and operational. Click on the &quot;Next&quot; button to continue the setup process.</p>

After you have confirmed the smart switch is plugged in and operational. Click on the "Next" button to continue the setup process.

12
Step 12 of 24
<p>The next screen in the setup process will ask you to confirm that the Wi-Fi light of the plug is on. It should be flashing between orange and blue. Once this is confirmed please click the &quot;Next&quot; button at the bottom of the screen.</p>

The next screen in the setup process will ask you to confirm that the Wi-Fi light of the plug is on. It should be flashing between orange and blue. Once this is confirmed please click the "Next" button at the bottom of the screen.

13
Step 13 of 24
<p>Connect to the smart plug's Wi-Fi network via the phone's settings. It should be something similar to &quot;TP-LINK_Smart Plug_XXXX&quot;.</p>
<p>Note: Once connected to the device the Wi-Fi page will inform you that aren't connect to a network. This is expected functionality.</p>

Connect to the smart plug's Wi-Fi network via the phone's settings. It should be something similar to "TP-LINK_Smart Plug_XXXX".

Note: Once connected to the device the Wi-Fi page will inform you that aren't connect to a network. This is expected functionality.

14
Step 14 of 24
<p>Return to the &quot;Kasa Smart&quot; application and the screen should now read &quot;Connecting to Smart Plug&quot; wait until your device finishes establishing connection.</p>

Return to the "Kasa Smart" application and the screen should now read "Connecting to Smart Plug" wait until your device finishes establishing connection.

15
Step 15 of 24
<p>Once connected the screen will advance and you will be prompted to connect to your local network. Select your network at this time.</p>
<p>Note: The smart switch can not connect to 5G Wi-Fi so you will not see such networks in your list of options.</p>

Once connected the screen will advance and you will be prompted to connect to your local network. Select your network at this time.

Note: The smart switch can not connect to 5G Wi-Fi so you will not see such networks in your list of options.

16
Step 16 of 24
<p>Enter the password to your local network and then click the &quot;Join&quot; button at the bottom of the screen.</p>

Enter the password to your local network and then click the "Join" button at the bottom of the screen.

17
Step 17 of 24
<p>Your device will now connect the smart switch to your local network. This may take a few minutes. It is best to keep your device in close proximity to the smart switch.</p>

Your device will now connect the smart switch to your local network. This may take a few minutes. It is best to keep your device in close proximity to the smart switch.

18
Step 18 of 24
<p>Once connected, you will be prompted to give the device a name. Please name the device after the location you are installing it in for example a smart plug installed at &quot;Akron&quot; should be named &quot;Akron&quot;.</p>

Once connected, you will be prompted to give the device a name. Please name the device after the location you are installing it in for example a smart plug installed at "Akron" should be named "Akron".

19
Step 19 of 24
<p>You are then asked to set a customer icon. The default switch icon is preferred so simply click the &quot;Save&quot; button at the bottom of the screen.</p>

You are then asked to set a customer icon. The default switch icon is preferred so simply click the "Save" button at the bottom of the screen.

20
Step 20 of 24
<p>You will then be promted to provide the Smart Plugs location. Once again name it after the location where it is being installed as beforeif the smart plug is installed at &quot;Akron&quot; location name should be &quot;Akron&quot;.</p>

You will then be promted to provide the Smart Plugs location. Once again name it after the location where it is being installed as beforeif the smart plug is installed at "Akron" location name should be "Akron".

21
Step 21 of 24
<p>You will then be told &quot;Congratulations!&quot; and that you have configured the smart switch, but wait we aren't completely done yet. Click the &quot;Sounds Good&quot; button at the bottom of the screen to continue.</p>

You will then be told "Congratulations!" and that you have configured the smart switch, but wait we aren't completely done yet. Click the "Sounds Good" button at the bottom of the screen to continue.

22
Step 22 of 24
<p>Depending on the device you may be prompted to complete a firmware update. In this case click the &quot;Update Now&quot; button at the bottom of the screen. Keep your device in close proximity to the smart switch while this update takes place.</p>

Depending on the device you may be prompted to complete a firmware update. In this case click the "Update Now" button at the bottom of the screen. Keep your device in close proximity to the smart switch while this update takes place.

23
Step 23 of 24
<p>You will be informed once the firmware update is completed. Click the &quot;Done&quot; button on the bottom screen and you will be taken back to the Kasa Smart app's main screen.</p>

You will be informed once the firmware update is completed. Click the "Done" button on the bottom screen and you will be taken back to the Kasa Smart app's main screen.

24
Step 24 of 24
<p>From the main screen locate the smart switch you just setup and tap the power button icon. You should see the smart switches LED turn on/off depending on it's state, as well as hear a soft but audible <em>click</em> sound.</p>
<p>Congratulations the smart switch is properly installed!</p>

From the main screen locate the smart switch you just setup and tap the power button icon. You should see the smart switches LED turn on/off depending on it's state, as well as hear a soft but audible click sound.

Congratulations the smart switch is properly installed!