
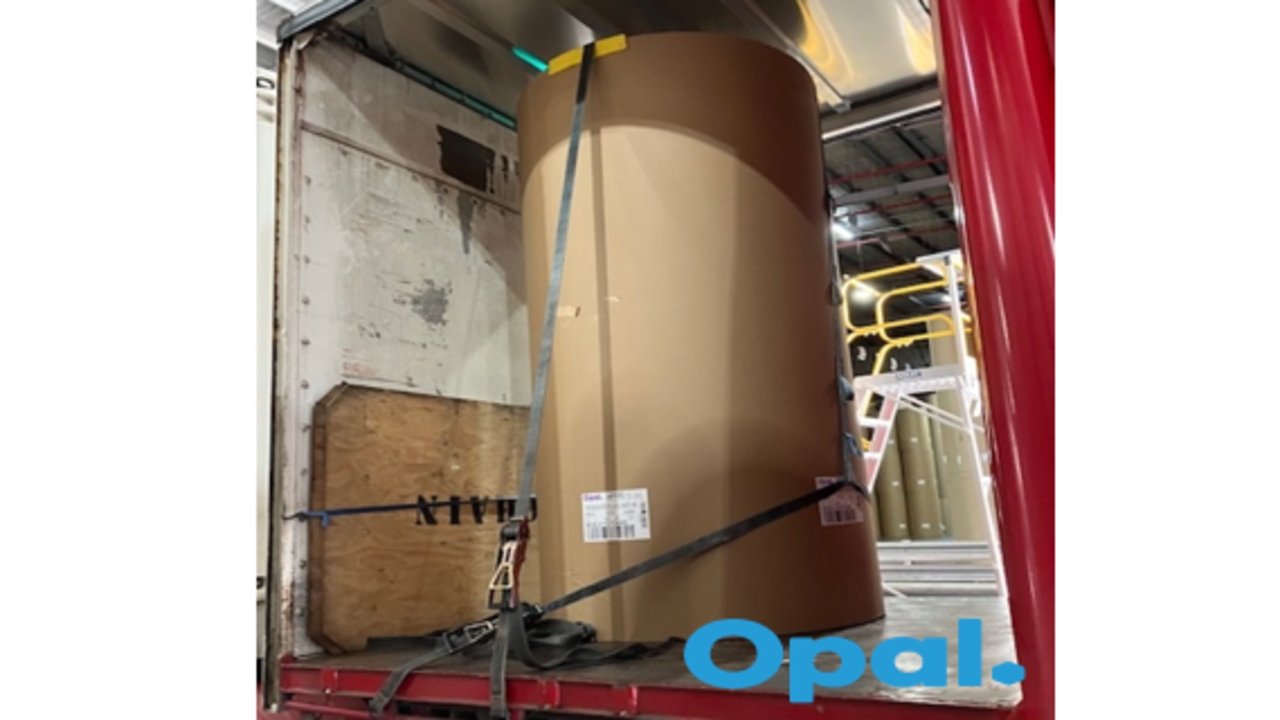
Application of Pull-back Lash
This procedure establishes a standard process for the application of the paper reel 'Pull-back Lash' to meet with loading performance requirements of paper reels.
This procedure establishes a standard process for the application of the paper reel 'Pull-back Lash' to meet with loading performance requirements of paper reels.
1
Step 1 of 8Pull-back Lash Requirement for Paper Reel Loads with Gaps
A pullback strap must be used for any paper reel load that includes a gap.
What is a Gap in Load?
- A gap in load changes the load from a "blocked" to an "unblocked" configuration, which alters the required restraint methods.
A gap is defined as:
- Any space more than 50mm between the first reel and the front headboard.
- A cumulative gap of more than 200mm between the trailer headboard, rear wall, and the paper reels.
2
Step 2 of 8Pull-back Support Lashing – Setup Steps
- Identify Reel: Determine which paper reel needs pull-back support lashing. (Note: Apply to the lead reel of group of unblocked reels).
- Position Reel & Ladder: Place the reel and secure the platform ladder in a pedestrian-only area. Ensure the ladder is locked and the safety rail is closed.
- Pre-set Lashings: Prepare the lashings by rolling out the top strap across the centre of the reel, leaving one end on top.
- Thread Lashing: Thread the top lash through the pull-back support lashing loops.
- Final Position: Centre the top lash across the reel, with the pull-back support lashing hanging down the front.
Note
Pull-back Support lashing loops are available at various heights to accommodate different-sized reels, ensuring the pull-back remains 750mm above the trailer floor.
3
Step 3 of 8Pull-back Support Lashing and Top Lash Taping
- Tape Lashing in Place: Use enough tape to hold the lash securely, allowing the top strap to move while keeping the Pull-back Support lashing in position.
- Tape an X: Apply tape in an X shape over the centre of the straps.
- Side Taping: Run tape from the X to each side, avoiding any tape directly across the top lash.
4
Step 4 of 8Pull-back Support Lashing and Side Lash Taping
- Unroll Pull-back Lash: Unroll the pullback strap.
- Position Loop: Select the correct loop, ensuring the pull-back lash stays above 750mm from the base of the paper reel.
- Thread Lash: Thread the pullback lash evenly through the pull-back support lashing.
- Tape Lash: Using sufficient tape, bundle and secure the top lash and pull-back lash to each side of the paper reel. Ensure it is safe and easy for the grab driver to pick up and load onto the trailer.
5
Step 5 of 8Reel Placement
- Position Reel: Place the reel at the front of the rear block, with the pull-back support lashing facing forward.
- Centre the Reel: Position the blocking reel as close to the trailer’s centre as possible.
- Use Friction Matting: Ensure all paper reels are loaded on rubber friction matting.
6
Step 6 of 8Curved Edge Protection
- Position Edge Protection: Place curved edge protection under the top lash.
7
Step 7 of 8
Top Strap
- Tighten: Apply full tension to the top lashing.
8
Step 8 of 8Pullback Strap
- Latch: Secure the pull-back lash to the trailer deck at least 2 metres behind the paper reel for a maximum 14.4 tonne load.
- Tension: Tighten the pull-back strap to remove any slack, but avoid over-tensioning.
Note:
Adjust Capacity: By reducing the distance behind the paper reel decreases the block capacity - e.g., 1 metre behind the reel supports a 7.2 tonne load.