Form fields let you gather responses from users as they follow a knowby – great for training sign-offs, checklists, or feedback.
To use it, go to the Create/Edit screen, switch to the Steps tab, and open the Form panel on the right. This collapsible panel lets you create and preview all your form fields.

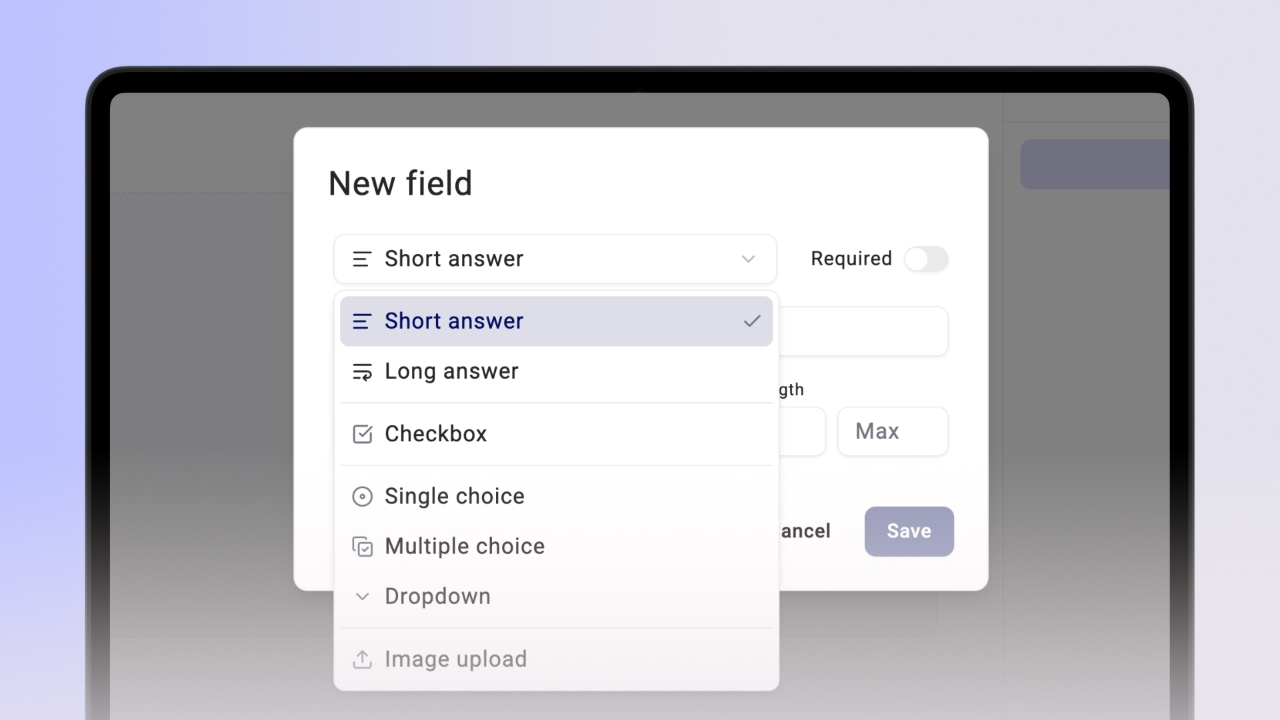
The form fields that can be inserted in a step are:
Short answer, with optional validation (text or number) for short inputs;
Long answer, for open-ended responses;
Checkbox, a single agreement-style statement (e.g., “I agree to…”);
Single choice, where users select one answer from several options;
Multiple choice, where multiple answers can be selected;
Dropdown, a compact list of options to choose one;
Image upload, lets users attach photos.
Start by entering a Label, this is your question or statement. If your field type requires options (e.g., single/multiple choice, dropdown), add them below the label.
Once ready, click Save to add the field to the step.
In the form fields with multiple options, you can delete or reorder them easily.
You can also enable Values for integrations by ticking the checkbox under the label, helpful for syncing with other systems.
All saved form fields appear as a preview in the Form panel.
These form fields are clickable, but it’s just a way for creators to see how users can interact with form fields. The answers won't be recorded until the knowby is published.
To edit a form field, click the Edit button next to its label.
For more actions like duplicating, moving up/down, or deleting, click the three-dot menu next to Edit.
When a knowby is published, it will display the form fields directly below the step, right after the media and step text. If your step contains multiple forms, the viewer will be able to scroll to see them all.
As soon as the user starts interacting with any of the form fields, step navigation will become locked. The step progress bar will switch to two buttons:
Submit response – this saves the answers to the form fields;
Clear – this resets all responses and re-enables navigation between steps.
This ensures users complete the step before moving forward and keeps responses accurate and intentional.
When you translate a knowby (whether automatically or manually), the form labels and options will also be included in the translated version.
To ensure all form field responses are saved, the knowby must be marked as Complete.
Go through each step and make sure all required form fields are filled out. On the final step, click the Complete button. A pop-up will appear, confirm your action by clicking Mark as complete.
Once done, all your form responses will be securely saved and associated with your Knowby completion.
To view a completed form, go to the Reporting section.
Reporting is currently available only to Admins and on desktop devices.
Click the App switcher icon in the top-left corner of your screen;
Select Reporting;
Go to Knowby tab → Completions;
Choose a knowby you want to review;
Click View in a list of submissions.
You’ll see a full knowby displayed in a vertical format, with all submitted form responses included.