
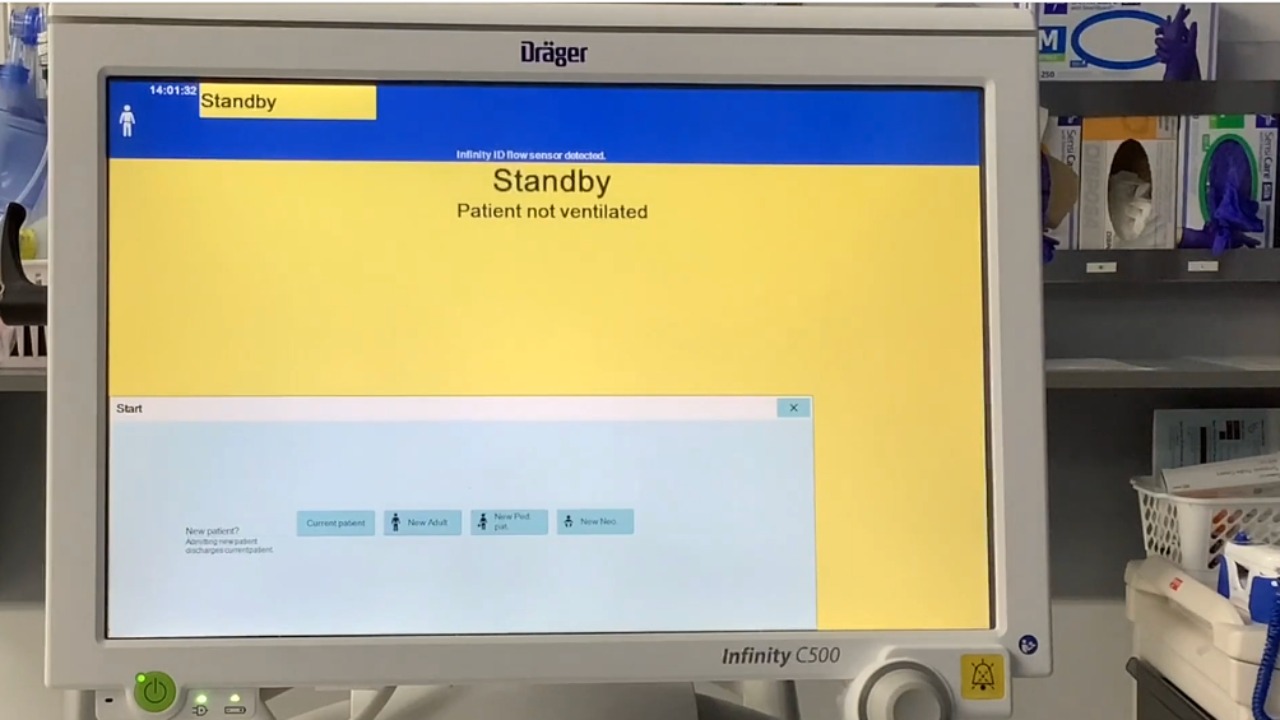
Ventilator Drager Infinity C500 Part 3 Setup for an Adult
Okay, so we have the ventilator set up now to use on adult patients.
Okay, so we have the ventilator set up now to use on adult patients.
1
Step 1 of 81Okay, so we have the ventilator set up now to use on adult patients.
2
Step 2 of 81We're going to turn it on. This green button here.
3
Step 3 of 81Wait for it to start. So now that it's on, you're going to see some options here.
4
Step 4 of 81So current patient, new adult, new pediatric patient, or new neo.
5
Step 5 of 81So we're going to choose new adult. So we're going to click that.
6
Step 6 of 81It'll say confirmation will discharge current patient, which is fine.
7
Step 7 of 81And then we're going to press this button here to accept. So then we're going to see this green, which is our standby.
8
Step 8 of 81It'll say standby patient not ventilated. This always shows up, this alarm, just reminding you to perform the device and breathing circuit check.
9
Step 9 of 81But that is already done. We'll just click alarm reset.
10
Step 10 of 81And then down at the bottom, click to confirm. So there's some options in here.
11
Step 11 of 81So what we want to do is go into ventilation settings.
12
Step 12 of 81We'll click there. So up top is our modes. So we have our volume control, assist control mode.
13
Step 13 of 81There's a pressure control, assist control mode. And then there is some other options like PSV or spontaneous mode.
14
Step 14 of 81So we're just going to talk about ventilating on a volume control, assist control mode.
15
Step 15 of 81So our options that we have here to set are going to be our FIO2.
16
Step 16 of 81So if we wanted to change it, we would click it, turn this knob here.
17
Step 17 of 81And then we also have to click to accept so that we see that it's changed.
18
Step 18 of 81And if that service date reached or anything shows up there, you just press alarm reset and click.
19
Step 19 of 81So here the next one to set is our title volume. So again, for these settings, you're going to get an order from the physician for what to put in.
20
Step 20 of 81And then we're going to set them here. So let's say that we want to set our title volume to 500.
21
Step 21 of 81We're going to turn down and then we're going to click it. So when we're on here, you can see here that it tells you on this volume and this rate, what our minute ventilation is going to be.
22
Step 22 of 81And our next thing that we're going to set is our inspiratory time.
23
Step 23 of 81So that again, when you click on it, you're going to see I to E ratio.
24
Step 24 of 81So it's telling us currently it's one to 2.9.
25
Step 25 of 81And then it's going to tell you what your exhalation time is with that.
26
Step 26 of 81So this I'm going to set at 1.
27
Step 27 of 81And then our respiratory rate is currently 14.
28
Step 28 of 81So you'll notice if I change my respiratory rate, it's showing us a little box down here because if we're changing our rate, we're also changing our I to E ratio.
29
Step 29 of 81So you got to remember to look at that. But again, these you should get all of these settings as an order.
30
Step 30 of 81We won't touch our slope at all.
31
Step 31 of 81And our P max is just our max pressure.
32
Step 32 of 81So we'll leave that at 40 where it's set to. And then our last one is peep.
33
Step 33 of 81So again, we can increase it if we wanted to and click to accept.
34
Step 34 of 81So under additional settings here, we have a trigger.
35
Step 35 of 81We generally leave the flow trigger where it's at at 2.
36
Step 36 of 81And then auto flow. It should default to on.
37
Step 37 of 81So it is on. So once we have those settings set, we can exit out of here.
38
Step 38 of 81And then if we're ready to start ventilation, we would hook our tubing here.
39
Step 39 of 81So now that we have our circuit, we could take the cap off and we could connect it to our patient.
40
Step 40 of 81When it's connected to our patient, so we'll just use our test long here. So we can start ventilation.
41
Step 41 of 81We'll press start again. Well, it's yellow. So we have to accept it. And then our ventilator is going to start.
42
Step 42 of 81Now, because I don't want to over inflate this test long, I'm going to turn this down.
43
Step 43 of 81So now that we have our settings here, we're going to get values up here.
44
Step 44 of 81So these are all our measured values. These are what we set. And these are what we measure.
45
Step 45 of 81So another thing we need to look at is our alarms.
46
Step 46 of 81So when we go into our alarms, we want to make sure that, so right here we have, down here it's telling us what our ventilation is set to.
47
Step 47 of 81So it's set to 4.8. When we go into our alarms, our lower limit alarm is 5.8.
48
Step 48 of 81So it's going to alarm. So we just want to make sure that we set these lower than what we're giving.
49
Step 49 of 81And make sure the higher one is not too far away in distance.
50
Step 50 of 81And then in here we have our respiratory rate.
51
Step 51 of 81So the high alarm is set to 28. You just want to make sure we're giving 16 that it's above what we have set.
52
Step 52 of 81And then this is a tidal volume alarm. So our tidal volume is 300 and it's set quite a bit above it.
53
Step 53 of 81So we just want to make sure our alarms aren't going to continuously alarm and they'll alarm when appropriate.
54
Step 54 of 81So in here we have our peak inspiratory pressure measured.
55
Step 55 of 81And then you'll notice here it's blank and we're not measuring a plateau pressure. So if we want to get a plateau pressure measured, then we have to go in and do a manual inspiratory hold.
56
Step 56 of 81The patient can't be spontaneously breathing. Then you're going to have to press and hold it.
57
Step 57 of 81You'll see a line there. You're going to stop and you're going to hit freeze waveform.
58
Step 58 of 81So a number will pop up there 19 or you can roll the style over and measure.
59
Step 59 of 81So it's going to look a little different on an actual patient. You're going to have a little peak here and then it's going to go kind of a lower plateau pressure.
60
Step 60 of 81So this number ideally plateau pressure should be less than 30 and PIP should be less than 35.
61
Step 61 of 81Here we're also going to have our mean pressure that we chart and we also have measured respiratory rate.
62
Step 62 of 81So here it's set at 16, but if the patient is breathing above, you'll notice that number changes.
63
Step 63 of 81So this is there we go.
64
Step 64 of 81So our rate of 26 say, whatever it's reading there is what it's measuring.
65
Step 65 of 81And then here is what we set.
66
Step 66 of 81So the spontaneous respiratory rate is measured here.
67
Step 67 of 81So it'll tell you kind of the difference. And so any, so that any alarm that is no longer active will show up at the top like this.
68
Step 68 of 81So we'll hit alarm reset. So down in here, this is the measured, um, exhaled tidal volume.
69
Step 69 of 81Tidal volume. So what we have set as 300 and what this is reading here should be very similar.
70
Step 70 of 81Um, this is our minute ventilation.
71
Step 71 of 81So we do have it at 4.8, but it will change.
72
Step 72 of 81For example, if our patient starts breathing, that number will be higher.
73
Step 73 of 81And you'll also see that this number can change depending on what kind of breath our patient takes.
74
Step 74 of 81And then in here, we'll notice we have our I to E ratio that we talked about earlier.
75
Step 75 of 81So again, ideally you want your inspiratory time to be less than your expiratory time.
76
Step 76 of 81And it'll show you what is being measured in there.
77
Step 77 of 81And then this is also tells us a percent leak. So if there's a leak around like the cuff, if the ET tube was a bit small, and we have like cuff inflated, there could still be a little bit of a leak.
78
Step 78 of 81Uh, a leak could just be, uh, in the system. So when you disconnect or when you inline suction, you'll generally have a leak there as well, but it should go back down.
79
Step 79 of 81And then we have just our measured FiO2.
80
Step 80 of 81So generally the things that we chart are a combination of what we've set and then what we measure.
81
Step 81 of 81And, but for all of these, all of these settings that are inputted as well as the measured, if you have any questions about it, you should be talking to the physician.