
Knowby
Doing a finger prick test for blood sugar levels
If the sensor is not working for some reason, or if you want to check if its accurate, you may need to do a manual blood sugar test - Finger Prick Meila is pretty good with these now so will help
1
Step 1 of 8
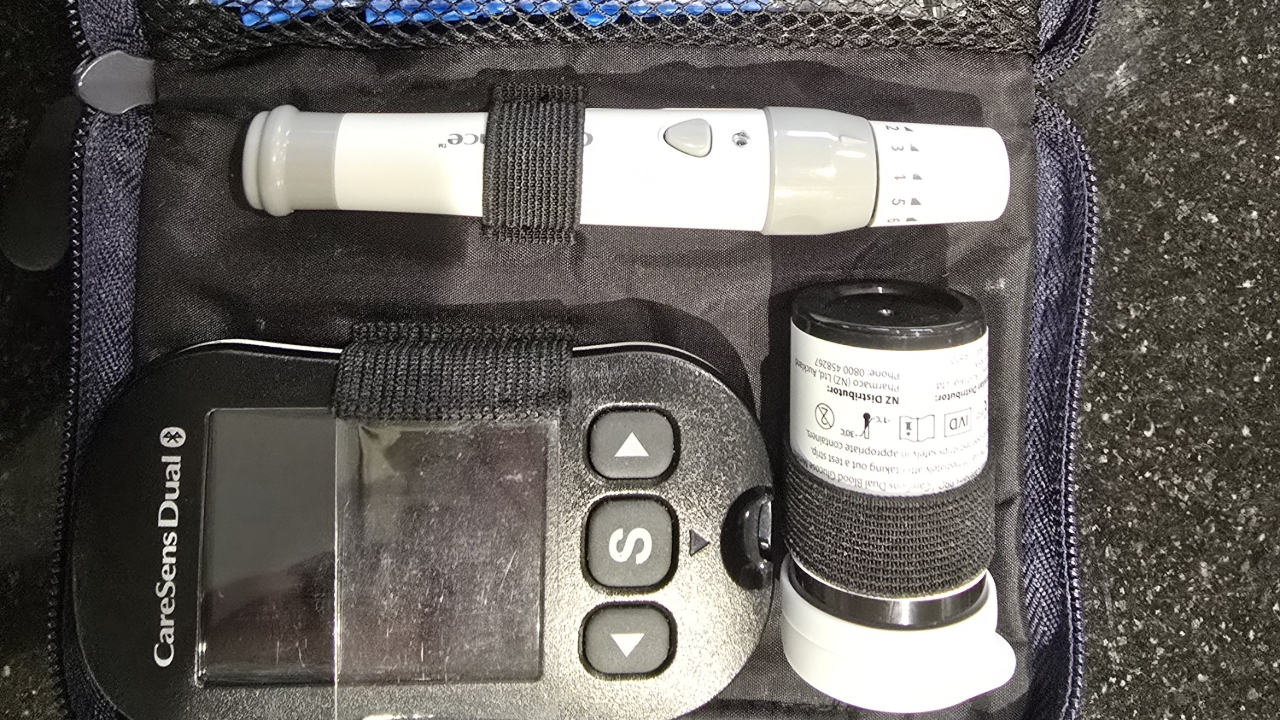
<p>Take out the kit and the tools you will need are&nbsp;</p><ul><li>The caresense dual machine</li><li>The White needle finger prick device</li><li>A caresense pro monitor strip</li><li>A tissue</li></ul>

Take out the kit and the tools you will need are 

  • The caresense dual machine
  • The White needle finger prick device
  • A caresense pro monitor strip
  • A tissue
2
Step 2 of 8
<p>Prep the finger prick device</p><p>1- Make sure the Setting is on number 4 (this is the depth of the needle)</p>

Prep the finger prick device

1- Make sure the Setting is on number 4 (this is the depth of the needle)

3
Step 3 of 8
<p><span>Prep the finger prick device</span></p><p>1- Pull back the top of the device to get the spring load ready</p><p><br></p><p><br></p>

Prep the finger prick device

1- Pull back the top of the device to get the spring load ready


4
Step 4 of 8
<p><span>Prep the finger prick device</span></p><p>1- The dot next to the trigger button should now be read. If its red its ready to go</p><p><br></p><p>The Grey triangle button is the one you will push to activate the needle/prick</p>

Prep the finger prick device

1- The dot next to the trigger button should now be read. If its red its ready to go


The Grey triangle button is the one you will push to activate the needle/prick

5
Step 5 of 8
<p>Identify the finger. Meila will show you . If you have to do a few through the day, use different fingers</p><p><br></p><p>Make sure this finger is clean. A quick wipe with wet cloth is fine</p>

Identify the finger. Meila will show you . If you have to do a few through the day, use different fingers


Make sure this finger is clean. A quick wipe with wet cloth is fine

6
Step 6 of 8
<p>Next - Get the monitor ready</p><p><br></p><ul><li>&nbsp;Insert the reader strip to the monitor. This will automatically start the machine</li></ul><p><br></p><p>ps&nbsp; - You need to make sure you keep it moving from here as you will not have along time with the machine resetting.&nbsp;</p>

Next - Get the monitor ready


  •  Insert the reader strip to the monitor. This will automatically start the machine


ps  - You need to make sure you keep it moving from here as you will not have along time with the machine resetting. 

7
Step 7 of 8

Do the finger prick and reading


  • Ensure the monitor has the strip in it and is on
  • Get the white needle pen and put against the finger. in the end fleshy part
  • Push the grey trigger button. Small prick will be done
  • Wipe away initial blood with tissue
  • Then gently squeeze finger to get a decent blob of blood out. Meila will help here
  • Dip the tip of the reader strip into this blood
  • The machine will tell you the reading
  • Use tissue to clean up


PS - the Machine reading can read slightly different to normal sensor due to tissue etc. still close enough. 

8
Step 8 of 8

Discard of used strip and tissue. All done