
Knowby
Add a verified translation
Add a verified translation to your knowby, so people viewing it in another language can trust it's accurate.
1
Step 1 of 9
<p>A verified translation is one you've personally checked and confirmed while creating or editing a knowby — so viewers can trust what they're reading, without worrying it's been mistranslated. </p><p>Verified languages also show up as an option when viewing a <strong>Public</strong> knowby. </p><p>From the <strong>Languages</strong> tab, you can either add and verify a language so it shows as verified, or add a language without verifying it — which still makes it available as an auto-translation.</p>

A verified translation is one you've personally checked and confirmed while creating or editing a knowby — so viewers can trust what they're reading, without worrying it's been mistranslated.

Verified languages also show up as an option when viewing a Public knowby.

From the Languages tab, you can either add and verify a language so it shows as verified, or add a language without verifying it — which still makes it available as an auto-translation.

2
Step 2 of 9

To add translations, click the Languages tab on the left side of the screen. Here you'll find:

  • A language management panel at the top, for adding, deleting, and tracking verified translations

  • Step thumbnails on the left, for navigating between steps

  • Text boxes — the original text on the left (editable only from other tabs) and the translation on the right

3
Step 3 of 9

To add a language, select it from the list, or search for it directly.

The system automatically translates everything in your knowby — the title, description, steps, and any forms — using machine translation.

Until you review it, this translation is labelled Unverified.

4
Step 4 of 9

Review the translation, and edit it using the text box on the right if needed.

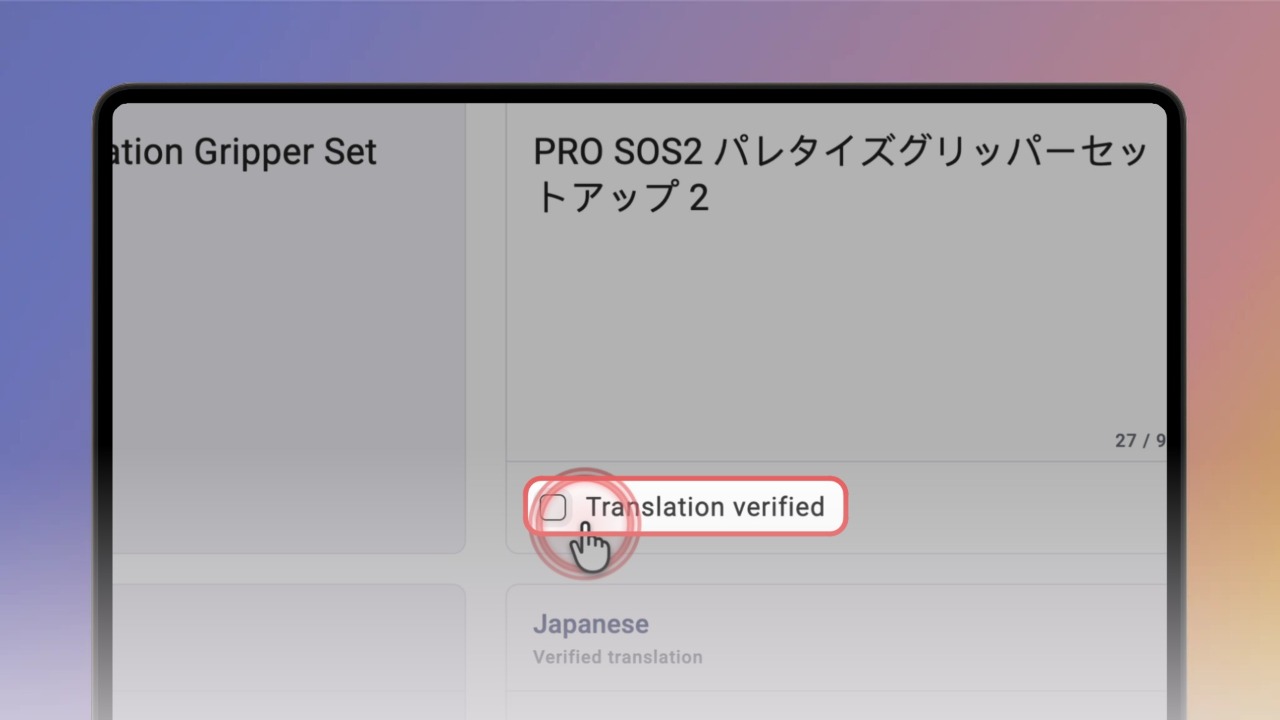
Once you're happy it's correct, check the Translation verified box for that step — and in the Title & Description step, verify both fields the same way.

Once every step is verified, a green checkmark appears next to the language, showing the whole knowby is verified.

5
Step 5 of 9

You can add as many languages as you like.

Even if one isn't fully verified yet, it'll still appear in the knowby as an auto-translation.

6
Step 6 of 9

You're not limited to a plain translation — you can edit the text and apply formatting that's different from the original.

7
Step 7 of 9

If you edit the original step text later, from the Steps or Details tab, a red dot appears next to the Languages tab to flag the change.

Inside Languages, a red banner shows exactly where the text was updated — navigate to that section and click Update translation to refresh it.

8
Step 8 of 9

Anyone viewing the knowby can switch languages by clicking the language icon in the top menu, or the chip showing the current language — this opens a pop-up listing all verified languages, and selecting one translates the entire knowby.

9
Step 9 of 9

💡 Want to learn about automatic, unverified translations too? See the Use Auto-Translation guide →