
Knowby Real Pet Food Co
Knowby
SOP SOM 08 002 Matthews Ink Jet Printer Operation
Standard Operating Procedure Matthews Ink Jet Printer – Operation Version: 3 Date: 15.12.2025 SOP Details Site & Section Somersby, Sitewide WI Issue Date XXXX Linked Document(s) Manufacturer Operation Manual Printer Maintenance Work Instruction Printer iLeader Entry Aim of WI
1
Step 1 of 36
<p>Standard Operating Procedure</p><p>Matthews Ink Jet Printer – Operation</p><p>Version: 3</p><p>Date: 15.12.2025</p>

Standard Operating Procedure

Matthews Ink Jet Printer – Operation

Version: 3

Date: 15.12.2025

2
Step 2 of 36
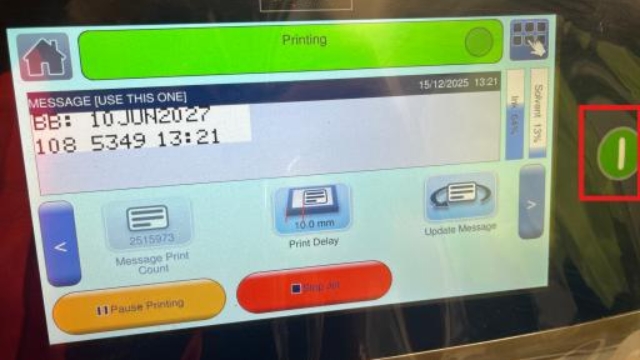
<p>Description and Overview</p><p></p><p>The Matthews Ink Jet printer is used to print best before dates and Julian Codes onto product packaging and cartons.</p><p></p><p>If the Matthews printer is malfunctioning, you must immediately disconnect it from the power and notify maintenance.</p>

Description and Overview

The Matthews Ink Jet printer is used to print best before dates and Julian Codes onto product packaging and cartons.

If the Matthews printer is malfunctioning, you must immediately disconnect it from the power and notify maintenance.
3
Step 3 of 36
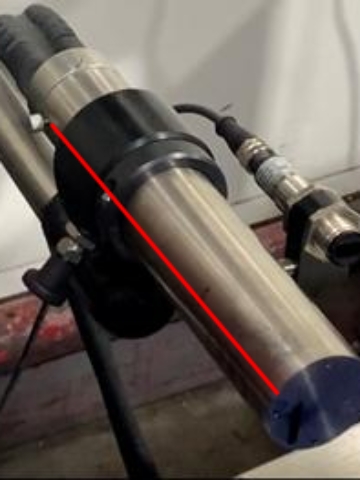
<p>Printer Start Up</p><p></p><p>To start the printer from shutdown:</p><p></p><ol><li><p>Turn the power supply on at the power source.</p></li><li><p>Press the green ‘Power’ button on the Date Printer screen.</p></li></ol><p></p><p>The Date Printer will automatically perform a nozzle flush and prepare for operation.</p><p></p>

Printer Start Up

To start the printer from shutdown:

  1. Turn the power supply on at the power source.

  2. Press the green ‘Power’ button on the Date Printer screen.

The Date Printer will automatically perform a nozzle flush and prepare for operation.
4
Step 4 of 36
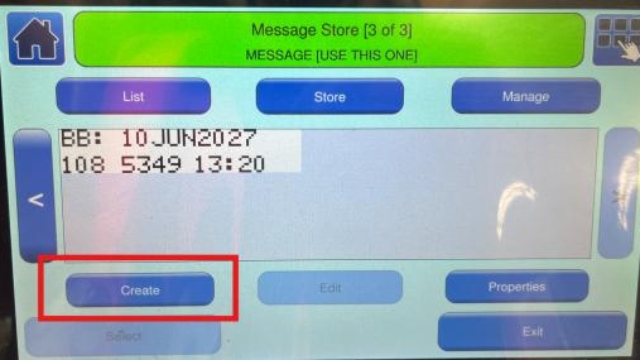
<p>NOTE: Ensure the screw on the printer
nozzle is parallel to the line, if it is on an
angle the printing will be done on an angle.</p>

NOTE: Ensure the screw on the printer nozzle is parallel to the line, if it is on an angle the printing will be done on an angle.
5
Step 5 of 36
<p>Creating a
product</p><p>Select the “Create” button.</p>

Creating a product

Select the “Create” button.
6
Step 6 of 36
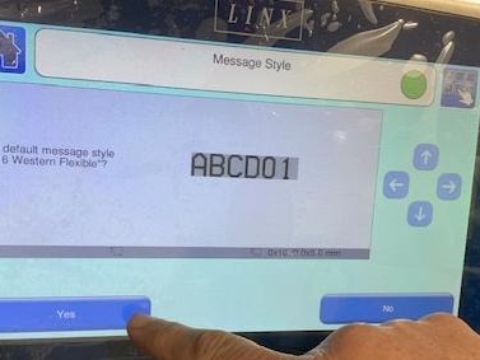
<p>A message will appear on the screen “use default message style” followed by the style of writing.</p><p></p><p>If you wish to change the style, select “No” if you are happy with the style select “Yes” and proceed to the next step.</p>

A message will appear on the screen “use default message style” followed by the style of writing.

If you wish to change the style, select “No” if you are happy with the style select “Yes” and proceed to the next step.
7
Step 7 of 36
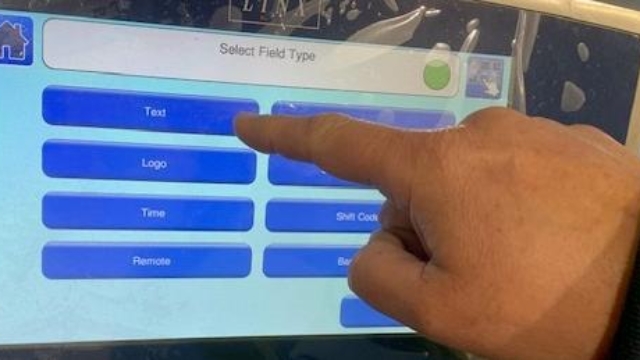
<p>To add text to your message, select the “text” button.</p><p></p><p>Then type in the text you want your message to have.</p><p></p><p>For example: BEST BEFORE</p>

To add text to your message, select the “text” button.

Then type in the text you want your message to have.

For example: BEST BEFORE
8
Step 8 of 36
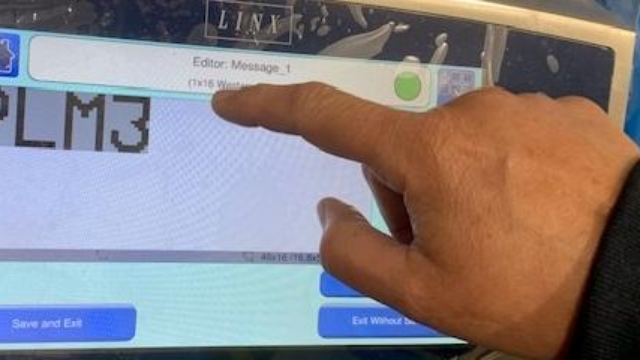
<p>Once you have entered the text, tap on the
screen where the text is and the “select
field” menu will appear.</p>

Once you have entered the text, tap on the screen where the text is and the “select field” menu will appear.
9
Step 9 of 36
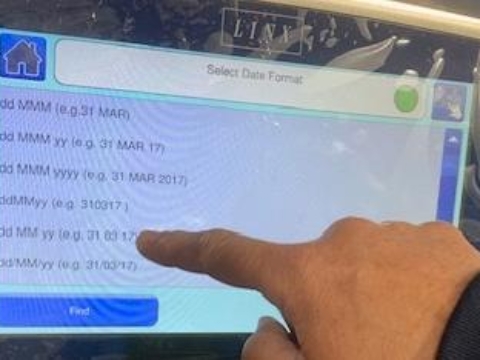
<p>In this menu select “date”. Then select the
format the date is required to appear in.
Then press “ok”.</p>

In this menu select “date”. Then select the format the date is required to appear in. Then press “ok”.
10
Step 10 of 36
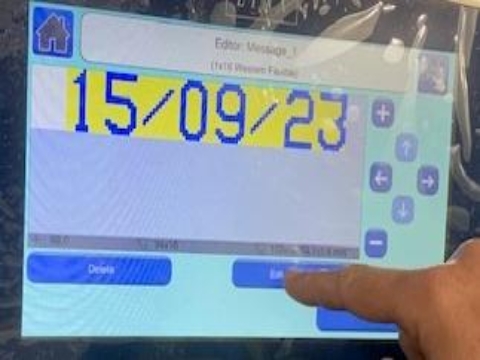
<p>The date format will appear on the screen,
then select “Edit Properties”.</p>

The date format will appear on the screen, then select “Edit Properties”.
11
Step 11 of 36
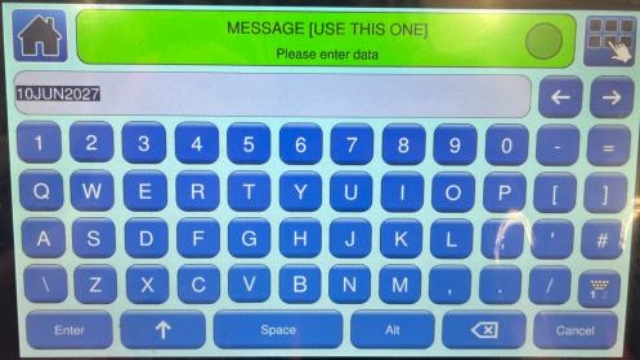
<p>Enter the expiry date required as directed
by work order information in iLeader.</p>

Enter the expiry date required as directed by work order information in iLeader.
12
Step 12 of 36
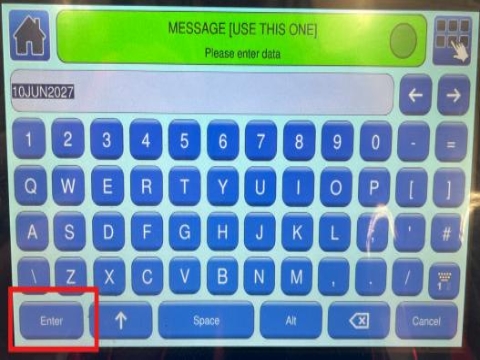
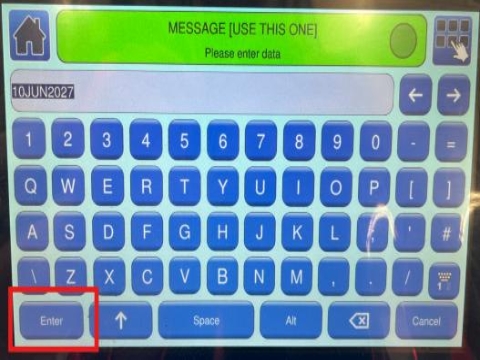
<p>Select “Enter”. This will then change the
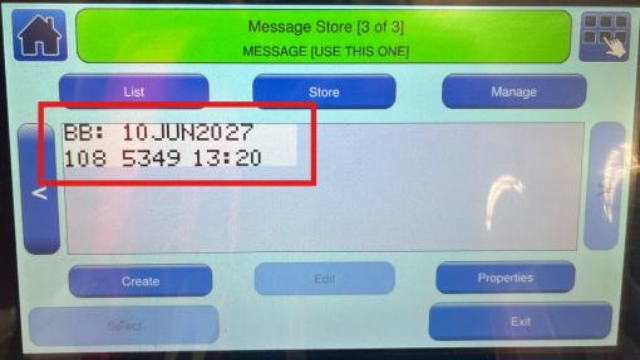
screen to have a preview of your message.</p>

Select “Enter”. This will then change the screen to have a preview of your message.
13
Step 13 of 36
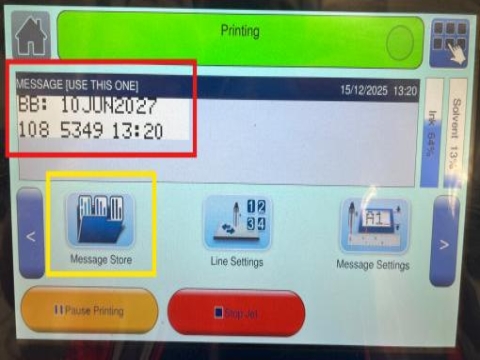
<p>If layout of the date is acceptable, press
exit, you will then be diverted to the main
screen.</p>

If layout of the date is acceptable, press exit, you will then be diverted to the main screen.
14
Step 14 of 36
<p>Selecting a
product</p><p>Once the printer has been turned on
ensure the correct product has been
selected.</p><p>Ensure the printer is in ‘Idle’ mode.</p><p>Select ‘Message Store’.</p>

Selecting a product

Once the printer has been turned on ensure the correct product has been selected.

Ensure the printer is in ‘Idle’ mode.

Select ‘Message Store’.
15
Step 15 of 36
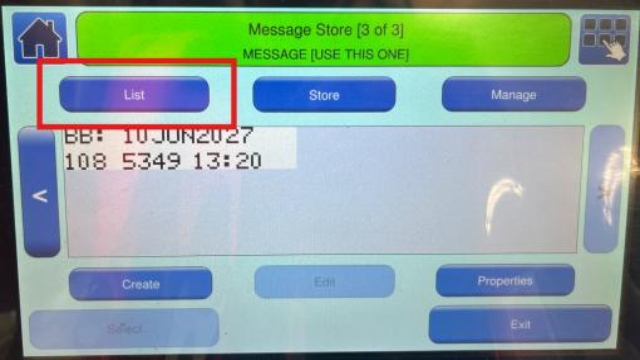
<p>Select ‘Message Store’.</p><p>Select ‘List’ button, this will bring up the list
of products to select from.</p>

Select ‘Message Store’.

Select ‘List’ button, this will bring up the list of products to select from.
16
Step 16 of 36
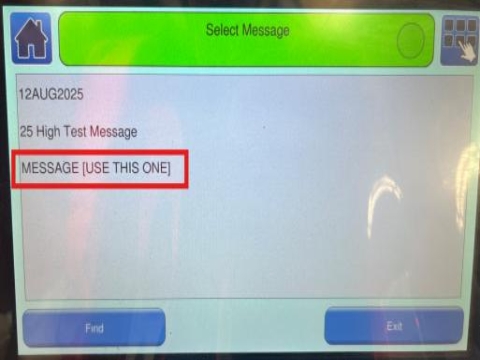
<p>Tap on the product required to run.</p>

Tap on the product required to run.

17
Step 17 of 36
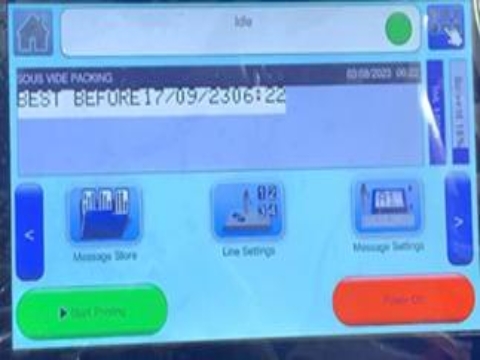
<p>The product Best Before date will come up
on the screen, press ‘Select’.</p>

The product Best Before date will come up on the screen, press ‘Select’.
18
Step 18 of 36
<p>Running the
Date Printer
for
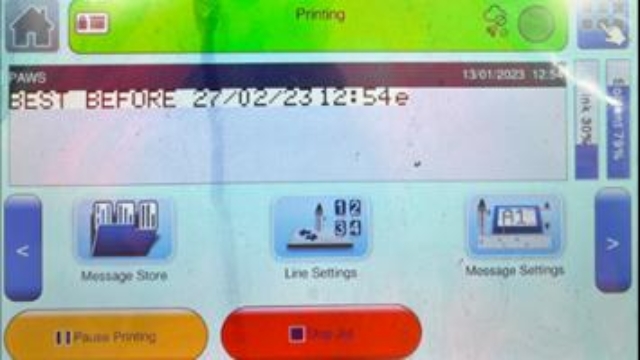
Production</p><p>To start running the Date Printer:</p><p>From the main screen, select ‘Start
Printing’.</p>

Running the Date Printer for Production

To start running the Date Printer:

From the main screen, select ‘Start Printing’.
19
Step 19 of 36
<p>To stop the printer during production,
select ‘Stop Jet’ button.
To pause the printer during production,
select ‘Pause’ button.</p>

To stop the printer during production, select ‘Stop Jet’ button. To pause the printer during production, select ‘Pause’ button.

20
Step 20 of 36
<p>‘Printing’- Printer is Running.</p>

‘Printing’- Printer is Running.

21
Step 21 of 36
<p>‘Idle’ – Printer is on but not printing.</p>

‘Idle’ – Printer is on but not printing.

22
Step 22 of 36
<p>Changing the
Best Before
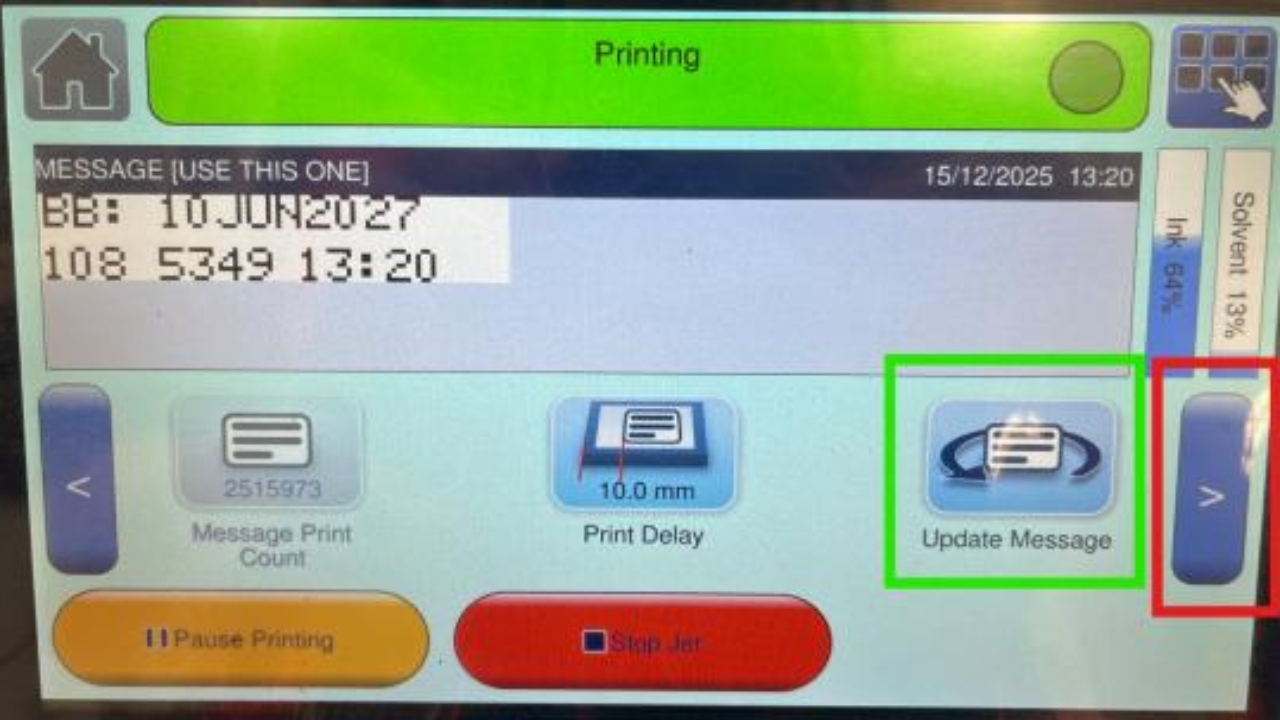
date</p><p>Press the right arrow to scroll the main
menu (highlighted red on photo).</p><p>Press the ‘Update Message’ icon
(highlighted green on photo).</p>

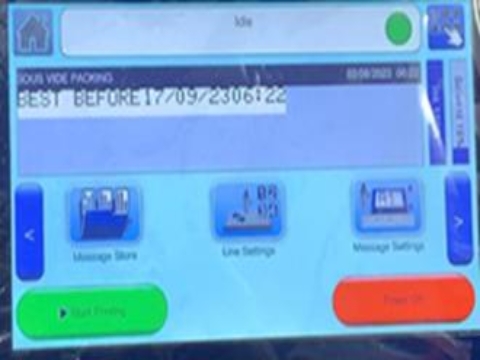
Changing the Best Before date

Press the right arrow to scroll the main menu (highlighted red on photo).

Press the ‘Update Message’ icon (highlighted green on photo).
23
Step 23 of 36
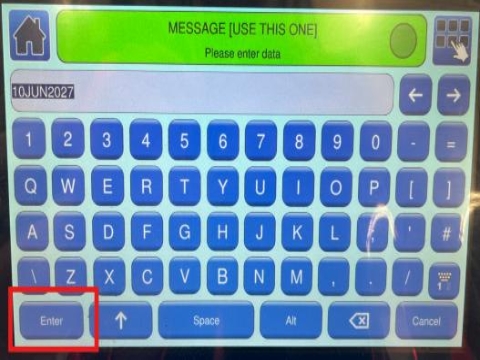
<p>Enter the required date according to
Printer iLeader Entry, followed by pressing
‘Enter’ to save the entry and return to main
screen.</p>

Enter the required date according to Printer iLeader Entry, followed by pressing ‘Enter’ to save the entry and return to main screen.
24
Step 24 of 36
<p>Placing the
Date printer
in Standby
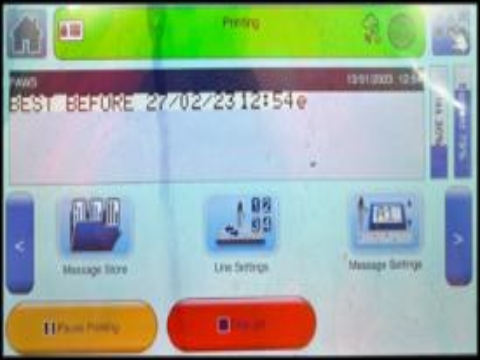
Mode</p><p>To place the Date Printer into Stand By
mode select ‘Stop Jet’, this will put the
Date Printer into ‘Idle’ status.</p>

Placing the Date printer in Standby Mode

To place the Date Printer into Stand By mode select ‘Stop Jet’, this will put the Date Printer into ‘Idle’ status.
25
Step 25 of 36
<p>Shutting
down the
Date Printer
for end of
production/
week</p><p>NOTE: It is important that the Date
Printer is powered off correctly.</p><p>At the end of production/week the Date
Printer needs a nozzle clean before being
correctly shutdown:</p><p>Follow the maintenance procedure for
cleaning the nozzle.</p><p>Place the Date Printer into ‘Idle’ by
selecting ‘Stop Jet’.</p>

Shutting down the Date Printer for end of production/ week

NOTE: It is important that the Date Printer is powered off correctly.

At the end of production/week the Date Printer needs a nozzle clean before being correctly shutdown:

Follow the maintenance procedure for cleaning the nozzle.

Place the Date Printer into ‘Idle’ by selecting ‘Stop Jet’.
26
Step 26 of 36
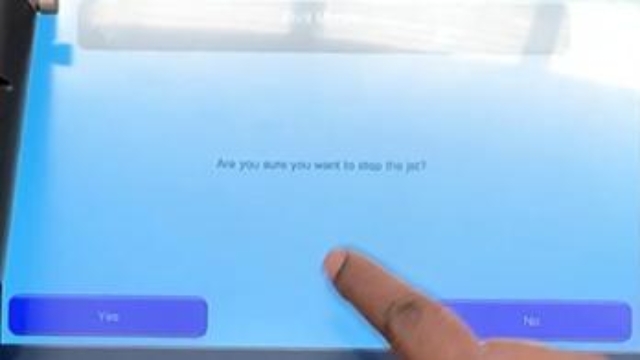
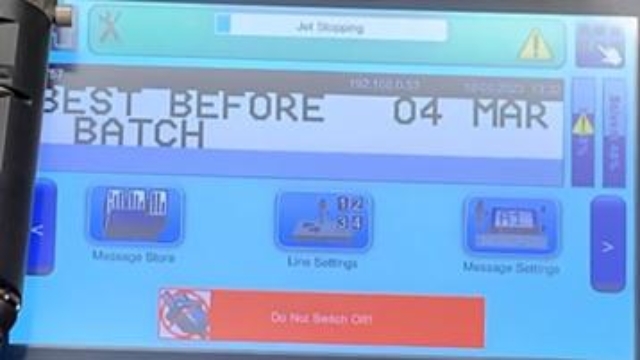
<p>In the pop-up screen ‘Are you sure you
want to stop the jet?’ Select ‘Yes’</p>

In the pop-up screen ‘Are you sure you want to stop the jet?’ Select ‘Yes’
27
Step 27 of 36
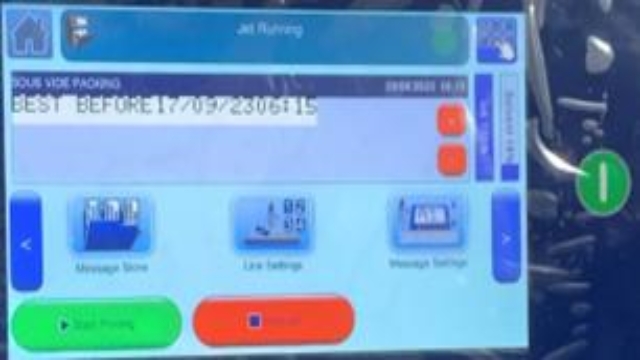
<p>You will need to wait until the jet has
stopped and screen status is ‘Idle’ before
turning Date Printer off.</p>

You will need to wait until the jet has stopped and screen status is ‘Idle’ before turning Date Printer off.
28
Step 28 of 36
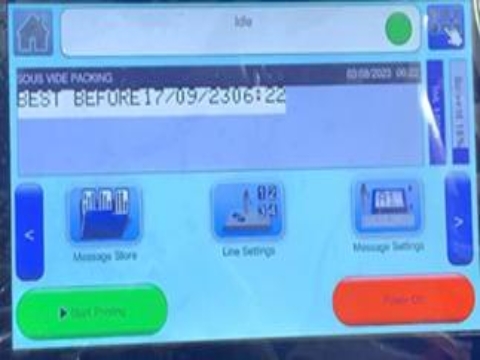
<p>Press ‘Power’ button. Printer can now be
turned off at main supply.</p>

Press ‘Power’ button. Printer can now be turned off at main supply.
29
Step 29 of 36
<p>Troubleshooting</p><p>Dots on date
to spread out/
font needs to
be
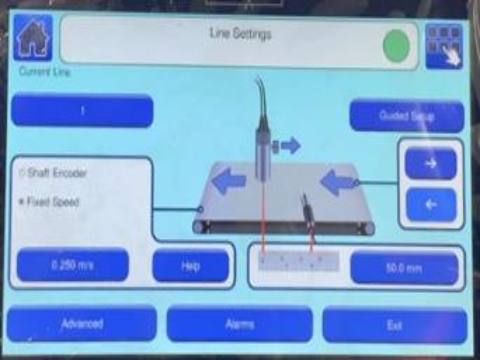
larger/smaller</p><p>Pause the line then select ‘Line Settings’.</p>

Troubleshooting

Dots on date to spread out/ font needs to be larger/smaller

Pause the line then select ‘Line Settings’.
30
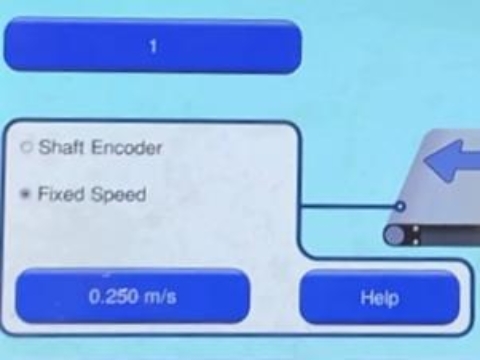
Step 30 of 36
<p>Adjust the line speed select the fixed
speed button.</p>

Adjust the line speed select the fixed speed button.
31
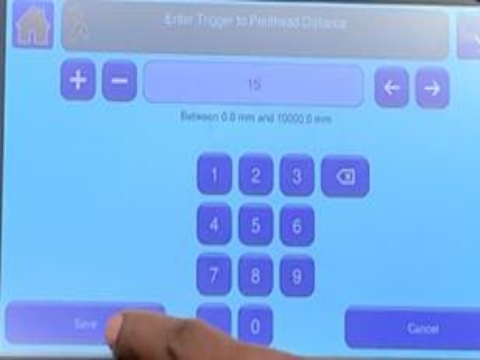
Step 31 of 36
<p>In the pop-up screen change the line
speed, to increase the speed to make font
smaller and decrease the speed to make
font larger.</p>

In the pop-up screen change the line speed, to increase the speed to make font smaller and decrease the speed to make font larger.
32
Step 32 of 36
<p>Select ‘Save’.</p>

Select ‘Save’.

33
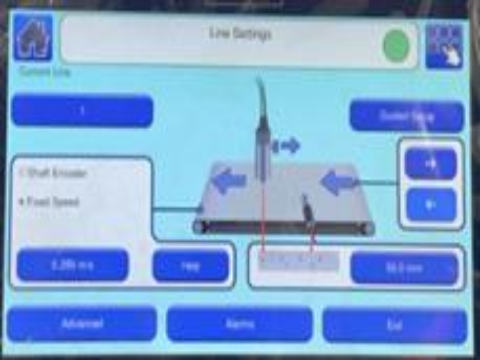
Step 33 of 36
<p>Adjusting
date to fit</p><p>Select ‘Line Speed’.</p>

Adjusting date to fit

Select ‘Line Speed’.
34
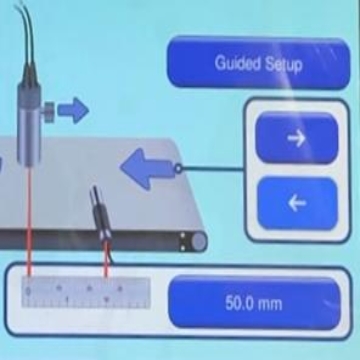
Step 34 of 36
<p>Adjust the length in the ‘Guide Set up’
button.</p>

Adjust the length in the ‘Guide Set up’ button.
35
Step 35 of 36
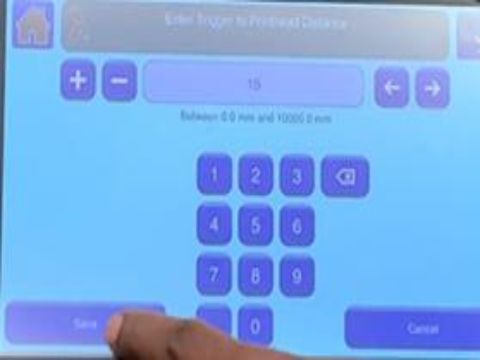
<p>In the pop-up screen change the guide set
up to change how long the space is
between the sensor to the printhead.
Enter the distance in mm.</p>

In the pop-up screen change the guide set up to change how long the space is between the sensor to the printhead. Enter the distance in mm.
36
Step 36 of 36
<p>Select ‘Save’.</p><p>Once the sensor picks up the product
passing through it will wait the required
length before printing starts on the
printhead.</p>

Select ‘Save’.

Once the sensor picks up the product passing through it will wait the required length before printing starts on the printhead.