Knowby Supplant
Knowby
Field Station Installation
1
Step 1 of 34
<p>Dig a hole just over 400mm deep.</p>

Dig a hole just over 400mm deep.

2
Step 2 of 34
<p>Dig your hole under a dripper and not right up against a vine.</p>

Dig your hole under a dripper and not right up against a vine.

3
Step 3 of 34

Make sure you keep the layers of soil in order so you can replace the soil back into the hole like for like.

4
Step 4 of 34
<p>There are two probes.
One goes down 20cm and one 40cm.
At least one of the pre wired in probes will be labeled so you get the right probe at the right level.</p>

There are two probes. One goes down 20cm and one 40cm. At least one of the pre wired in probes will be labeled so you get the right probe at the right level.

5
Step 5 of 34
<p>Pull the protector off the probe.</p>

Pull the protector off the probe.

6
Step 6 of 34

At 40cm ( about the middle of where you push the probe in ) push the probe into the wall. Do it virtually like this.

7
Step 7 of 34
<p>Now measure down 20cm and push the 20cm probe in the same way.</p>

Now measure down 20cm and push the 20cm probe in the same way.

8
Step 8 of 34
<p>Your whole should now look like this.</p>

Your whole should now look like this.

9
Step 9 of 34
<p>Refill the hole with the correct layers in the right order at about the same compaction.</p>

Refill the hole with the correct layers in the right order at about the same compaction.

10
Step 10 of 34
<p>Cable tie the cables back to the unit to the wire or dripper pipe.</p>

Cable tie the cables back to the unit to the wire or dripper pipe.

11
Step 11 of 34
<p>When finished put chicken wire arouthe vine and cables to protect them from animals.</p>

When finished put chicken wire arouthe vine and cables to protect them from animals.

12
Step 12 of 34
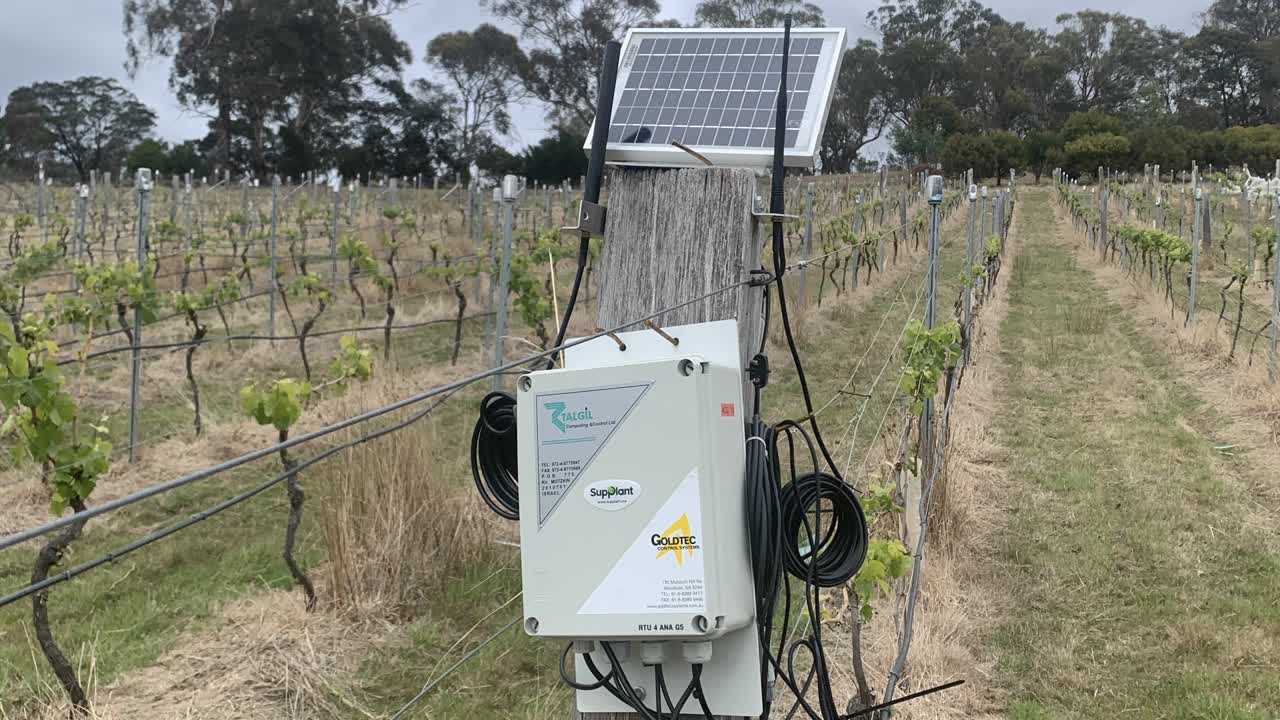
<p>Attach the two units to a post with tech screws like this or to a poll with the supplied U bolts.</p>

Attach the two units to a post with tech screws like this or to a poll with the supplied U bolts.

13
Step 13 of 34
<p>Hand the dendromitor and fruit sensor on a hook out of the way until you are ready to install them.</p>

Hand the dendromitor and fruit sensor on a hook out of the way until you are ready to install them.

14
Step 14 of 34
<p>Remove the cover from the smaller box.</p>

Remove the cover from the smaller box.

15
Step 15 of 34

Pull the red connector out.

16
Step 16 of 34
<p>There is a short connector wire coming out of the big box.
Push the end of the wire up into the little box.</p>

There is a short connector wire coming out of the big box. Push the end of the wire up into the little box.

17
Step 17 of 34
<p>Connect the end wires into the red connector like this.
Red wire on left.
Black next to it.</p>

Connect the end wires into the red connector like this. Red wire on left. Black next to it.

18
Step 18 of 34

Push the red connector back into place. Both boxes power is now connected.

19
Step 19 of 34
<p>Replace the cover on the little box.</p>

Replace the cover on the little box.

20
Step 20 of 34
<p>Remove the cover on the big box.</p>

Remove the cover on the big box.

21
Step 21 of 34

Remove the red connector.

22
Step 22 of 34

Push the wires from the solar panel into the box like this.

23
Step 23 of 34
<p>Wire them into the red connector like this.
Red to the left.
Black on the right hand end.</p>

Wire them into the red connector like this. Red to the left. Black on the right hand end.

24
Step 24 of 34

Push the red connector back into place.

25
Step 25 of 34
<p>Now connect the battery.
The units are now powered up and will start beeping.</p>

Now connect the battery. The units are now powered up and will start beeping.

26
Step 26 of 34
<p>Put the cover back on again.</p>

Put the cover back on again.

27
Step 27 of 34
<p>Face the solar panel in the right direction ( north ) and attach.</p>

Face the solar panel in the right direction ( north ) and attach.

28
Step 28 of 34
<p>Push both aerial connections through the brackets and put the nuts on.</p>

Push both aerial connections through the brackets and put the nuts on.

29
Step 29 of 34
<p>Now attach the aerials.</p>

Now attach the aerials.

30
Step 30 of 34
<p>Tech screw the brackets to the post.</p>

Tech screw the brackets to the post.

31
Step 31 of 34
<p>Click this link to <a href="https://knowby.show/54e464bd-a88c-4973-8b36-540eab32b4c8">attach dendrometer</a></p>

Click this link to attach dendrometer

32
Step 32 of 34
<p>You need to record exactly which box is at which site.
The big box is a RTU4ANA unit
The small box is a RTU2ANA unit</p>

You need to record exactly which box is at which site. The big box is a RTU4ANA unit The small box is a RTU2ANA unit

33
Step 33 of 34
<p>Inside each box are 5 grey dials with arrows pointing to a number.
This unit is:
Network ID 81
RTU ID 001</p>

Inside each box are 5 grey dials with arrows pointing to a number. This unit is: Network ID 81 RTU ID 001

34
Step 34 of 34
<p>These need recorded in the Configuration Form under hardware description.
Make sure they line up with the correct block / location.</p>

These need recorded in the Configuration Form under hardware description. Make sure they line up with the correct block / location.