Knowby
Tyre Doctor
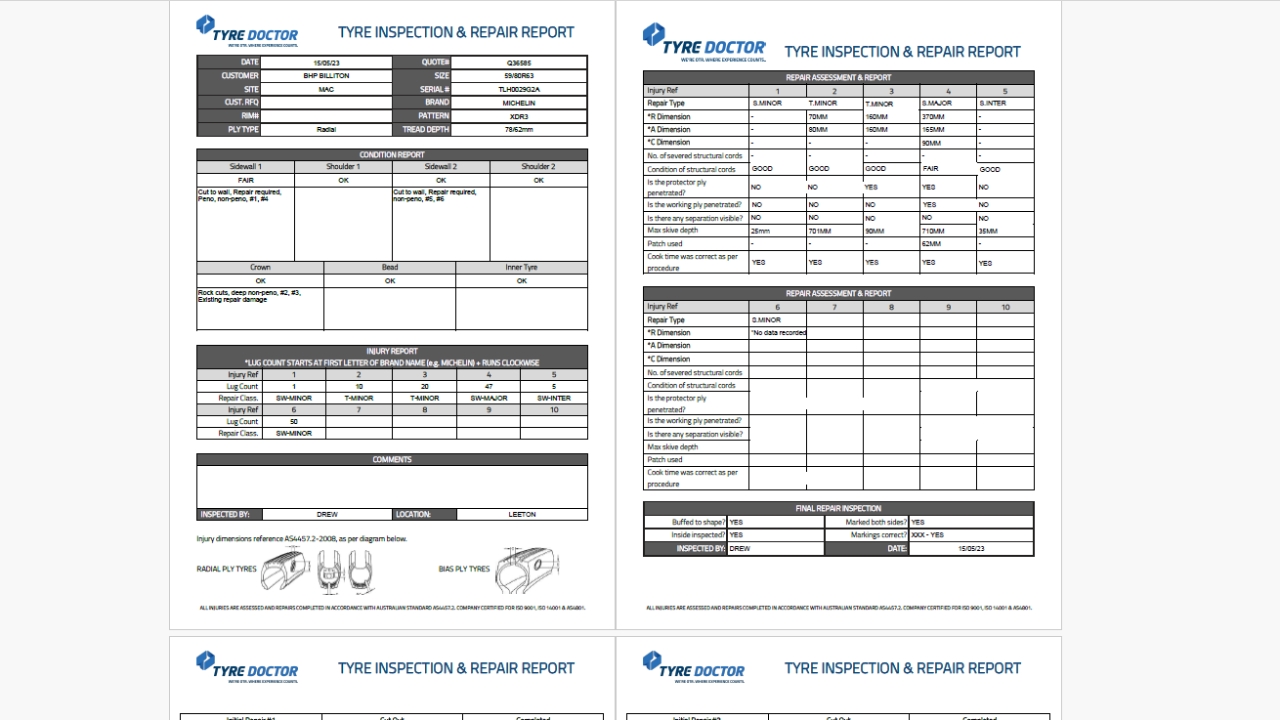
Creating Tyre Repair Reports
How to successfully create a Tyre Repair Report.
How to successfully create a Tyre Repair Report.
1
Step 1 of 13Creating the Report📝 - Step 1
- In smartsheet, head to "Inspection Report".
i.e.
- Leeton Branch
- Hunter Valley (Muswellbrook)
- Mackay
- Kalgoorlie
2
Step 2 of 13Creating the Report📝 - Step 2
- Click on the row of the tyre.
- Select "Generate Documents"
3
Step 3 of 13Creating the Report📝 - Step 3
- Select the third template.
- Download to PDF.
- Rename PDF File.
i.e.
- TR = Tyre Repair.
- Quote Number.
- Customer.
- Tyre Serial Number.
4
Step 4 of 13Creating the Report📝 - Step 4
- Copy (Cut) the file.
- head to the following folder.
Operations - Documents >
b. Tyre Repair Ops - Leeton >
Leeton - Repair Report.
3. Paste the following File.
5
Step 5 of 13Creating the Report📝 - Step 5
- Head to the Inspection Report (Smartsheet)
- On the select row Tick "Report Printed"
- Hit Save (CTRL + S)
6
Step 6 of 13Creating the Report📝 - Step 6
- Open (Operations - Documents)
- Place Q# into Search Bar.
- Open up Tyre Repair Report (PDF)
- Place Side v Side with Documents for easy access.
7
Step 7 of 13Creating the Report📝 - Step 7
- Head to the Right Side Column, Select the Page Break.
- Click on the '+' to Add a File.
- Head to Operations > Tyre Repair Ops - Leeton > Leeton Repair Report.
- CLick on REPAIR REPORT PAGE (NEW).
8
Step 8 of 13Editing the Report🖋️ - Step 1
- Enter in the details for Repair Assessment / Report.
- Copy Inspection Report for the Repair Type.
- Have the Repair Photo's available for Data Entry.
(Found in Operation Documents > Search)
4. Cook Time is always 'YES'
9
Step 9 of 13Editing the Report🖋️ - Step 2
- Enter in Final Repair Inspections.
- Buffed to Shape = Yes (Always)
- Inside Inspected = Yes (Always)
- Markings Both sides = Yes (Always)
- Inspected By = (Same as Top Page!)
- Markings Correct = X or XX or XXX
Majors = XXX
Intermediates = XX
Minors = X
10
Step 10 of 13Editing the Report🖋️ - Step 3
- Head to PDF Edit > Add Image.
- Place Quote Number into Search to bring up photos.
- Allocate photos correctly.
- Damage Photo = 1st.
- Cut Out = 2nd.
- Completed = 3rd.
11
Step 11 of 13Editing the Report🖋️ - Step 4
- Delete the excess pages.
- Click on 'Prepare a Form'
- Press (CTRL + A) on the Keyboard.
- Left Click on any Field.
- Click on 'Properties'.
- Select/Tick ('Ready Only' + 'Locked').
- Save PDF File.
12
Step 12 of 13Editing the Report🖋️ - Step 5
- Cut the PDF File (Repair Report).
- Head to the following.
- Operations Folder >
- b.Tyre Repair Ops - Leeton >
- Leeton - Repair Report >
- e.g. Cadia (Tyre Repair Customer)
4. Paste the Report into the folder.
13
Step 13 of 13Editing the Report🖋️ - Step 6
- Search the Quote Number to access the photos.
- Cut the photos.
- Head to the following.
- Operations Folder >
- b.Tyre Repair Ops - Leeton >
- Leeton - Repair Report >
- z. Photo Archive.
4. Paste the Photos into Archive.
Task Completed!