Knowby Pentair Water
Knowby
Manitowoc - Indigo NXT Clean and Sanitize procedure
Sanitation process quick guide - Indigo NXT
1
Step 1 of 19
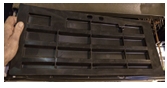
<h3>1.  Remove front panel</h3><p></p><p>Use a Phillips screwdriver to loosen the screw(s) securing the door. Do not remove screw(s) completely; they are secured to prevent loss.</p>

1. Remove front panel

Use a Phillips screwdriver to loosen the screw(s) securing the door. Do not remove screw(s) completely; they are secured to prevent loss.
2
Step 2 of 19
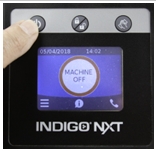
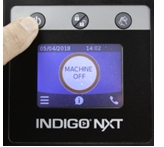
<h3>2. Turn Ice Machine Off</h3><p></p><p>After ice has fallen from the evaporator, turn the ice machine OFF by pressing the power button.</p>

2. Turn Ice Machine Off

After ice has fallen from the evaporator, turn the ice machine OFF by pressing the power button.
3
Step 3 of 19
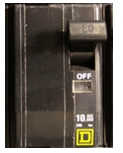
<h3>3. Disconnect main power at the breaker or power point</h3><p></p><p><strong><em>WARNING </em></strong>Do not begin cleaning other parts of the ice machine until line voltage is disconnected from the ice machine.</p><p></p>

3. Disconnect main power at the breaker or power point

WARNING Do not begin cleaning other parts of the ice machine until line voltage is disconnected from the ice machine.
4
Step 4 of 19
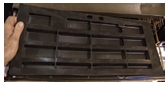
<ol start="4"><li><p><strong>Remove top cover and evaporator dust cover. </strong></p></li></ol><p></p><p>Lift top cover to remove, then lift and remove evaporator dust cover.</p>
  1. Remove top cover and evaporator dust cover.

Lift top cover to remove, then lift and remove evaporator dust cover.
5
Step 5 of 19
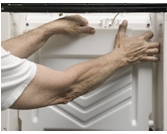
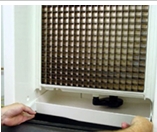
<h3>5. Remove water curtain.</h3><p></p><p>Gently flex the curtain in the center and remove it from the right side. Slide the left pin out.</p><p></p>

5. Remove water curtain.

Gently flex the curtain in the center and remove it from the right side. Slide the left pin out.
6
Step 6 of 19
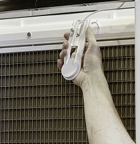
<h3><strong>6 Remove water trough.</strong></h3><p></p><p>Depress tabs on right and left side of the water trough. Allow front of water trough to drop as you pull forward to disengage the rear pins.</p>

6 Remove water trough.

Depress tabs on right and left side of the water trough. Allow front of water trough to drop as you pull forward to disengage the rear pins.
7
Step 7 of 19
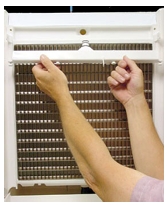
<p><strong>7. Remove the ice thickness probe.</strong></p><p>Compress the hinge pin on the top of the ice thickness probe. Pivot the ice thickness probe to disengage one pin then the other</p>

7. Remove the ice thickness probe.

Compress the hinge pin on the top of the ice thickness probe. Pivot the ice thickness probe to disengage one pin then the other
8
Step 8 of 19
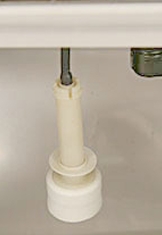
<p><strong>8. Remove the water distribution tube.</strong></p><p>Loosen the two outer screws (do not remove screws completely; they are retained to prevent loss). Pull forward on the distribution tube to release from slip joint. Remove the water distribution tube. Disassemble the distribution tube by loosening the two (2)middle thumbscrews and dividing the distribution tube into two pieces. Remove both water distribution tubes on 48” models</p>

8. Remove the water distribution tube.

Loosen the two outer screws (do not remove screws completely; they are retained to prevent loss). Pull forward on the distribution tube to release from slip joint. Remove the water distribution tube. Disassemble the distribution tube by loosening the two (2)middle thumbscrews and dividing the distribution tube into two pieces. Remove both water distribution tubes on 48” models
9
Step 9 of 19
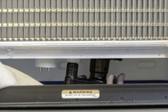
<h3>9. Remove the water level probe. </h3><p></p><p>Pull the water level probe straight down to disengage. Lower the water level probe to obtain access. The water level probe can be sanitized at this point without complete removal. If complete removal is desired, disconnect the ice thickness control wire from the control board. </p><p></p><p><span style="font-size: 18px; line-height: 1.4;"><em>NOTE: Some models allow disconnection of the wire lead from the water level probe. Lower the water level probe until the wiring connector is visible, then disconnect the wire lead connector from the water level probe and remove from the ice machine.</em></span></p>

9. Remove the water level probe.

Pull the water level probe straight down to disengage. Lower the water level probe to obtain access. The water level probe can be sanitized at this point without complete removal. If complete removal is desired, disconnect the ice thickness control wire from the control board.

NOTE: Some models allow disconnection of the wire lead from the water level probe. Lower the water level probe until the wiring connector is visible, then disconnect the wire lead connector from the water level probe and remove from the ice machine.
10
Step 10 of 19
<h3>10. Remove the water pump. </h3><p></p><p>Grasp pump and pull straight down on pump assembly until disengaged and the electrical connector is visible. Disconnect the electrical connector. Remove the water pump assembly from ice machine.</p>

10. Remove the water pump.

Grasp pump and pull straight down on pump assembly until disengaged and the electrical connector is visible. Disconnect the electrical connector. Remove the water pump assembly from ice machine.
11
Step 11 of 19
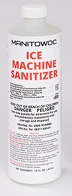
<h1>WARNING</h1><p>Wear protective gloves and safety goggles when handling ice machine sanitizer.</p><p></p><p>Ice machine sanitizer disinfects and removes algae and slime. Sanitizer must be used a minimum of once every six months.</p><p></p><p>Use of an approved filtration system with a polyphosphate scale inhibitor is highly recommended for all ice machine installations and will significantly reduce the need to descale in hard water applications.</p><p></p><p>For Descaling of Manitowoc ice machines please see separate detailed de-scaling and sanitization process. </p>

WARNING

Wear protective gloves and safety goggles when handling ice machine sanitizer.

Ice machine sanitizer disinfects and removes algae and slime. Sanitizer must be used a minimum of once every six months.

Use of an approved filtration system with a polyphosphate scale inhibitor is highly recommended for all ice machine installations and will significantly reduce the need to descale in hard water applications.

For Descaling of Manitowoc ice machines please see separate detailed de-scaling and sanitization process.
12
Step 12 of 19
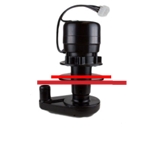
<h3>CAUTION</h3><p></p><p>Do not immerse the water pump motor or electrical connector in liquids. Only soak the water pump impeller and impeller housing. Do not immerse above the red line on the graphic.</p><p></p><h3>Notice</h3><p>Electrical connectors must never be exposed to any liquids.</p>

CAUTION

Do not immerse the water pump motor or electrical connector in liquids. Only soak the water pump impeller and impeller housing. Do not immerse above the red line on the graphic.

Notice

Electrical connectors must never be exposed to any liquids.
13
Step 13 of 19
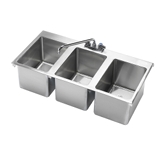
<h3>13. Sanitize and rinse plastic parts.</h3><p></p><p>Mix 60 ml of ice machine sanitizer (Part No. 9405663) with 11 litres of water in a three compartment sink. Add twenty litres of water to third sink compartment. Place plastic parts into the sanitizer solution and allow to soak for at least 5 minute.</p><p></p><h3>Notice</h3><p>As mentioned in step 12 do not immerse the water pump motor or electrical connector in liquids.</p><p></p>

13. Sanitize and rinse plastic parts.

Mix 60 ml of ice machine sanitizer (Part No. 9405663) with 11 litres of water in a three compartment sink. Add twenty litres of water to third sink compartment. Place plastic parts into the sanitizer solution and allow to soak for at least 5 minute.

Notice

As mentioned in step 12 do not immerse the water pump motor or electrical connector in liquids.
14
Step 14 of 19
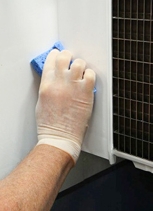
<h3>14. Sanitize surface areas of ice machine.</h3><p></p><p> Use a clean sanitizer-soaked cloth to sanitize ice machine surfaces, including the side walls, base (area above water trough), and the bin or dispenser. Spray surfaces with sanitizer solution and wipe down. </p><p>Manitowoc sanitizer is classified as a no rinse sanitizer - Do not rinse sanitized surfaces</p>

14. Sanitize surface areas of ice machine.

Use a clean sanitizer-soaked cloth to sanitize ice machine surfaces, including the side walls, base (area above water trough), and the bin or dispenser. Spray surfaces with sanitizer solution and wipe down.

Manitowoc sanitizer is classified as a no rinse sanitizer - Do not rinse sanitized surfaces
15
Step 15 of 19
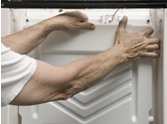
<h3>15. Reinstall all removed parts.</h3><p></p><p>Return the parts to the ice machine and reassemble. (Perform Steps 4 to 10 in reverse order).</p><p></p><ol><li><p>Water pump</p></li><li><p>Water level probe</p></li><li><p>water distribution tube</p></li><li><p>Ice thickness probe</p></li><li><p>Water trough</p></li><li><p>Water Curtain</p></li><li><p>Top cover and evaporator dust cover</p></li></ol><h3>Notice </h3><p>When re-installing the water level probe, ensure the rubber gasket is sealed against the base of the ice machine and that any electrical connectors or wires remain free from moisture. </p>

15. Reinstall all removed parts.

Return the parts to the ice machine and reassemble. (Perform Steps 4 to 10 in reverse order).

  1. Water pump

  2. Water level probe

  3. water distribution tube

  4. Ice thickness probe

  5. Water trough

  6. Water Curtain

  7. Top cover and evaporator dust cover

Notice

When re-installing the water level probe, ensure the rubber gasket is sealed against the base of the ice machine and that any electrical connectors or wires remain free from moisture.
16
Step 16 of 19
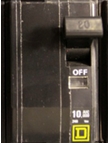
<h3>16. Restore power to the ice machine. </h3><p></p><p>Restore power to the ice machine.</p><p></p>

16. Restore power to the ice machine.

Restore power to the ice machine.
17
Step 17 of 19
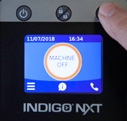
<h3>17. Press CLEAN button.</h3><p></p><p>Follow the screen prompts to start the sanitize cycle. Wait until the prompt to add sanitizer is displayed (approximately 2 minutes) then continue with next step.</p>

17. Press CLEAN button.

Follow the screen prompts to start the sanitize cycle. Wait until the prompt to add sanitizer is displayed (approximately 2 minutes) then continue with next step.
18
Step 18 of 19
<h3>18. Add Manitowoc sanitizer </h3><p></p><p>Add sanitizer (Part No. 9405653) to the water trough. Add the correct amount of sanitizer for your model by pouring between the evaporator and water curtain. The bottle is marked with 60ml (2 oz) graduations.</p>

18. Add Manitowoc sanitizer

Add sanitizer (Part No. 9405653) to the water trough. Add the correct amount of sanitizer for your model by pouring between the evaporator and water curtain. The bottle is marked with 60ml (2 oz) graduations.

19
Step 19 of 19
<p></p><p></p>