Knowby
How to use the Geocert Datalogger
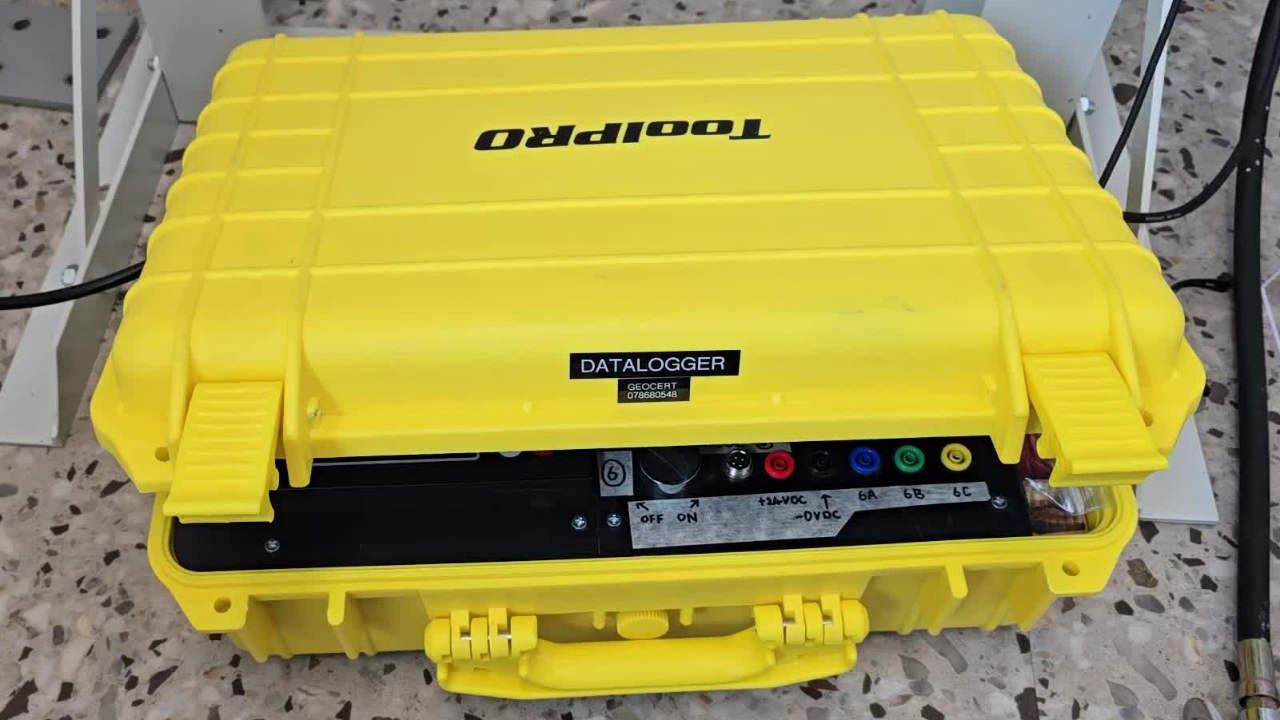
This is a quick video to show how to use the Geocert Data Logger in the yellow case with the sensors.
1
Step 1 of 28

This is a quick tutorial to show how to use the Geocert Data Logger in the yellow case.

2
Step 2 of 28

So, opening it up, we have our power input over in the back corner.

3
Step 3 of 28
This is our on and off switch. It's operated by this data logger keyed input here to shut it off.
4
Step 4 of 28

Just take the key out. If the key can't be removed, it's in the on position.

5
Step 5 of 28

We have some meters and monitors, gauges here for various readouts, dont be too worried about what they all do. Just for monitoring voltages etc in the kit.

6
Step 6 of 28

We have the channel on/off controls here. Off is to the left, and on is to the right.

7
Step 7 of 28

Then we have our channel input points down here.

8
Step 8 of 28

I've currently got the pressure sensor and the laser displacement sensor plugged in.

Sensors go in the socket as they are labelled to the right of the plug to ensure that the setup values in the recorder correlate with what they see from the input.

9
Step 9 of 28
So now we're going to turn it on.
10
Step 10 of 28
We switch it on and you'll get a green AC light come on.
11
Step 11 of 28

Then you'll have these gauges all light up. The recorder will go through a boot-up procedure.

Let this complete before moving on.

12
Step 12 of 28
Then you will start to see these values here.
13
Step 13 of 28
When you see the hashes that means that the channel is not turned on. It's not reading anything at the moment.
14
Step 14 of 28

Once you see the gauges turn up and you've got voltage coming through, you can then go to the channel to which you want to use and turn it on.

15
Step 15 of 28
We're going to turn on the pressure sensor and the laser displacement sensor.
16
Step 16 of 28
You'll see them activate on the recorder.
17
Step 17 of 28

These readings will change depending on the value of the device the sensor is reading.

Give them 30 seconds to stabilise.

18
Step 18 of 28

They log data into this recorder at an interval of one second per reading.

19
Step 19 of 28
If you need to use the marker channel, there is a signal generator in the system which can be activated by turning on channel one.
20
Step 20 of 28
That will give a 4 to 20 milliamp signal in here that you can change through the knob.
21
Step 21 of 28
So decrease and you can press it in and that loads it and stores it in its memory.
22
Step 22 of 28
Now you'll see it's come down to 8 there. That can be used to mark different channels and events in time by changing it to a new value that will show up on the data readout.
23
Step 23 of 28
To turn this off, just turn the channel off and the value will disappear.
24
Step 24 of 28

To just monitor the outputs from the device readout/ screen, you shouldn't need this function. It will make the data set recorded clearer if you leave it off.

25
Step 25 of 28

Once you've finished using the device, make sure you turn the channels off.

26
Step 26 of 28
The sensors will stop transmitting and the data instrument will go back to hashes on all inputs.
27
Step 27 of 28
When you power it down, switch off the input, make sure all of the gauges are de-energized which means no lights showing before you remove the power socket.
28
Step 28 of 28

That is how to use the Geocert DataLogging sensor case.

Any questions please email: info@geocert.co.nz 

Or call 078680548.