Knowby Metalform
Knowby
T&F loadCell and Incab Glue proccess
1
Step 1 of 8
<p>Note: Before applying glue, please ensure that all components are functioning correctly. Verify that each PCB and microcontroller operates properly. Check for any loose components and make sure everything is free of dust.</p>

Note: Before applying glue, please ensure that all components are functioning correctly. Verify that each PCB and microcontroller operates properly. Check for any loose components and make sure everything is free of dust.

2
Step 2 of 8
<p>Start by grabbing the MICRO USB.Refer to the picture for an overview of the required parts.</p>

Start by grabbing the MICRO USB.Refer to the picture for an overview of the required parts.

3
Step 3 of 8
<p>Assemble each component of the MICRO USB and ensure it is securely tightened. Attach the RAM mount using four M5 x 10 socket cap screws (SS), and then install the pressure relief valve.</p>

Assemble each component of the MICRO USB and ensure it is securely tightened. Attach the RAM mount using four M5 x 10 socket cap screws (SS), and then install the pressure relief valve.

4
Step 4 of 8
<p>Preparation Enclosures.Clean the edges of both the front and back enclosures with isopropyl alcohol.
Apply tape around the edges of each. And, Trim any excess tape to ensure a clean and precise surface.</p>

Preparation Enclosures.Clean the edges of both the front and back enclosures with isopropyl alcohol. Apply tape around the edges of each. And, Trim any excess tape to ensure a clean and precise surface.

5
Step 5 of 8
<p>Apply primer to the channels of both enclosures to improve glue adhesion. Also, make sure the monitor cable has a rubber washer installed.
Tip: If you haven’t applied the glue yet, reapply the primer after 30 minutes.</p>

Apply primer to the channels of both enclosures to improve glue adhesion. Also, make sure the monitor cable has a rubber washer installed. Tip: If you haven’t applied the glue yet, reapply the primer after 30 minutes.

6
Step 6 of 8
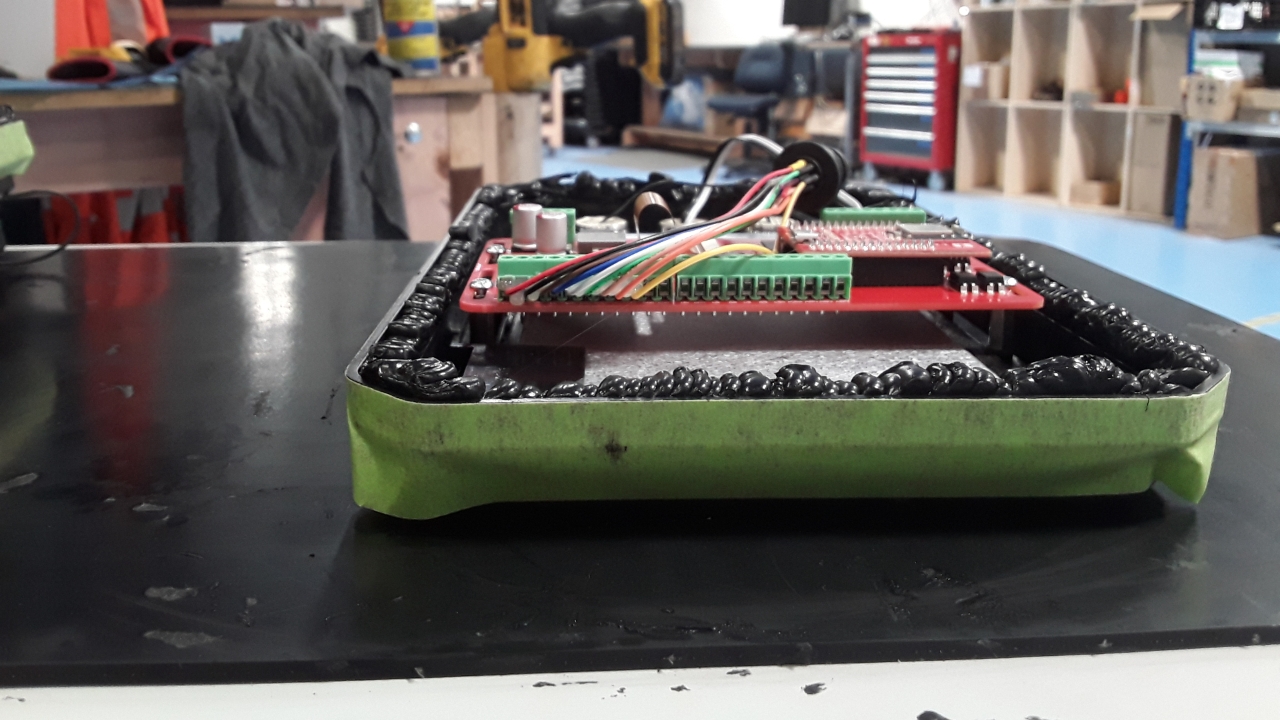
<p>Important Step: Connect the MICRO USB to the Board. Apply glue generously to both channels. You’ll know you’ve applied enough glue when, upon closing the monitor, glue starts to squeeze out from the edges. If this doesn’t happen, add more glue to the channel between the enclosures.</p>

Important Step: Connect the MICRO USB to the Board. Apply glue generously to both channels. You’ll know you’ve applied enough glue when, upon closing the monitor, glue starts to squeeze out from the edges. If this doesn’t happen, add more glue to the channel between the enclosures.

7
Step 7 of 8
<p>Remove excess glue with a spatula for a clean finish, then use a plastic bag sprayed with silicone to smooth the surface. Afterward, carefully remove the tape and clean any remaining glue residue from the surfaces.</p>

Remove excess glue with a spatula for a clean finish, then use a plastic bag sprayed with silicone to smooth the surface. Afterward, carefully remove the tape and clean any remaining glue residue from the surfaces.

8
Step 8 of 8
<p>When the glue is completely dry. Remove with Isopropel Alcohol any excess of glue . Make it clean and nice as new! Also check the every cables are tigth anougth to prevent water come inside .</p>

When the glue is completely dry. Remove with Isopropel Alcohol any excess of glue . Make it clean and nice as new! Also check the every cables are tigth anougth to prevent water come inside .