
Cut the cable ties securing the BSM loom to the bumper.
Pop the reverse sensors out of the housings.
Remove the screws holding the BSM to the bumper.
Remove the screws holding the bumper to the frame to pull the BSM loom out.
Unplug the number plate light & reverse light.
Take the BSM loom out.
Make sure you remember or write down which side is passengers and drivers side.
Remove the reverse light from the bumper and cut the plug from it, leaving as much wiring on the plug as possible.
Unplug your BSM and fasten it to the BSM spacer using stainless steel M6x10 button heads and nylocs with anti seize.
Make sure the orientation of the spacer is correct depending on whether you are fastening the drivers or passengers BSM on.
Next, fasten the spacer to the mount plate using stainless steel M6x16 button heads and anti seize.
Feed the BSM plug and reverse sensors through the cover plate and clip the key transponder to the back.
Plug the BSM back in and push the reverse sensors into the reverse housings in the face plate.
Place the mount plate into the face plate.
Fasten the mount plate to the face plate using stainless steel M6x16 button heads with anti seize.
Take the number plate light wires and strip them back. Take 3mm twin core and solder splice red to red and black to black.
Once you have solder spliced them, cover them with some black heat shrink.
Ensure that the BSM and BSM spacer is in the correct orientation.
Fasten the plastic cover plates to the face plate using stainless steel M6x16 button heads & anti seize.
Repeat these steps to the other BSM and reverse sensors.
Your BSM and reverse sensor kit should now look like this.
Take your taillights and feed the loom through the large hole on the bumper of the tray.
Take your BSM kit and mount them to the tray using the bolts on the taillight. Fasten using the flat washers, spring washers and nuts.
Plug your taillight back into the main loom.
Take your BSM & reverse sensor plug and plug back into the main loom.
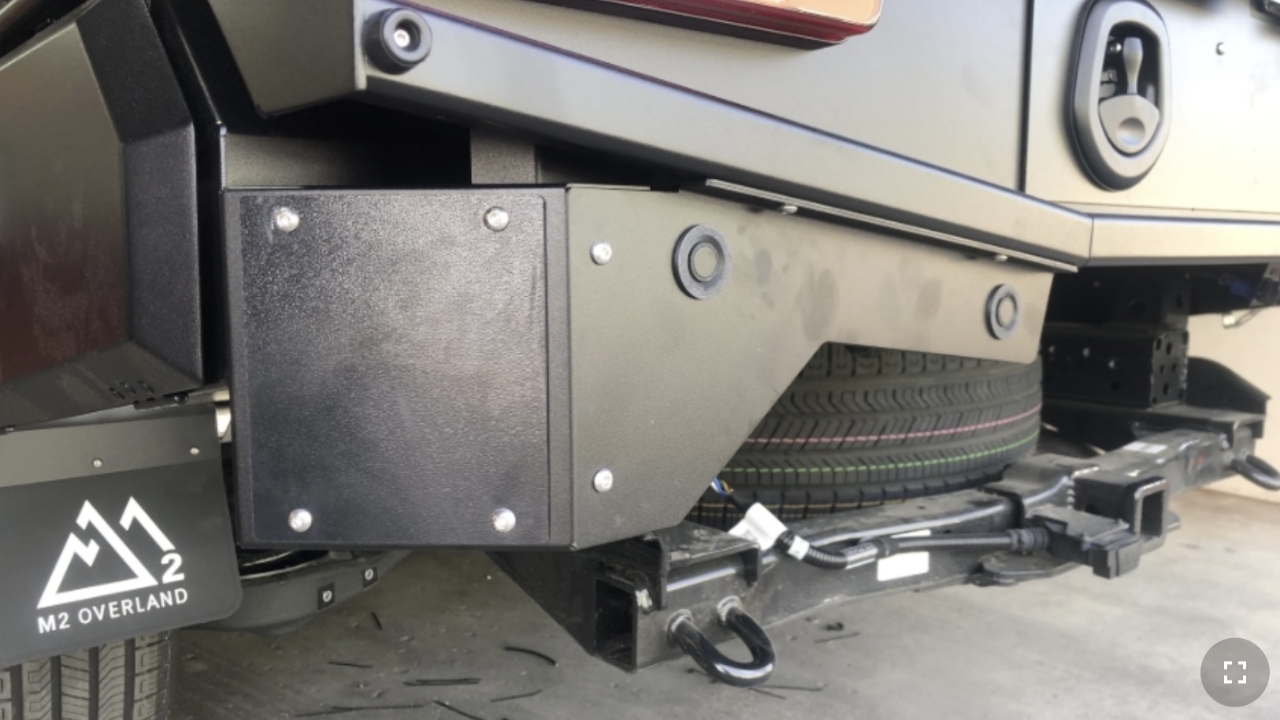
Your taillight and BSM set up should be looking like so.
Cut the BSM loom off the chassis to allow from more slack and plug the BSM back in to the main vehicle BSM loom.
To finish fastening the BSM to the tray, place x2 stainless steel M6x16 button heads and nylocs with anti seize up through the BSM & tray.
Ensure that the gap between your BSM mount and undermount toolbox is equal to the gap between the undermount toolbox & guard.
Begin cable tying loose wires to the tray.
Make sure that all wires & looms and secured away from any hot or moving parts.
Take the 3mm twin core from the BSM and strip the wires back.
Solder splice the red wire to the brown wire on the number plate light, then black to white.
Cover the splices with electrical tape and fasten to the tray with a cable tie.