Planning for dry weather is crucial when it comes to outdoor projects like deck painting or staining. Adequate dry time ensures the best adhesion and longevity of the finish. It might indeed be a bit tricky to coordinate, but the results will be worth the effort.
For the job, gather tools like a jet or garden hose, a stiff-bristled broom, a decent-sized brush for oil application, appropriate clothing (including gloves), and if you plan on scrubbing on your hands and knees, consider using a garden kneeler for comfort.
Start by giving the deck a thorough sweep. Pay special attention to the grooves in decking, as they tend to collect a surprising amount of dirt and debris.
Use Decking Cleaner and Reviver by pouring it directly onto the decking in manageable patches. If needed, consider decanting it into an easier-to-pour container.
After application, scrub the deck thoroughly with your broom. This should create a lather that might look quite dirty, which is always satisfying. Leave it on for 15 to 20 minutes before rinsing it off.
Here's a tip: if you're working on a large area, consider rinsing as you go, especially on warm days. Ideally, you don't want the reviver to dry completely.
For rinsing, a power washer is great, but keep a safe distance to avoid stirring up wood fibers. If you don't have one, a standard garden hose with a spray nozzle works well.
Let it dry to spot any missed areas after the initial scrub, then take a well-deserved tea break.
This is also a good opportunity to inspect the condition of the planks and screws and replace any that may be necessary.
Next, lightly dampen the deck in preparation for applying the Wood Reviver Gel. Grab your tub, distractions, and a hand brush.
This is potent, so wear clothes you don't mind to pollute and a pair of gloves.
While scrubbing on your hands and knees may seem less convenient, it's the most effective method for giving each plank a thorough cleaning compared to using a broom.
One litre (1L) should be sufficient to cover an area of 10 square meters.
Again, with this step, aim to create a satisfying mess as you start to observe the color returning to the wood.
Allow it to work its magic for 20 minutes before thoroughly rinsing it off. Leave the decking to dry for at least 48 hours.
Upon your return to the decking, you should notice a significant improvement in the color and cleanliness of the wood.
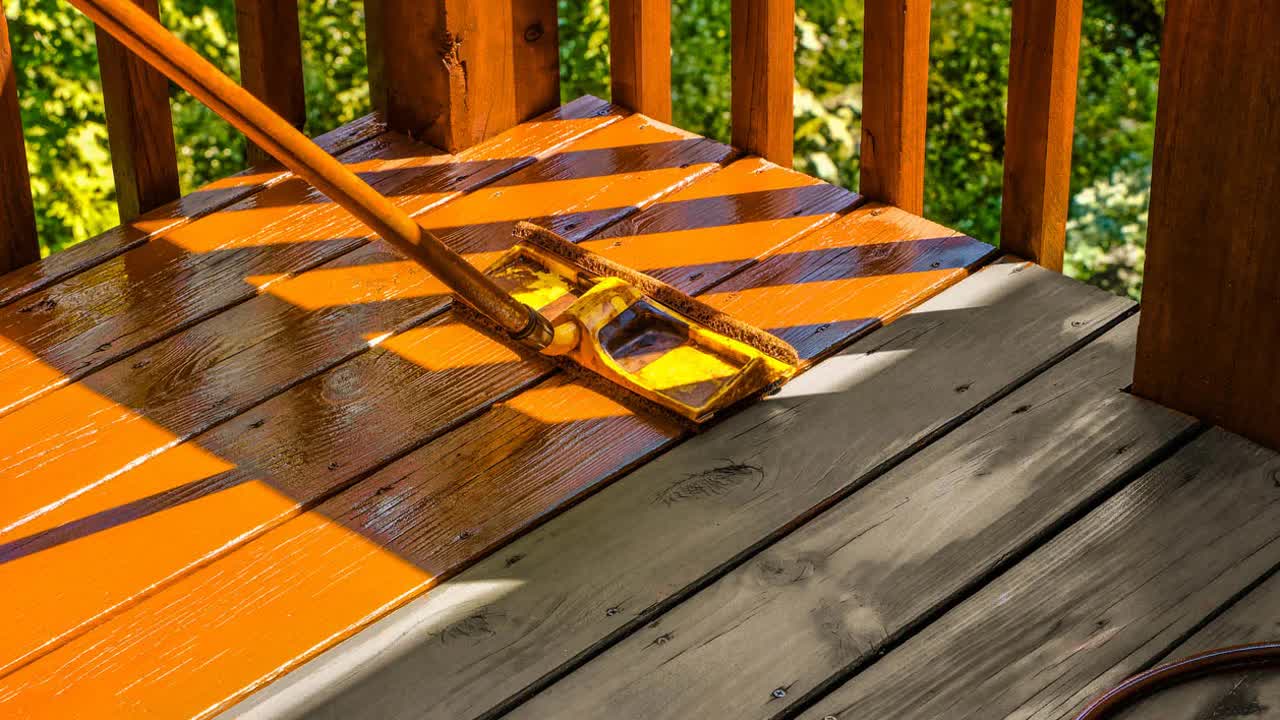
Before applying the first coat of oil, sweep the deck again to clear any new debris. Now, for the next step, open the tin of Decking Oil and stir it thoroughly.
For your guidance, it's recommended to conduct a test area. This ensures everyone is pleased with the color and also allows you to become familiar with how the oil behaves during application.
Use a decent-sized brush, making sure to work thoroughly into the grooves and ends of the decking planks. The oil goes on easily and instantly enhances the appearance.
Wipe off any excess with a microfiber cloth and allow it to dry for 12 hours before applying the second coat. Once again, leave it for 12 hours before enjoying your newly revived deck.
Enjoy your newly restored outdoor space!