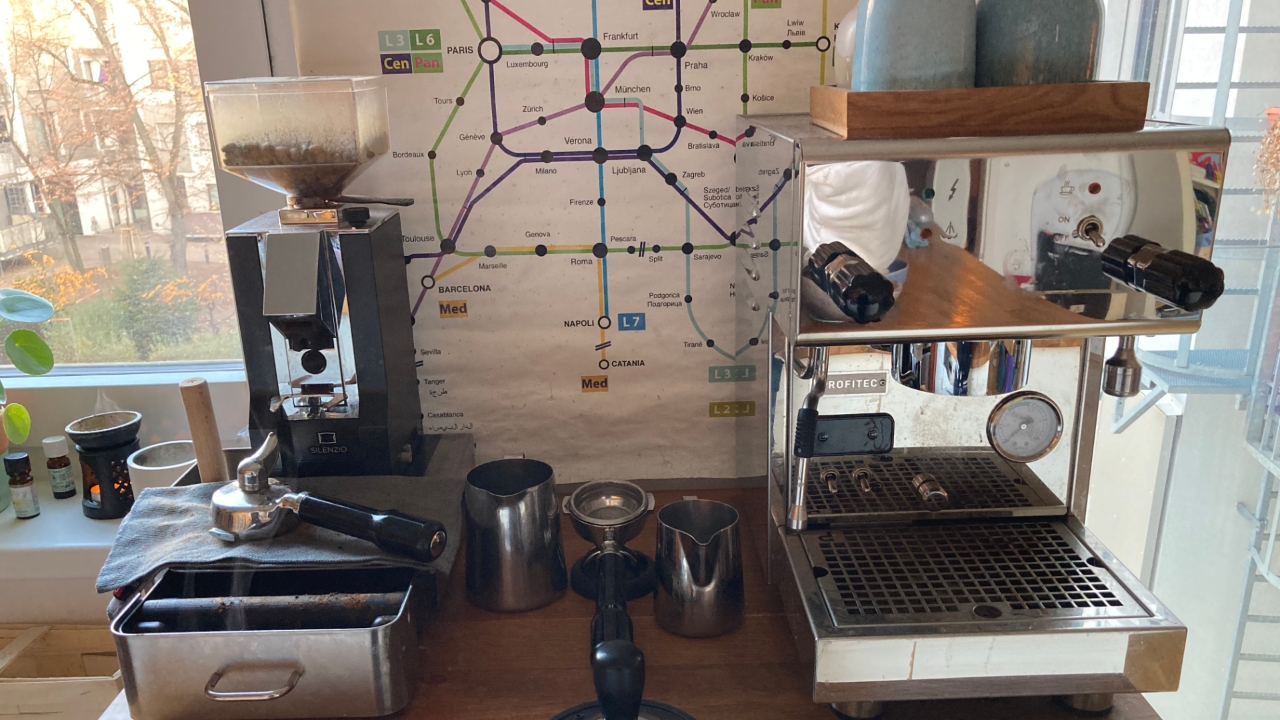
Turn on the machine by flipping both the “Brew” and “Steamer” switches to the ON position.

Wait until the temperature reaches at least 91°C and the pressure gauge moves into the green zone.
Attach the group head by inserting it and turning it to the right until it is secure. Ensure it is snug but not overly tightened.
- Place a cup under the portafilter.
- Turn on the “Brew” switch and let hot water fill the cup for 5-10 seconds to warm it.
- Turn off the “Brew” switch.
Remove the portafilter and discard the water into the drip tray.
Thoroughly dry the filter, ensuring it is completely dry before proceeding with coffee grinding.
- Place the portafilter on the metal seat of the grinder.
- Push it gently to activate the grinder, allowing ground coffee to fill the portafilter.
Adjust the amount of coffee by gently shaking or tapping the portafilter against the rubber pole to pre-flatten the grounds. The portafilter should be filled to 75-80% of its capacity.
Use the tamper to firmly press and flatten the ground coffee evenly in the portafilter.
Ensure the surface of the tamped coffee is level and smooth. Adjust if necessary to achieve an even surface.
- Attach the portafilter to the brew head.
- Turn the “Brew” switch on, and immediately place the cup underneath the brew.
- It’s important to place the cup right away to prevent the ground coffee from burning before the brewing water begins flowing.
Allow the brew to run for 25-30 seconds, then turn off the “Brew” switch.
After 25-30 seconds of brewing, turn off the “Brew” switch.
Remove the cup and detach the portafilter. Knock the coffee residue into the dedicated waste tray.

Prepare the milk and the metal frothing jug. Ensure the jug is clean and ready for steaming.
Purge any leftover water from the steamer wand before frothing the milk. This helps ensure the steam is dry and at the correct temperature for frothing.
Turn the steamer off once all the leftover water has been purged.
Pour milk into the metal jug
Place the metal frothing jug so that the steamer wand is positioned inside the jug, just below the surface of the milk.

Position the nozzle of the steamer so that it gently touches the surface of the milk. This helps create the desired froth and texture.
- Turn the steamer on and adjust the jug and nozzle so that it stays just at the surface of the milk while frothing.
- Periodically touch the metal jug to monitor the temperature. Once it becomes too hot to touch, this indicates the milk has reached the desired temperature. Turn the steamer off.
- Your milk froth is now ready.
Before pouring the frothed milk, gently knock the jug 3-4 times to remove any large bubbles. Once done, you can pour the frothed milk into the coffee.

Coffee is served