
Knowby
SAI1.xx Installation Instructions
Describes the process of installing the SAI1.xx Suction into a bath tub
1
Step 1 of 11
<h1>Tools Required</h1><p></p><ul><li><p>3" Hole Saw&nbsp; (76mm)</p></li><li><p>Drill</p></li><li><p>Installation Tool - Part No 500109</p></li><li><p>Silicant Sealant</p></li><li><p>Caulking Gun</p></li><li><p>PVC Solvent Cement</p></li></ul><p></p>

Tools Required

  • 3" Hole Saw  (76mm)

  • Drill

  • Installation Tool - Part No 500109

  • Silicant Sealant

  • Caulking Gun

  • PVC Solvent Cement

2
Step 2 of 11
<h1>STEP 1</h1><p></p><p>Cut a 3" (76 mm) hole through the tub wall using a hole saw or suitable tool.</p><p></p><blockquote><p>CHECK</p><p>✔ Remove any burrs from the edge of the hole.</p></blockquote><p></p>

STEP 1

Cut a 3" (76 mm) hole through the tub wall using a hole saw or suitable tool.

CHECK

✔ Remove any burrs from the edge of the hole.

3
Step 3 of 11
<h1>STEP 2</h1><p></p><p>Apply a continuous bead of silicone sealant around the edge of the hole at the back of the tub.</p><p></p><p>Alternatively, apply the silicone sealant to the flange of the suction elbow.</p><p></p><p></p>

STEP 2

Apply a continuous bead of silicone sealant around the edge of the hole at the back of the tub.

Alternatively, apply the silicone sealant to the flange of the suction elbow.

4
Step 4 of 11
<h1>STEP 3</h1><p></p><p>Apply a continuous bead of silicone sealant to the back face of the mounting flange.</p><p></p><p></p><p></p><p></p><p></p>

STEP 3

Apply a continuous bead of silicone sealant to the back face of the mounting flange.

5
Step 5 of 11
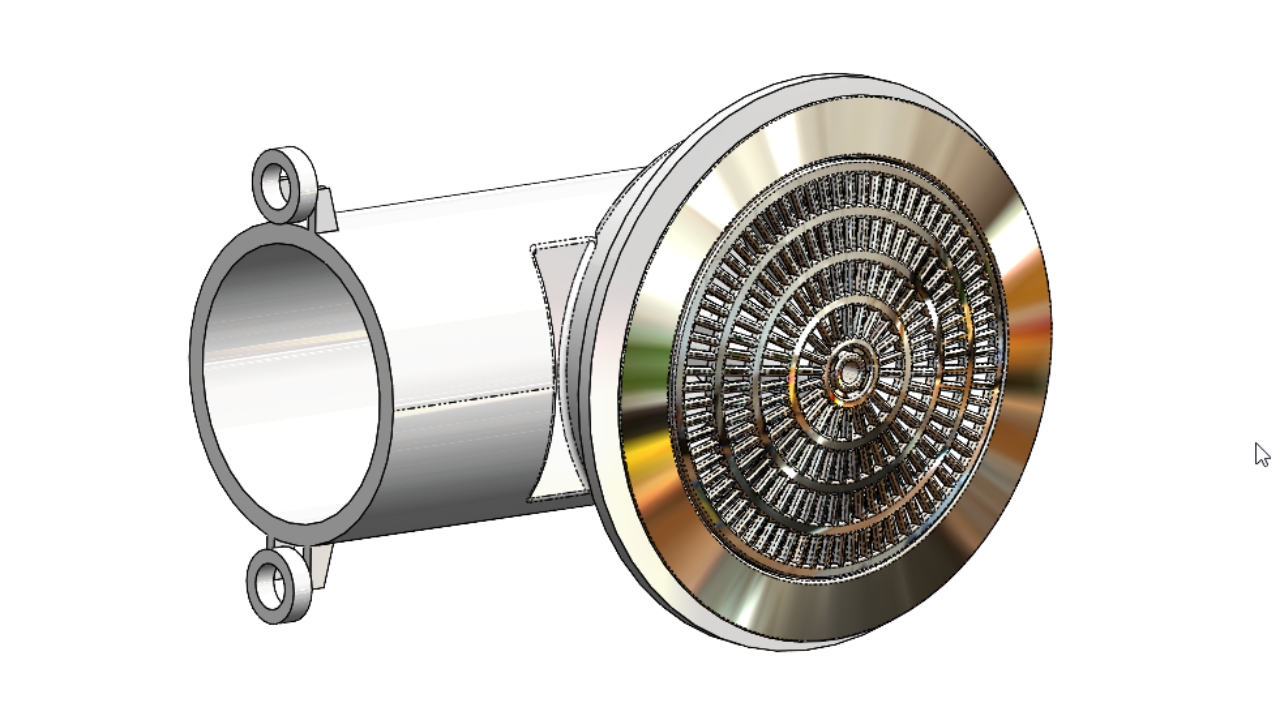
<h1>STEP 4</h1><p>Position the suction elbow behind the tub, aligned with the hole.<br></p><p>Insert the wall flange with mounting trim into the hole from inside the tub.<br></p><p>Screw the wall flange into the jet body.&nbsp;</p>

STEP 4

Position the suction elbow behind the tub, aligned with the hole.

Insert the wall flange with mounting trim into the hole from inside the tub.

Screw the wall flange into the jet body. 

6
Step 6 of 11
<h1>STEP 5</h1><p>Using the installation tool (Part No. 500109), tighten the wall flange into the suction body.</p><p></p><blockquote><p>CHECK</p><p>✔ Metal flange fully seated against   the tub wall.</p><p>✔ No gap or sharp edges.</p><p></p></blockquote><p></p>

STEP 5

Using the installation tool (Part No. 500109), tighten the wall flange into the suction body.

CHECK

✔ Metal flange fully seated against the tub wall.

✔ No gap or sharp edges.

7
Step 7 of 11
<h1>STEP 6</h1><p>Tighten until both flanges contact the tub wall, then tighten a further maximum of 1/4 turn.</p><blockquote><h2><strong>⚠</strong> CRITICAL CHECK</h2><p>Do not overtighten</p><p>Overtightening may cause distortion and affect fit</p></blockquote><p></p>

STEP 6

Tighten until both flanges contact the tub wall, then tighten a further maximum of 1/4 turn.

CRITICAL CHECK

Do not overtighten

Overtightening may cause distortion and affect fit

8
Step 8 of 11
<h1>STEP 7</h1><p>Align the stub on the back of the suction cover with the centre hole in the wall flange.</p><p>Push firmly with the palm of your hand until it snaps into place.</p><p></p><blockquote><p>CHECK</p><p>✔Ensure the cover is correctly aligned before pushing.</p><p>✔The cover should snap into place when properly fitted.</p><p><br></p><p>The cover should snap into place when properly fitted.</p></blockquote><p></p>

STEP 7

Align the stub on the back of the suction cover with the centre hole in the wall flange.

Push firmly with the palm of your hand until it snaps into place.

CHECK

✔Ensure the cover is correctly aligned before pushing.

✔The cover should snap into place when properly fitted.


The cover should snap into place when properly fitted.

9
Step 9 of 11
<h1>STEP 8</h1><p>Apply PVC solvent cement and glue the air breather tube onto the nipple.</p><p></p><blockquote><p><span style="font-size: 30px; line-height: 1.4;">⚠️</span>CRITICAL CHECK</p><p>Ensure the hole is not blocked by glue.</p><p>This is a safety feature and must remain clear.</p></blockquote><p></p>

STEP 8

Apply PVC solvent cement and glue the air breather tube onto the nipple.

⚠️CRITICAL CHECK

Ensure the hole is not blocked by glue.

This is a safety feature and must remain clear.

10
Step 10 of 11
<h1>STEP 9</h1><p>Mount the Hartford loop fitting high under the bath flange, above the water line.</p><p>Apply PVC solvent cement and glue it into the end of the air breather tube.</p><p>Secure in place using a screw or cable tie.</p><p></p><blockquote><p>Check</p><p>✔ Ensure the Hartford loop is securely fixed for long-term use.</p><p>✔ Ensure it will not come loose.</p></blockquote><p></p>

STEP 9

Mount the Hartford loop fitting high under the bath flange, above the water line.

Apply PVC solvent cement and glue it into the end of the air breather tube.

Secure in place using a screw or cable tie.

Check

✔ Ensure the Hartford loop is securely fixed for long-term use.

✔ Ensure it will not come loose.

11
Step 11 of 11
<p><span style="font-size: 30px; line-height: 1.4;">INSTALLATION COMPLETE</span></p><p>Ensure all components are correctly fitted and secure.</p><p>Confirm all connections are sealed and free from leaks.</p><blockquote><blockquote><p>FINAL CHECK</p><p>✔ All parts are installed and secure</p><p>✔ No gaps, misalignment, or loose components</p><p>✔ Air breather and Hartford loop are clear and correctly positioned</p><p>✔ No leaks after testing</p></blockquote></blockquote><p></p><p></p>

INSTALLATION COMPLETE

Ensure all components are correctly fitted and secure.

Confirm all connections are sealed and free from leaks.

FINAL CHECK

✔ All parts are installed and secure

✔ No gaps, misalignment, or loose components

✔ Air breather and Hartford loop are clear and correctly positioned

✔ No leaks after testing