Knowby Pentair Water
Knowby
75E Quick Install Guide
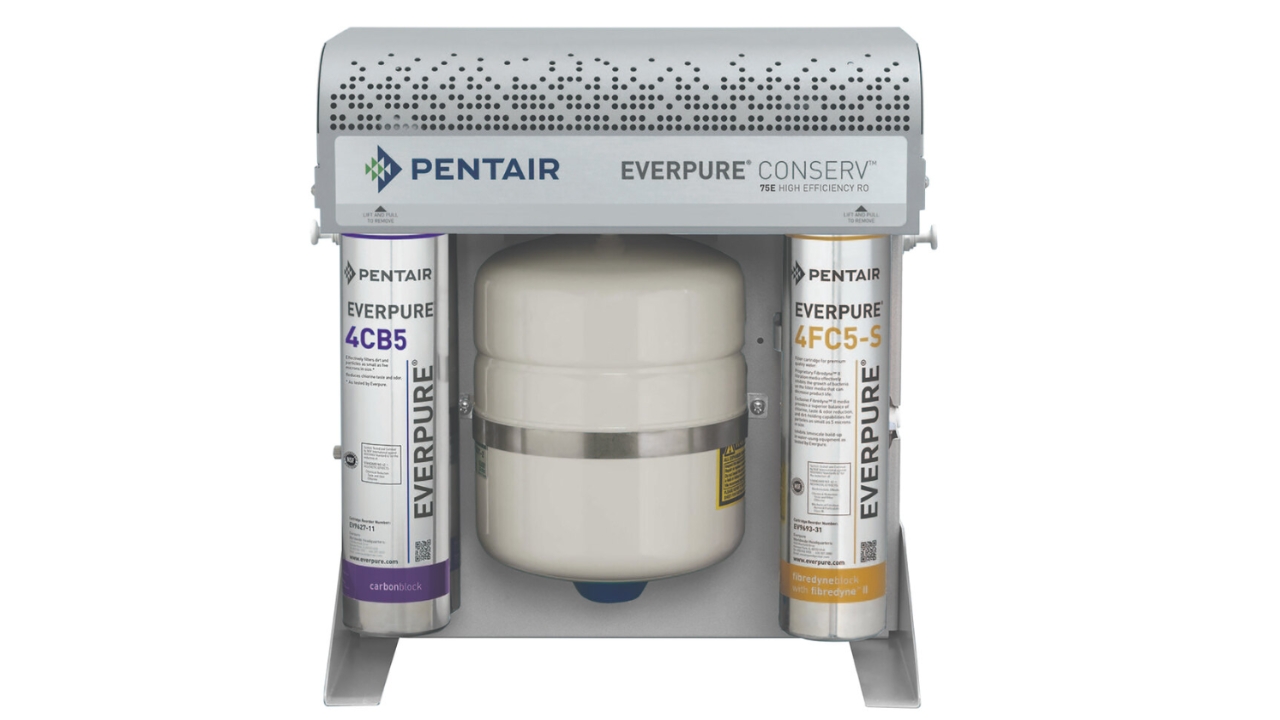
Welcome to the install guide for the Pentair Everpure 75E Reverse Osmosis system. The tutorial will only take a few minutes however be prepared to spend between 30 to 60 minutes to have the unit operating correctly.
1
Step 1 of 15
<p>Tools required for install</p><ul><li><p>a bike pump with a *Schrader fitting</p></li><li><p>a pressure gauge</p></li><li><p>a jug with 500ml capacity</p></li><li><p>a TDS Meter</p></li></ul><p>* Common car tire valve</p><p></p>

Tools required for install

  • a bike pump with a *Schrader fitting

  • a pressure gauge

  • a jug with 500ml capacity

  • a TDS Meter

* Common car tire valve

2
Step 2 of 15
<ol><li><p>Remove the cover from the unit and gently lay the unit over, exposing the bottom of the storage tank.</p></li><li><p>Remove the blue cover</p></li></ol><p></p>
  1. Remove the cover from the unit and gently lay the unit over, exposing the bottom of the storage tank.

  2. Remove the blue cover

3
Step 3 of 15
<p>Attach a bike pump to the tank and pump</p><p></p>

Attach a bike pump to the tank and pump

4
Step 4 of 15
<ol><li><p>Periodically check the pressure of the pump.</p></li><li><p>Once you have obtained 10 psi replace the blue cap.</p></li><li><p>Lift the unit back onto it's feet.</p></li></ol><p>NB. If you intend on attaching an additional tank, set this to 15-20 PSI.</p><p></p>
  1. Periodically check the pressure of the pump.

  2. Once you have obtained 10 psi replace the blue cap.

  3. Lift the unit back onto it's feet.

NB. If you intend on attaching an additional tank, set this to 15-20 PSI.

5
Step 5 of 15
<ol><li><p>Attach John Guest 3/8 Inch line to the 'Water Inlet' with the ball valve in the closed position.</p></li></ol><p></p>
  1. Attach John Guest 3/8 Inch line to the 'Water Inlet' with the ball valve in the closed position.

6
Step 6 of 15
<ol><li><p>Ensure the outlet is closed for now. (RED)</p></li><li><p>Attach the drain hose and have it draining to a suitable location (GREEN)</p></li><li><p>Ensure the 'Tank' outlet has a plug placed in line (BLUE)</p></li></ol><p></p>
  1. Ensure the outlet is closed for now. (RED)

  2. Attach the drain hose and have it draining to a suitable location (GREEN)

  3. Ensure the 'Tank' outlet has a plug placed in line (BLUE)

7
Step 7 of 15
<p>Ensure the storage tank ball valve is in the closed position.</p>

Ensure the storage tank ball valve is in the closed position.

8
Step 8 of 15
<ol><li><p>Install the membrane cartridge. Push each John Guest elbow firmly into their corresponding colour. </p></li></ol><p></p>
  1. Install the membrane cartridge. Push each John Guest elbow firmly into their corresponding colour.

9
Step 9 of 15
<ol><li><p>Assuming there is water connected to the system, open the ball valve and allow the cartridge to flush.&nbsp;<br><br>Flushing requirements can be found on the Specification Sheets for each filter however generally, the filter is flushed when there is no visible media in the water. E.G. The 4CC will make the water cloudy white, the 4CB will make the water grey.&nbsp;</p></li><li><p>Once the cartridge is flushed, turn the ball valve off and remove the cartridge. Replace it with the nest cartridge to be flushed.&nbsp;</p></li><li><p>The final cartridge to be flushed will be the 4FC-S. This can be left in it's location as this is the final location for it.</p></li></ol><p></p>
  1. Assuming there is water connected to the system, open the ball valve and allow the cartridge to flush. 

    Flushing requirements can be found on the Specification Sheets for each filter however generally, the filter is flushed when there is no visible media in the water. E.G. The 4CC will make the water cloudy white, the 4CB will make the water grey. 

  2. Once the cartridge is flushed, turn the ball valve off and remove the cartridge. Replace it with the nest cartridge to be flushed. 

  3. The final cartridge to be flushed will be the 4FC-S. This can be left in it's location as this is the final location for it.

10
Step 10 of 15
<ol><li><p>Attach a 3/8" John Guest to the flush outlet. (RED) Make sure this line is directed to a suitable location. E.G. Sink, drain, large bucket.</p></li><li><p>Place the first filter in the flush location. (BLUE)</p></li></ol><p>The best order is 4CC Cartridge, followed by the 4BC then 4FC-S</p><p></p>
  1. Attach a 3/8" John Guest to the flush outlet. (RED) Make sure this line is directed to a suitable location. E.G. Sink, drain, large bucket.

  2. Place the first filter in the flush location. (BLUE)

The best order is 4CC Cartridge, followed by the 4BC then 4FC-S

11
Step 11 of 15
<ol><li><p>When all cartridges are flushed, ensure the ball valves are all in their off position.</p></li><li><p>Remove the flush line and replace it with the plug.</p></li><li><p>Install a 3/8" line into the outlet line and ensure this is in a suitable location for water however not completely plumbed in. We will need this line to test the TDS.</p></li><li><p>Set the blend valve to fully closed; clockwise.</p></li><li><p>Open the inlet ball valve, the outlet ball valve to commence saturating the membrane. </p></li></ol><p></p>
  1. When all cartridges are flushed, ensure the ball valves are all in their off position.

  2. Remove the flush line and replace it with the plug.

  3. Install a 3/8" line into the outlet line and ensure this is in a suitable location for water however not completely plumbed in. We will need this line to test the TDS.

  4. Set the blend valve to fully closed; clockwise.

  5. Open the inlet ball valve, the outlet ball valve to commence saturating the membrane.

12
Step 12 of 15
<ol><li><p>After 10 minutes, take a sample of water (100-200ml) and test the TDS<br><br>The TDS will likely be 20ppm + 5-10% of the incoming TDS<br><br>E.G. The incoming TDS is 200ppm, 5% is 10ppm plus 20ppm (this is coming from the 4CC Mineral cartridge)</p></li><li><p>If the TDS is still high, continue flushing the membrane.&nbsp;<br><br>You should see a stable TDS for 5-10 minutes to ensure the membrane is saturated and working efficiently.&nbsp;</p></li></ol><p></p>
  1. After 10 minutes, take a sample of water (100-200ml) and test the TDS

    The TDS will likely be 20ppm + 5-10% of the incoming TDS

    E.G. The incoming TDS is 200ppm, 5% is 10ppm plus 20ppm (this is coming from the 4CC Mineral cartridge)

  2. If the TDS is still high, continue flushing the membrane. 

    You should see a stable TDS for 5-10 minutes to ensure the membrane is saturated and working efficiently. 

13
Step 13 of 15
<p>With a measuring jug, measure how many millimeters the unit is creating in 60 seconds. </p><p>Pentair recommends placing a sticker on the inside of the cover with this information to communicate with technicians that may work on the unit</p><ul><li><p>Milliliters per minute. </p></li><li><p>Incoming TDS</p></li><li><p>Outgoing TDS</p></li></ul><p></p>

With a measuring jug, measure how many millimeters the unit is creating in 60 seconds.

Pentair recommends placing a sticker on the inside of the cover with this information to communicate with technicians that may work on the unit

  • Milliliters per minute.

  • Incoming TDS

  • Outgoing TDS

14
Step 14 of 15
<p>At this point you can set the blend valve to achieve your desired TDS.&nbsp;</p><ol><li><p>Open the valve 1/4 turn at a time and continue flushing for 2minutes.&nbsp;</p></li><li><p>Test the TDS</p></li><li><p>Continue to adjust until you are at your desired TDS</p></li><li><p>Once achieved, turn the locking ring clockwise to lock the TDS.&nbsp;</p></li></ol><p></p>

At this point you can set the blend valve to achieve your desired TDS. 

  1. Open the valve 1/4 turn at a time and continue flushing for 2minutes. 

  2. Test the TDS

  3. Continue to adjust until you are at your desired TDS

  4. Once achieved, turn the locking ring clockwise to lock the TDS. 

15
Step 15 of 15
<p>Once all filters are flushed and the TDS is set, you can open the storage tank and allow it to fill.</p><p>At this stage you can plumb in the outlet line to the intended location. </p><p>This is also a good time to attach an additional tank to the 'Tank' outlet. Ensure all ball valves are closed when you remove the plug. </p>

Once all filters are flushed and the TDS is set, you can open the storage tank and allow it to fill.

At this stage you can plumb in the outlet line to the intended location.

This is also a good time to attach an additional tank to the 'Tank' outlet. Ensure all ball valves are closed when you remove the plug.