
Knowby
Boss Canopy End Walls, Fabrication
1
Step 1 of 27

It will look like this when 1 pair are complete

2
Step 2 of 27
<p>Start with end wall on a clean workbench</p>

Start with end wall on a clean workbench

3
Step 3 of 27

Identify the stiffening bracket

4
Step 4 of 27
<p>Use the Domed head steel rivets</p><p><br></p><p>Part #: ..............</p>

Use the Domed head steel rivets


Part #: ..............

5
Step 5 of 27
<p>Rivet them on.&nbsp;</p><p>Repeat for both sides</p>

Rivet them on. 

Repeat for both sides

6
Step 6 of 27

Flip over

7
Step 7 of 27
<p>Countersink all holes on this outside face</p>

Countersink all holes on this outside face

8
Step 8 of 27
<p>Get a countersunk Huck bolt</p>

Get a countersunk Huck bolt

9
Step 9 of 27

Check that it sits flush. 


If not, countersink deeper.

10
Step 10 of 27

Excluding the bottom row, put in the Huck bolts

11
Step 11 of 27

Tape them up


(This is so when you turn the part over, they don't all fall out)

12
Step 12 of 27
<p>It should look like this</p>

It should look like this

13
Step 13 of 27
<p>Identify the end wall extrusions.&nbsp;</p><p><br></p><p>The end will 2 holes, goes to the top of canopy</p>

Identify the end wall extrusions. 


The end will 2 holes, goes to the top of canopy

14
Step 14 of 27
<p>Put them on.&nbsp;</p><p>Qty 4 per End Wall.&nbsp;</p>

Put them on. 

Qty 4 per End Wall. 

15
Step 15 of 27
<p>Get the Huck "Nuts"&nbsp;</p>

Get the Huck "Nuts" 

16
Step 16 of 27
<p>Huck bolt them on</p>

Huck bolt them on

17
Step 17 of 27

Fit the 50x50mm lift RHS. 


Cut lengths: 

1900 Canopy: Cut @ ...........mm

2000 Canopy: Cut @ ...........mm

2100 Canopy: Cut @ ...........mm

18
Step 18 of 27

Tap it so it is centred. 


It should stick out each end approx 3mm

19
Step 19 of 27

MIG weld here

20
Step 20 of 27
<p>Next, we will weld in this top filler piece.&nbsp;</p>

Next, we will weld in this top filler piece. 

21
Step 21 of 27

Identify the piece. 


Part #:................

22
Step 22 of 27

Clamp and tack weld in place

23
Step 23 of 27
<p><strong>Pro Tip:&nbsp;</strong></p><p>Stand it up vertically for welding</p>

Pro Tip: 

Stand it up vertically for welding

24
Step 24 of 27

Remove the tape

25
Step 25 of 27

Flush this top face

26
Step 26 of 27

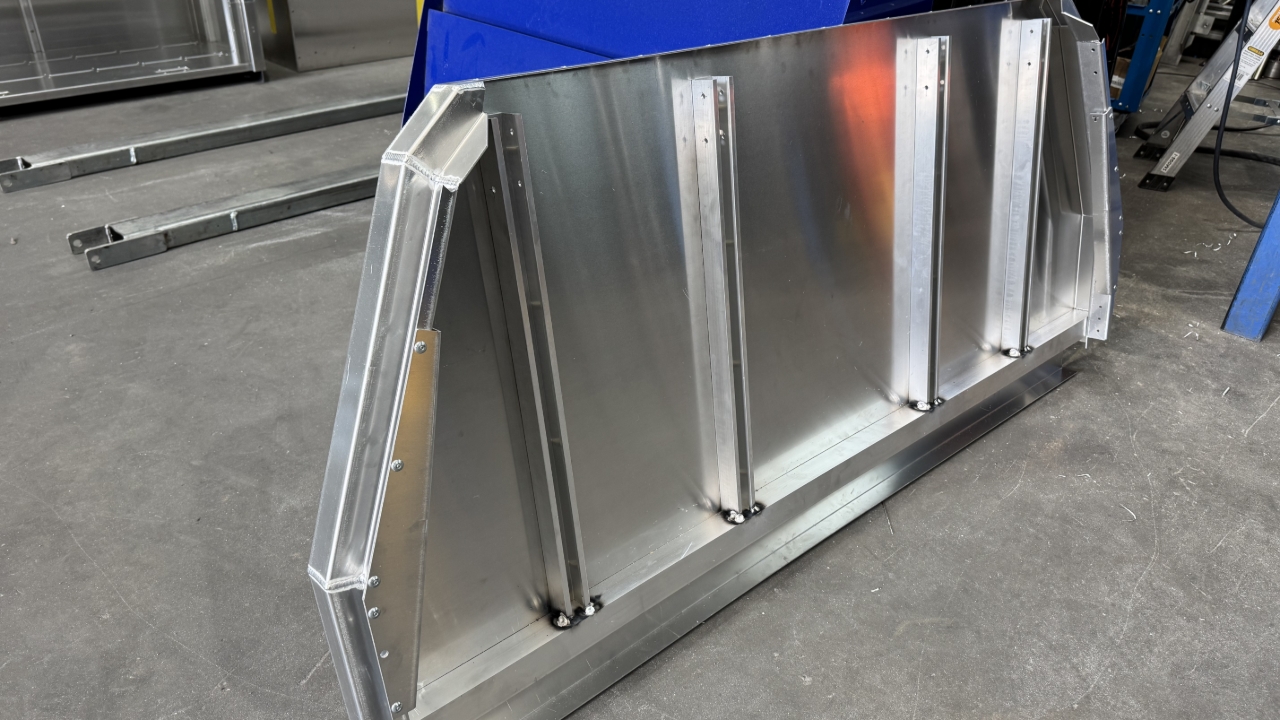
It is now complete

27
Step 27 of 27

A complete set looks like this