
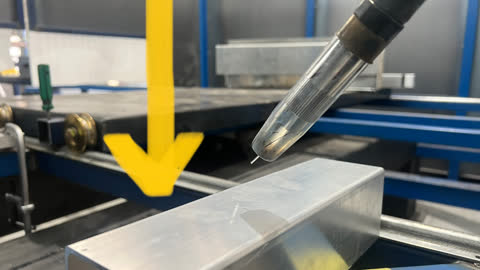
This will be a “-Z” search

Start with the robot approx 30mm above the job

Torch at 45 degrees is best for touch sensing

IMPORTANT Wire stick out should be precisely 15mm
Make sure robot is “ON”.
Click on “VIII” with your left thumb. A green light will come on the robot button (bottom left corner of screen)
To find the touch sensing menu
At the same time, click RIGHT TRIGGER + ENTER (with right thumb)
This larger screen will appear
Push thumb wheel to the right to select
Scroll thumb wheel down to “Sensing Start Point”.
When it becomes blue, push thumb wheel to the right to select it

It should look like this

Select enter with right thumb

Screen will now show this- good

Press ENTER again
Use thumb wheel to go to “Browse”
When “Browse” Is highlighted blue, push thumb wheel to the right to select
Use thumb wheel so that cursor highlights the top row

Push thumb wheel to right to select
Once you do the thumb wheel to the right, the text will change from BLACK to BLUE.
You can now scroll to the type of search you want

For this example, we have scrolled down to #90, which is a 1 axis search in the -Z direction.

Press ENTER

It will now show the selection we made, #90

Press ENTER

“Move” will now show is top left corner, and will say “Motion Key ON”
We will now test the touch sense sequence !
Turn on the servo motor button

To do it,
Select “Move” by clicking “IV” with left thumb
The robot will do the touch sense, including a pull away point
IMPORTANT This is easy to forget. Now Add a point. This will be the pull away point
Done! Repeat process for as many touch points are you need