Knowby Supplant
Knowby
Install Base Station
1
Step 1 of 20
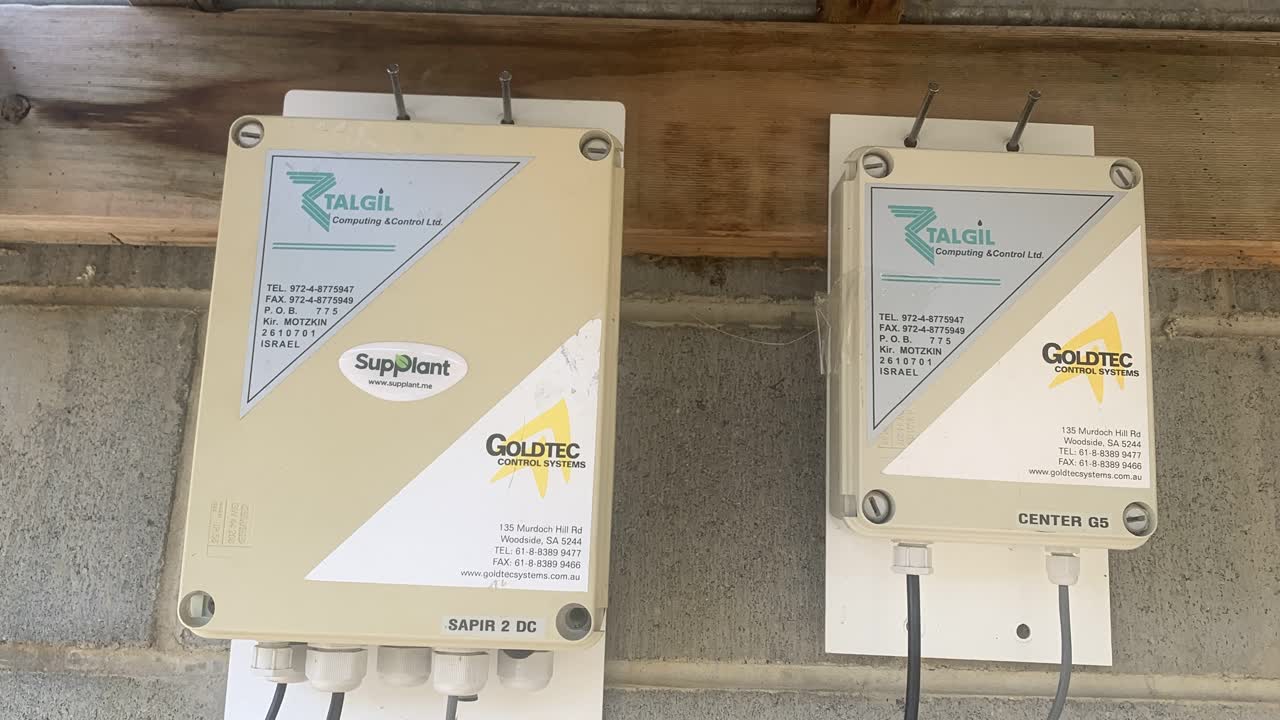
<p>You will have two connected boxes.
Both with aerials. One is pre attached and one isn’t.</p>

You will have two connected boxes. Both with aerials. One is pre attached and one isn’t.

2
Step 2 of 20
<p>One solar panel and lead.</p>

One solar panel and lead.

3
Step 3 of 20
<p>Various U bolts for attachment.
If you are going to use tech screw you will need to purchase them.</p>

Various U bolts for attachment. If you are going to use tech screw you will need to purchase them.

4
Step 4 of 20
<p>Mount the two boxes with tech screws or the supplied U bolts.
You can mount them to a post or pole or building.
They can be side by side or top and bottom. It doesn’t matter.</p>

Mount the two boxes with tech screws or the supplied U bolts. You can mount them to a post or pole or building. They can be side by side or top and bottom. It doesn’t matter.

5
Step 5 of 20
<p>Attach the second aerial end to a bracket.</p>

Attach the second aerial end to a bracket.

6
Step 6 of 20
<p>Now screw the aerial on.</p>

Now screw the aerial on.

7
Step 7 of 20
<p>The WiFi aerial is magnetic.</p>

The WiFi aerial is magnetic.

8
Step 8 of 20
<p>The second aerial needs attached via tech screws or similar.</p>

The second aerial needs attached via tech screws or similar.

9
Step 9 of 20
<p>Attach the solar panel in a sunny place close to the boxes.</p>

Attach the solar panel in a sunny place close to the boxes.

10
Step 10 of 20
<p>Cover the panel while you are connecting it to the battery.</p>

Cover the panel while you are connecting it to the battery.

11
Step 11 of 20

Remove the cover from the big box

12
Step 12 of 20
<p>This is where the solar panel is wired in.
On the charge side.
Red wire to +
Black wire to -</p>

This is where the solar panel is wired in. On the charge side. Red wire to + Black wire to -

13
Step 13 of 20
<p>Feed the wires through the base.
Remember to silicone seal once you are finished.</p>

Feed the wires through the base. Remember to silicone seal once you are finished.

14
Step 14 of 20

Pull the connector free so it’s easier to put the wire in.

15
Step 15 of 20
<p>Wire in and tighten firmly but not over tight.
Red on left.
Black on right.
Make sure no threads of wire are left outside the connector.</p>

Wire in and tighten firmly but not over tight. Red on left. Black on right. Make sure no threads of wire are left outside the connector.

16
Step 16 of 20

Now push the connector firmly back in place

17
Step 17 of 20

Now connect the battery and lights will start flashing.

18
Step 18 of 20
<p>Replace the cover.
Your base station is now operational.</p>

Replace the cover. Your base station is now operational.

19
Step 19 of 20
<p>Uncover the solar panel for charging.</p>

Uncover the solar panel for charging.

20
Step 20 of 20

Good job!