
Knowby
C - Canopy door grinding/sanding
How to grind and sand canopy doors.
1
Step 1 of 18
<p>Check grinding disc condition before starting.</p><p>Use 60 grit disks for grinding only. </p><blockquote><p><strong>Required PPE: </strong>Pants, safety glasses, hearing protection, face shield, dusk mask, steel capped boots, gloves, covered skin.</p><p></p></blockquote><p></p>

Check grinding disc condition before starting.

Use 60 grit disks for grinding only.

Required PPE: Pants, safety glasses, hearing protection, face shield, dusk mask, steel capped boots, gloves, covered skin.

2
Step 2 of 18
<p>Start with door face down.</p><p>Grind welds off all corners.</p><p></p>

Start with door face down.

Grind welds off all corners.

3
Step 3 of 18
<p>Take off welds at each corner, keeping all welds smooth.</p>

Take off welds at each corner, keeping all welds smooth.

4
Step 4 of 18
<p>After grinding check for pin holes, send back to welding station if needed.</p>

After grinding check for pin holes, send back to welding station if needed.

5
Step 5 of 18
<p>Use <strong>60 grit sandpaper</strong> Sand all grinding marks, scratches, and welding splatter from inside of door.</p><blockquote><p>If the inside of doors are clean no scratches or welding splatter do not sand</p></blockquote><p></p>

Use 60 grit sandpaper Sand all grinding marks, scratches, and welding splatter from inside of door.

If the inside of doors are clean no scratches or welding splatter do not sand

6
Step 6 of 18
<p>remove sticker from robot welder </p><p>if sticker is within the outlined area no cleanup is required </p><blockquote><p><strong>If the sticker is outside the outlined area clean any residue with wax n grease remover. DO NOT sand the sticker residue it will just smear it around trapping dust creating rework.</strong></p></blockquote><p></p>

remove sticker from robot welder

if sticker is within the outlined area no cleanup is required

If the sticker is outside the outlined area clean any residue with wax n grease remover. DO NOT sand the sticker residue it will just smear it around trapping dust creating rework.

7
Step 7 of 18

Flip door and begin work on other side.

8
Step 8 of 18

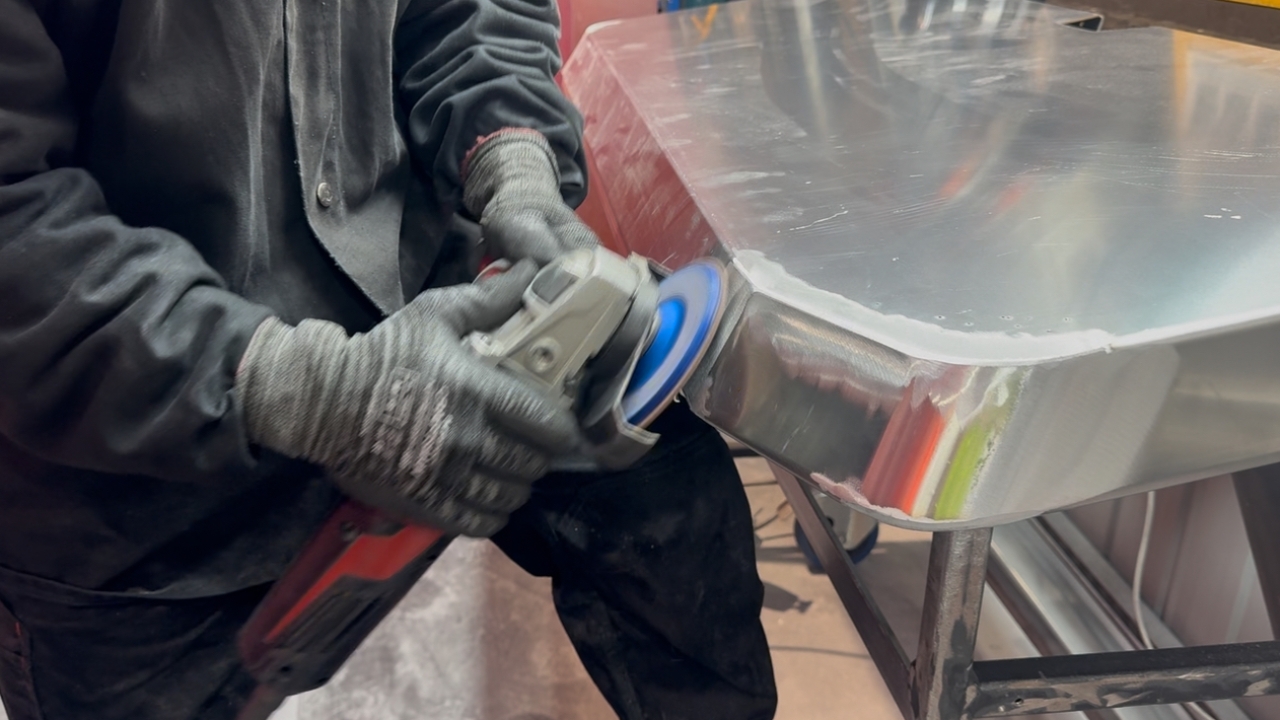
Grind all outer welds.

Keep grinder as flat as possible to avoid digging "dents".

9
Step 9 of 18

Follow natural shape of door.

Grind corners to flow smoothly.

10
Step 10 of 18
<p>Rub engineers ink (blue dye) onto grinding marks.</p><p>When sanding, the ink will reveal what areas are not flat and need  sanding to remove ink.</p><p></p><p></p>

Rub engineers ink (blue dye) onto grinding marks.

When sanding, the ink will reveal what areas are not flat and need sanding to remove ink.

11
Step 11 of 18

Sand grinding marks first, make sure flat faces are flattened off and corners are rounded to match the surrounding areas use 60 grit sandpaper

12
Step 12 of 18

Sand all outer faces, removing scratches.

Keep sander flat.

13
Step 13 of 18
<p>Deep scratches may need to use edge of sander.</p><p>Make sure you flatten it off afterwards</p><blockquote><p><strong>If not flattened out after using the edge of the sander it will show out after pc as a dent usually requiring rework</strong></p></blockquote><p></p>

Deep scratches may need to use edge of sander.

Make sure you flatten it off afterwards

If not flattened out after using the edge of the sander it will show out after pc as a dent usually requiring rework

14
Step 14 of 18
<p>Inspect for defects scratches, grinding marks, pinholes, missed welds.</p>

Inspect for defects scratches, grinding marks, pinholes, missed welds.

15
Step 15 of 18
<p>Put door in trolley ready for secondary QC</p>

Put door in trolley ready for secondary QC

16
Step 16 of 18
<p>Hang doors ready for powder coating.</p><p>If they failed inspection, return to fabrication for <a target="_blank" rel="noopener noreferrer nofollow" href="http://re-work.video">re-work.</a></p><p></p>

Hang doors ready for powder coating.

If they failed inspection, return to fabrication for re-work.

17
Step 17 of 18

Use air gun, blow down all surfaces of door.  

18
Step 18 of 18

once all doors are hung and blown down with air use blow torch and burn any fluff/dust from outer edges of all doors prior to hanging on conveyor for pc