
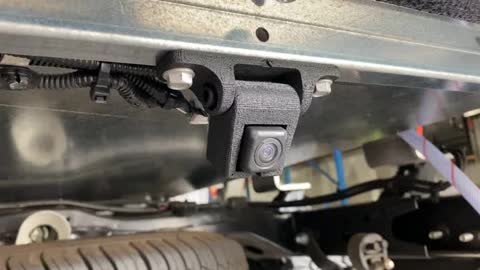
Re-Fit Camera: Hilux, "Tub" Variant
1
Step 1 of 11Look likes this when done
2
Step 2 of 11
Tools Required
- Fine Phillips Head screwdriver
- 10mm socket
- 10mm Spanner
3
Step 3 of 11
Use Fine phillips head screwdriver to remove from factory bracket
4
Step 4 of 11Printed words are on the top, this will help so you know how to put it into the 3D printed bracket
5
Step 5 of 11Identify the supplied 3D printed camera bracket
It will have “CB003” on it
6
Step 6 of 11
Looks like this from front
7
Step 7 of 11
Looks like this from back Tighten camera to bracket with the 2 x small original screws
8
Step 8 of 11Fit to Tray
9
Step 9 of 11
Don’t worry about this other lead. It is not re-used. Zip tie it up neatly to main camera harness.
10
Step 10 of 11Zip tie up neatly, Ensure camer is working and tilted to a nice angle
11
Step 11 of 11Put vehicle into reverse to insure camera is working correctly, and that the angle is nice.