
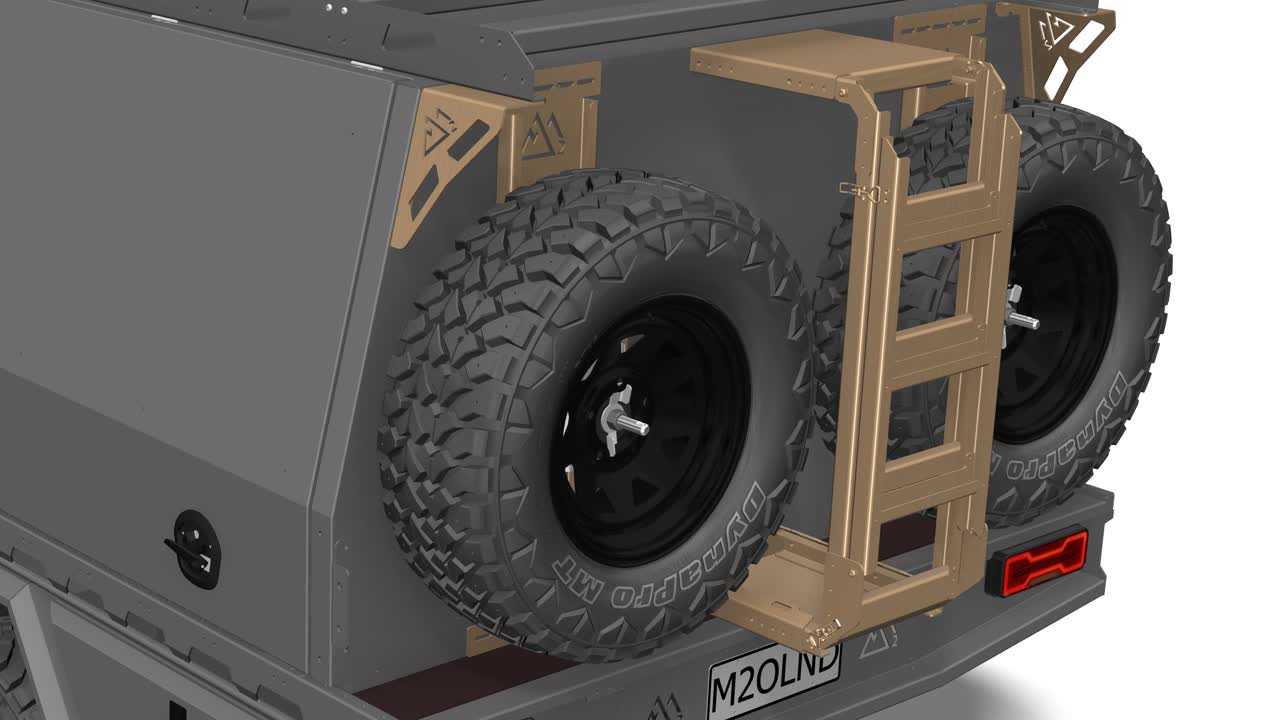
Begin by fastening the supports, side plates to the main column with x2 stainless steel M8x25 button heads, x1 washer on the back, a nyloc and antiseize. Ensure they are bolted through the lowest hole as shown above.
Repeat on the other side and fasten.
Slide the stainless bracket between the side plates and bolt together using x4 M8x20 stainless button heads, a washer on each side, a nyloc and antiseize. Once again, make sure that the stainless steel bracket is slid down as low as it can go before tightening.
Apply antiseize to your threaded rod and thread through bracket. Fasten a stainless M20 nut to the bottom of the threaded rod like so. Place foam tape around the circumferance of your disc about 3mm away from the edge.
Place disc onto bracket and fasten wing nut on. Insert a rubber button to the back of your supports like so. One on each side.
On the MRP job sheet, in the notes it should tell you the location of the spare wheel mount on the canopy. The location of the sparewheel mount detirmines which side of the bracket you place this sticker.
For a 17x spare wheel ladder you will need to add the bottom support. This slots into the main column like so and is fastened with x4 stainless rivets on each side.
The assembly of your spare wheel mount is now completed.
To begin your ladder, place the inner channel inside the bottom mount like so. Ensure you are using the correct channel and mount. Use stainless M8x20 button heads with antiseize, a washer at the back and a nyloc to fasten together.
Ensure channel is as far back in bottom mount as possible. Do this to both side and fasten. Add your hooks to the channel using M4x12 stainless countersunks, a nyloc and antiseize. Make sure the hook is facing the correct way and tighten.
Put together the upper mount and channels the same way as you put the lower mount together however the upper mount does not have hooks. Both upper and lower mounts should now look like this.
Take your longer ladder sides and rivet your bottom hinge plates using stainless steel rivets. Make sure you are riveting the hinge plate at the correct end of the ladder side. You ladder sides should now look this like.
Now fasten the top rivet plate using stainless rivets once again. Making sure you rivet the plate on the correct way. Place your ladder rung into your sides like so. Make sure that all holes line up on both sides before riveting.
Fasten with stainless steel rivets. Rivet the ladder rung with only one rivet hole first as this makes it easier to square the ladder. Add other ladder side.
Line up and rivet the ladder rung with only one rivet once again.
Flip over and insert stainless rivets. Use tool to force rivets into place and rivet together.
Place the lower rung into place like so and rivet on both sides.
Your ladder should now look like this.
Grab the shorter ladder sides and repeat the process. Once again making sure all holes line up before riveting.
Apply hooks to the top of shorter ladder using M4x12 stainless countersunk bolts, antiseize and nylocs. Then add latches to the top of the longer ladder using the same process.
Apply latches to the bottom of the longer ladder like so using the same hardware as above. Ensure all hooks and latches are facing the correct way.
Add x4 rubber buttons to remaining holes in the longer ladder like so.
Place shorter ladder ontop of longer. Fasten a M8x25 stainless button head, nylon washer, stainless flat washer on the back, nyloc and antiseize. Place nylon washer inbetween long and short ladder like so.
Repeat the process again to the other side and fasten.
Your ladder should be able to open and close like so and latch together. This is the assembly of your ladder completed.
To begin installing your ladder you need to find out the location of the ladder by looking at MRP job sheet notes. Fasten the lower mount to the canopy like so using stainless M8x25 button heads, spring washer, heavy washer and loctite. Bolt through only the 2 outer holes
Attach your ladder to your upper mount using M8x25 stainless button heads, nylon washer, stainless flat washer on the back and nyloc to the top rivet plate, placing the nylon washer in between like before.
Repeat on the other side and fasten.
Attach your ladder to the canopy once again using M8x25 stainless button head, spring washer, heavy washer and loctite. Only fastening through the two outer holes like before.
Fasten a stainless M5 nyloc to all latch threads. Your ladder installation is now complete.